If you require access to a disabled Outlook email inbox, IT Services will send you two PST files. The first PST contains the contents of the primary email inbox. The second file is the email archive (contains items older than two years at the time the account was closed). The following instructions will guide you on how to open, rename, and remove PST files in Outlook.
Open a PST file in Outlook
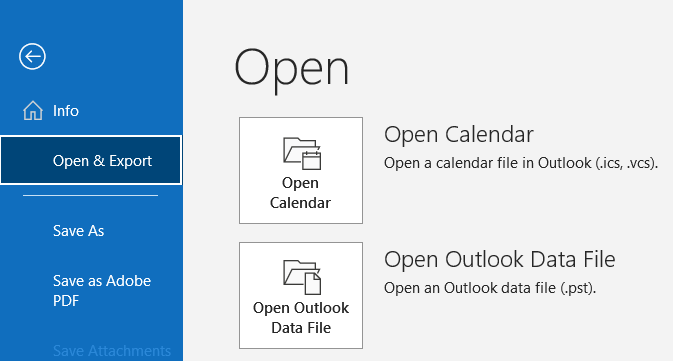
- In Outlook, select File, then Open & Export.
- Click on Open Outlook Data File.
- Navigate to the PST file you wish to open on your computer and select it.
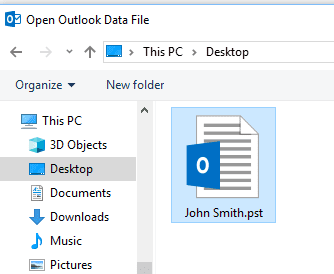
- Click OK. The mailbox will be added to your left panel in Outlook.
-
- Note: Outlook expects to find this file in the same location so do not move or delete the PST file from its location without removing its reference in Outlook first.
Remove a PST in Outlook
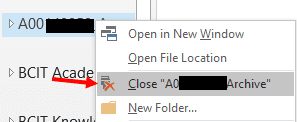
- In Outlook, Right-click on the name of the PST in the left panel.
- Select Close Outlook Data File. This will not delete the file from your computer, only remove it from your Outlook profile.
Rename a PST in Outlook
- Right-click on the name of the PST in the panel and select Data File Properties.
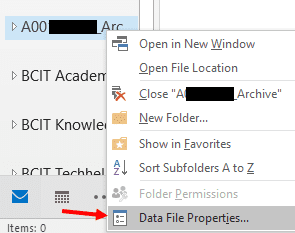
- Click on Advanced.
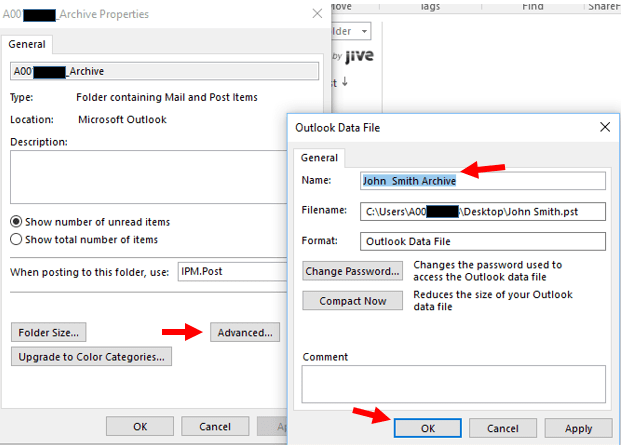
Type a new name and click OK.If you require further assistance, please contact the Technology Service Desk (604-412-7444 – option 1).
More information about Microsoft Outlook and Exchange Online
-
Adding an Attendee to a Meeting Request in Outlook & Exchange Online
-
Finding and Booking a Meeting Room/Resource in Outlook and Exchange Online
-
Managing Shared Email Accounts & Distribution Groups in Outlook
-
Problem with Outlook ActiveSync Maximum Number of Devices Allowed
-
Setting up BCIT Email and Connecting to Exchange Online on Your iOS Device
-
Using the right BCIT account: If you are an Employee and a Student