This document provides a basic overview of Banner terminology, look, filtering and shortcuts.
Introduction
Banner, by Ellucian, is the backbone of BCIT’s enterprise student information, human resources (HR), payroll, and finance systems. Banner 9 also provides single sign-on functionality, meaning you will log into Banner 9 with the same password you use to log on to the network.
Tip
Banner 9 is built on web-based technology so web shortcuts work with Banner 9. Use CTRL+ to increase zoom and CTRL- to decrease zoom. Use CTRL0 to reset zoom to 100%.
There are changes in terminology between Banner 8 and Banner 9. The most commonly used terms are listed below:
Banner 8
Banner 9
Form
Page
Block
Section
Roll Back
Start Over
Query
Filter
INB password
Network password
Banner INB
Banner Admin
View supplemental data
More information
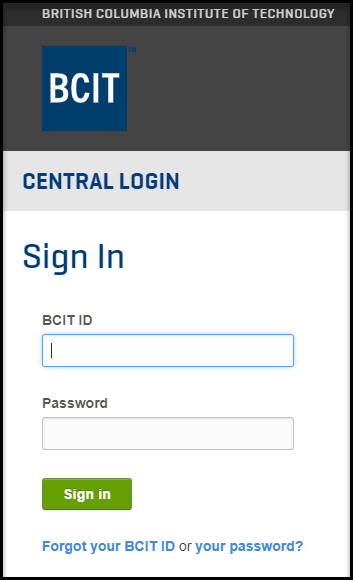
1. Click on the Banner 9 link or icon provided to you.
2. Login using your usual BCIT credentials (faculty & staff). Note: Banner 9 uses single sign-on functionality, use the same password as your network password to log on to Banner 9.
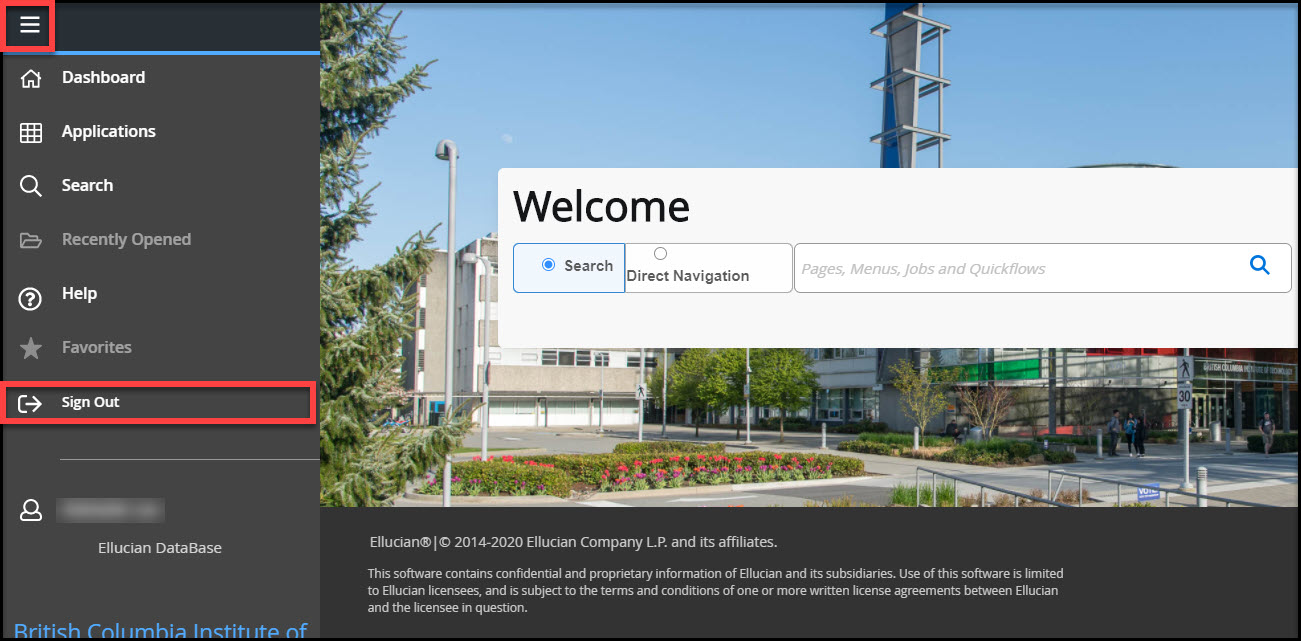
1. Click on the Sign Out icon or press Ctrl-Shift-F to log out of the application. TIP:Always end your work session by using the Sign Out icon. Clicking Close (x) instead of signing out might leave your connection to the application open, without properly closing or saving the data.
NOTE: The inactivity timeout screen appears if there is no user activity, such as saving or searching, for 75 minutes. When the timeout warning appears, click Yes to continue. If you are finished with your session, click No.
Application Navigator is your Banner landing page and is used to access your Banner Administrative applications. Use the following to navigate within Application Navigator:
Menu – The Menu icon is located in the upper left corner of the Application Navigator. Click to display or hide the icon names.
Dashboard (CTRL+SHIFT+X) – Click the Dashboard Icon (Home) from any page to return to the Application Navigator landing page.
Applications (CTRL+M) – Click the Applications icon to open the Banner menus. Select a button and continue selecting until you find the page you are interested in opening. Select the descriptive name or acronym to open the page.
Search (CTRL+Shift+Y) – Click the Search icon, shown as a magnifying glass, to open the Search window. Find pages using key words or the seven character identifier for the page. Results display after entering three characters.
Recently Opened (CTRL+Y) – The Recently Opened icon is only active once you have opened a page within your session. The number on the folder shows a count of opened pages. Open the list and select a page to access it.
Help (CTRL+Shift+L) – Select this icon to display help information about the page you are currently viewing. The Help icon is active from each Banner page.
Favorites – The user can now mark pages as Favorites from the Search bar. The Favorites icon star is available on all objects under center Search and vertical Search. Any object marked/unmarked as a favorite will reflect in the Favorites folder. Click on the star to the right of the selected Banner page to add to Favorites.
Sign Out (CTRL + Shift + F) – Click the Sign Out icon to securely log out of the application.
Search box in the centre of the page – Enter at least the first three letters of the descriptive name of the page or the seven character identifier in the Search Box. Select the desired page to open it.
Tip
To return to the expanded menu panel, use the keyboard shortcut used to open it, or click Back to Main Menu.
Basic navigation
The key block, page header, sections, and bottom page display are used to navigate each page.
The first block on most pages contains key information. The key block determines what data is entered or displayed on the rest of the page. All the information on the page is related to the key block. The key block stays on the page as subsequent sections are displayed.
When the cursor is in the key block, the fields that can be entered in the key block are enabled. When you leave the key block, the fields in the key block are disabled.
To access the body of the page, populate the key block data and then click Go.
Return to the key block from the body of a page by clicking Start Over (previously Rollback).
The page header identifies the open page name and provides easy access to key functions including:
Page close icon
Add and Retrieve icons – used with Banner Document Management
Related menu – displays a list of pages related to the open page
Tools icon – perform standard actions and options for the page currently displayed
Notification Centre – located in the top right corner and displays only once a notification is triggered. Notifications display the following types of information:
1. Error Notification – Will display a “!” in a circle when message is displayed2. Success Notification – Will display a checkmark in a circle when message is displayed.
3. Warning Notification – Will display a “!” in a yield sign when message is displayed. Will also display two buttons, Yes/No, that must be selected to continue. Note: To open or close the Notification Center click in the box with the number in the page header.
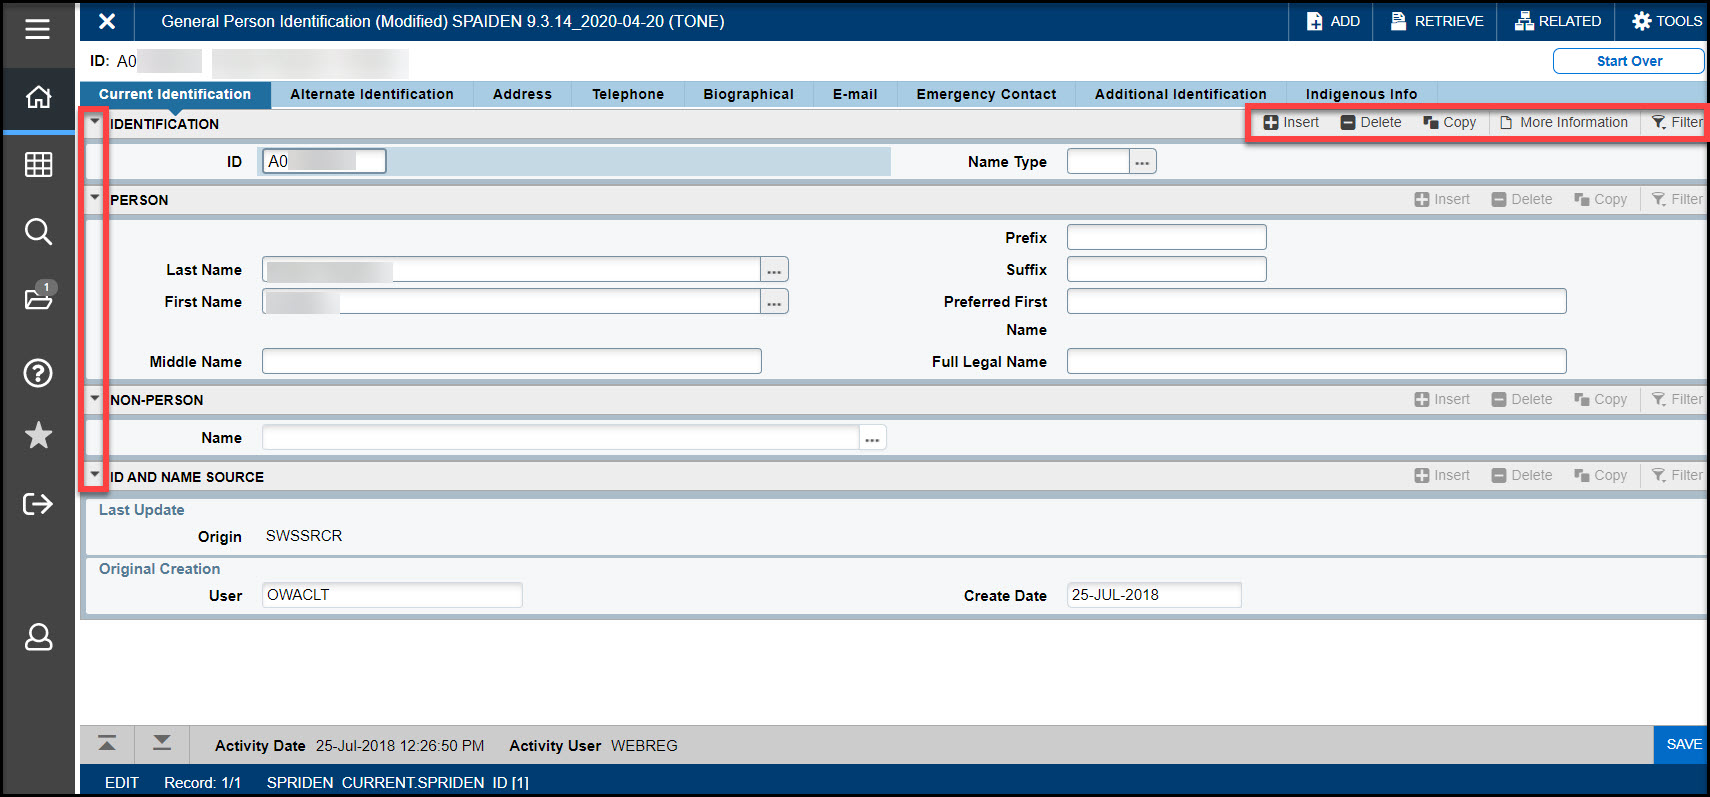
Pages are divided into sections (previously blocks) and contain additional details related to the key block information. A section can represent one record or multiple records depending on the type of information that you are working on.
Each section contains a description of the information contained within it, action buttons and details specific to that section. Sections of data are accessed by scrolling up and down the page. Some sections are accessed by using tabs that are displayed across the top of the page.
Open or collapse any section by clicking on the arrow in the top left of the section, beside the section description.
When the cursor is in a section the action buttons become enabled for that section. (notice the action buttons in the first block are darker than other sections, indicating they are active). Action buttons include:
Insert – insert records in this section
Delete – delete records in this section
Copy – copy records in the section
More Information – this will appear if supplemental data can be entered for the record.
This icon is displayed as a check mark if supplemental data already exists for the record.
Filter – filter (previously query) records in the section
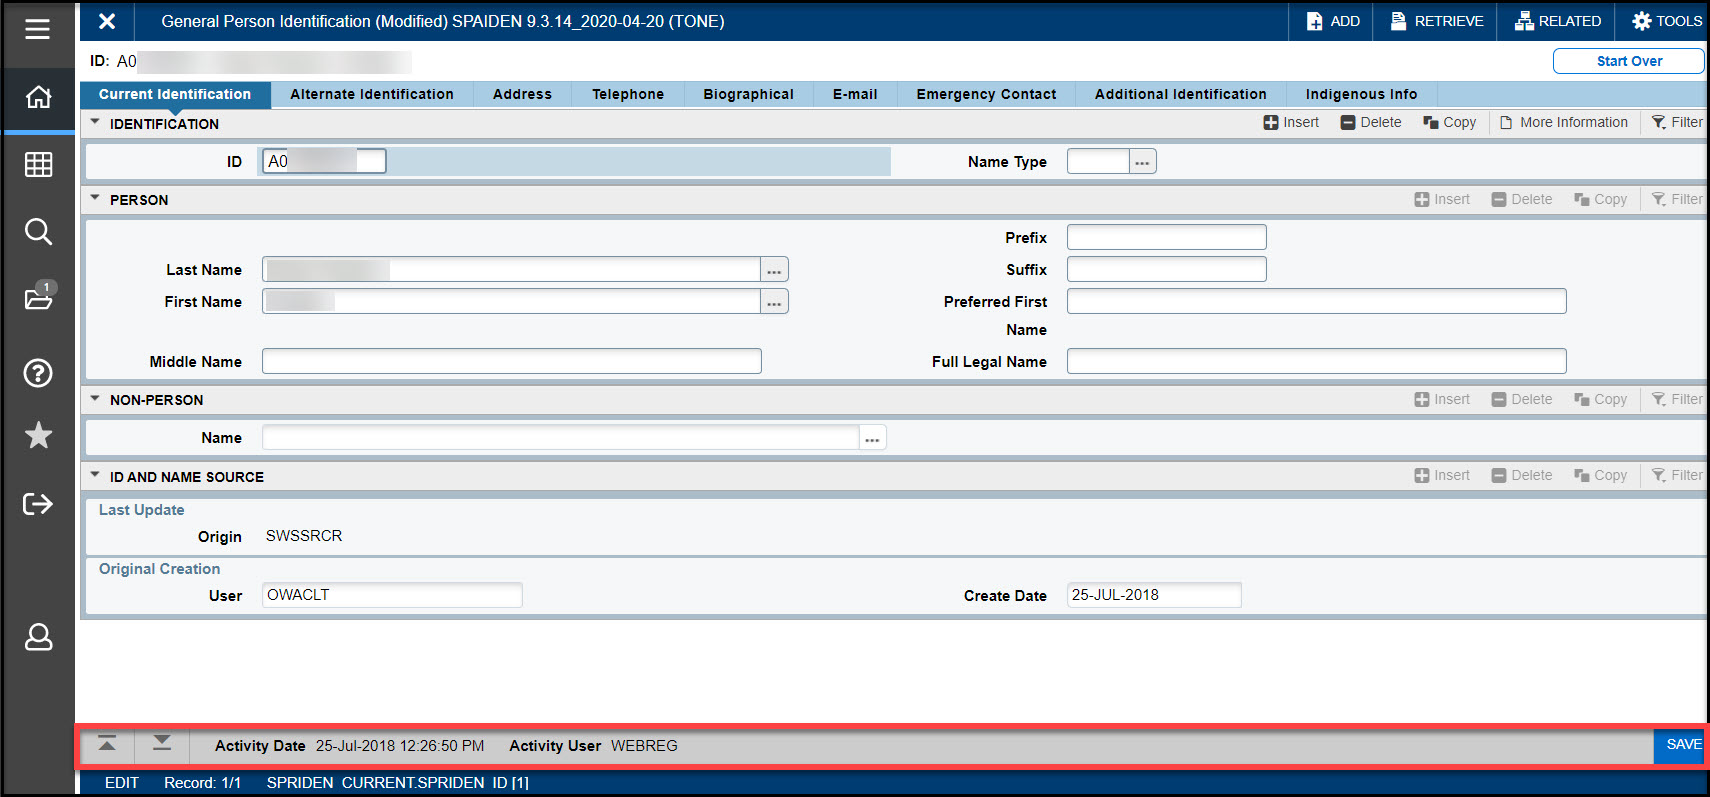
The bottom of the page contains icons to be used for navigation, to perform functions, and displays additional data.
Previous Section button – takes you backwards in the sections (Alt+Page Up)
Next Section button – takes you to the next section of the page (Alt+Page Down)
Activity Date – time stamped of when the record was created or modified
Activity User – name of account user who created or last modified the record
Save button – click to save your data
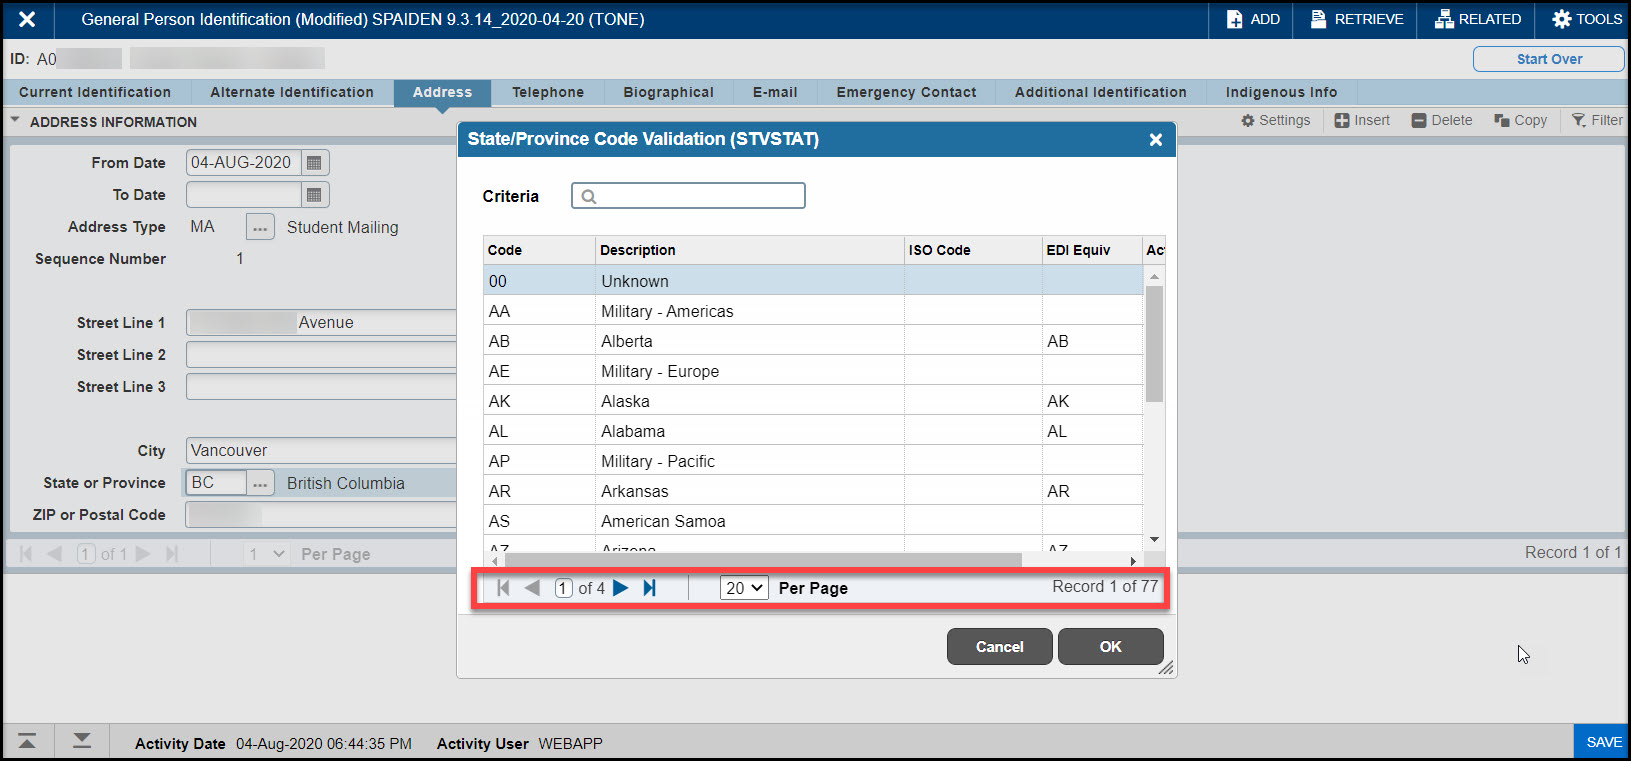
Use the Lookup feature to quickly find a value for a field. The Lookup button next to a field indicates that the field has the Lookup feature. Click the Lookup button (…), enter a filter value, and press Enter to display results that match the filter criteria. Select a value and click OK or double-click a value to return the value to the calling page.
TIP: When utilizing the Lookup option, you can perform either exact match lookups or partial match lookups when some of the information is unknown. To perform a partial match lookup use a “%” to replace the unknown information. For example, when searching for a student with an incomplete ID number enter the known information as A0055%47%.
TIP:When you are in the key block and all you see is an id field, press the Tab key, and this will allow you to enter a name search.
Required fields
An asterisk (*) displayed next to a field name indicates that the field requires a value before continuing. If a user leaves a section or a page without entering information in a required field, an error message will appear in the Notification Center, requiring the user to perform some additional action.
Pagination controls
Change the number of records that are displayed on each page by adjusting the Per Page drop down options, then use the pagination controls to view the data. (first, last, next, previous, or specific page number).
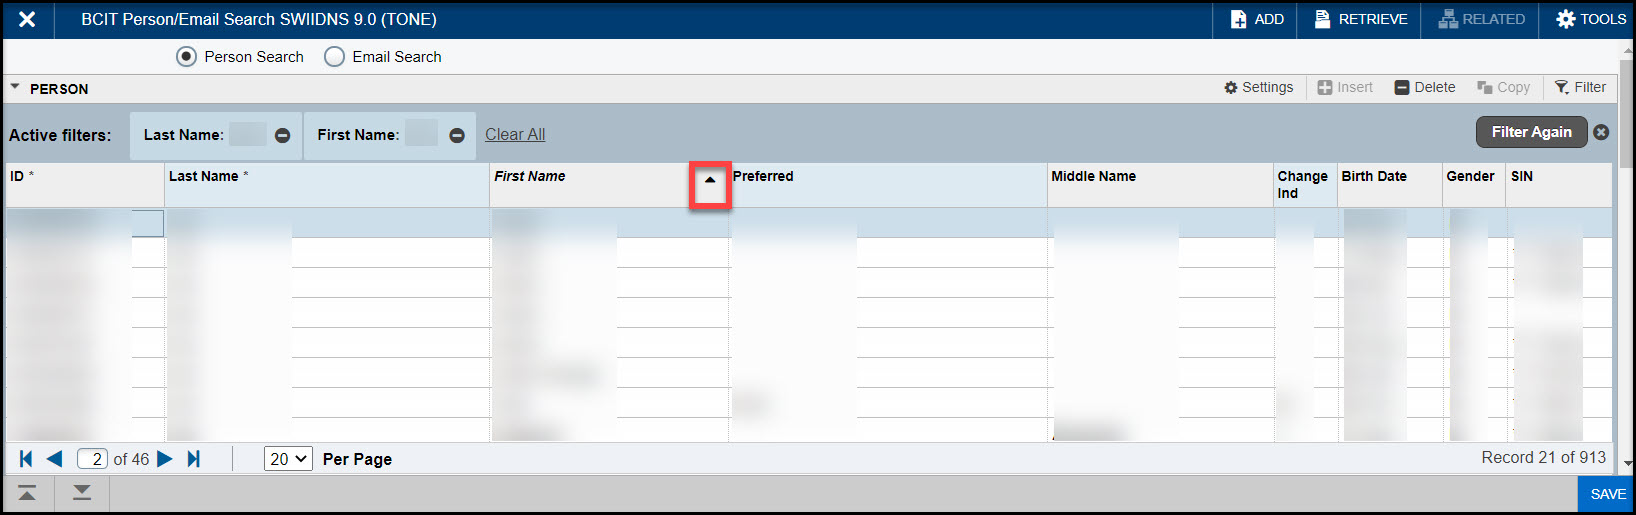
In a grid layout, values for a field can be sorted by clicking on the title of the column. If you have chosen to sort the data, an up or down arrow next to the field name indicates the current sort order for the field. Click the field label to reverse the sort order.
Enter the date directly into a cell or use the calendar icon for date selection. The date format can be entered as DDMMYY or DD-MON-YY.
Tip
To enter the current date, type any letter and Tab.
Filtering data
Query data in a section by clicking the active Filter icon in the section header. Note that in some cases, when you click the Lookup icon, you will be presented with the Filter window as well. There are two filter types: Basic and Advanced.
Basic Filter (default): Use the Basic Filter to specify search criteria using pre-defined search fields.
1. Click the active Filter (F7) icon for the section.
2. In the fields that display, enter or select a value for each field on which you want to search.
TIP: To return all records in the system, just click Go without entering any filter criteria. You may add basic operators when entering data in text fields (see below).
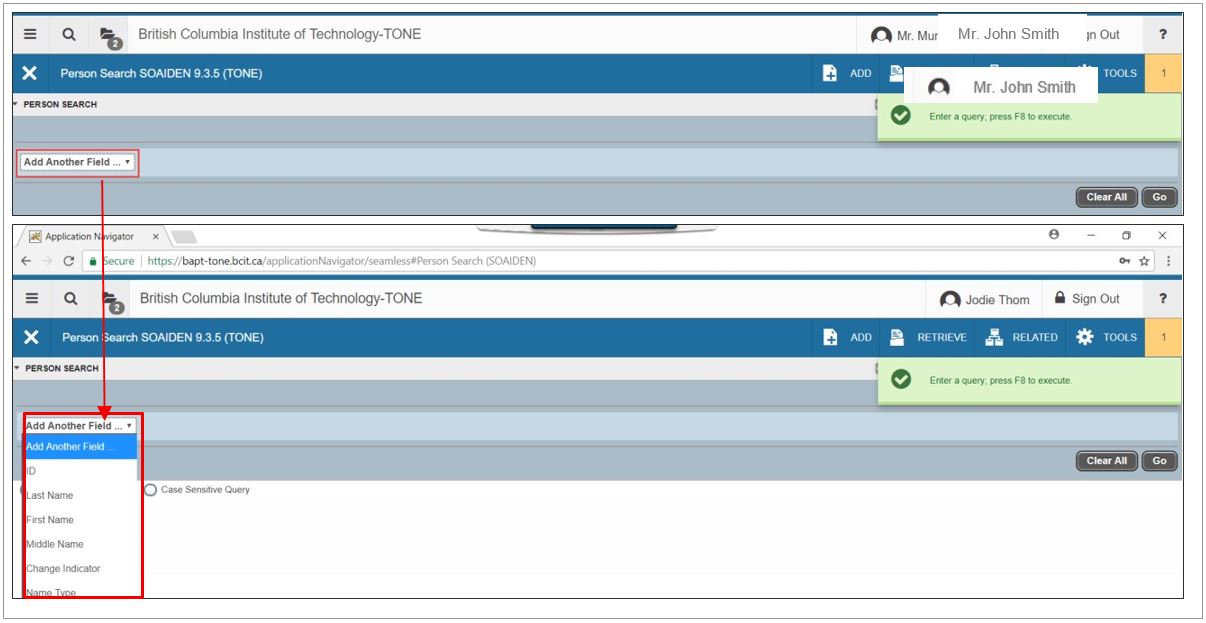
3. Click Go to display the results.
4. Click the Filter Again button (from the Search Results window) to further refine your search.
5. Choose the field you want to filter from the Add Another Field drop down list.
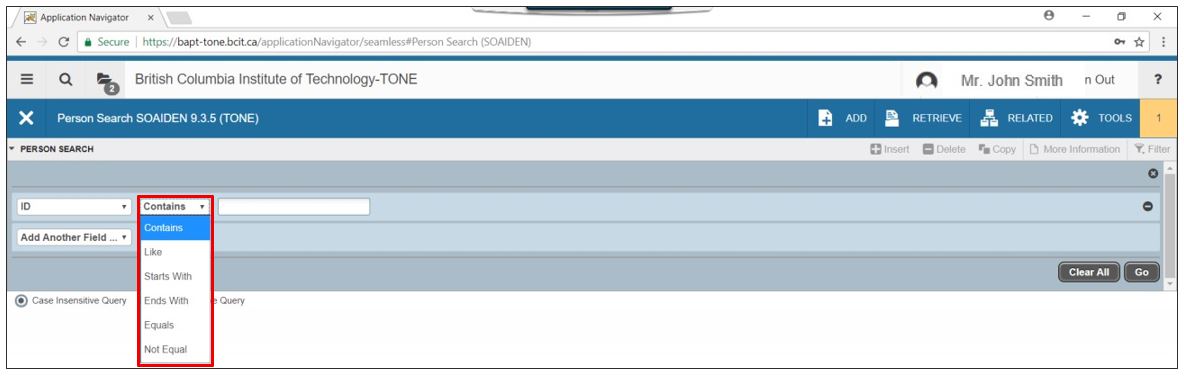
6. Choose an operator from the drop down list. The available operators depend on the type of field (numeric, alphanumeric, date, check box, or other).
TIP: The Contains operator is available for alphanumeric and other fields only.
The Between operator includes the values entered. For example, for codes “between” 1 and 5, the values 1, 2, 3, 4, and 5 are considered.
Required fields do not use the Is Null and Is Not Null operators.
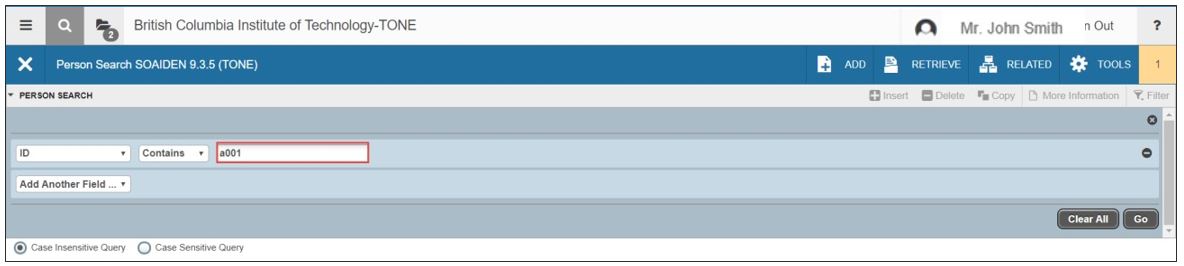
7. Enter a value for the field you selected.
NOTE: To add another field to the filter criteria, choose a field from the Add Another Field dropdown, select an operator, and enter a value for the field that you selected. Repeat this step until all filter criteria are entered.
8. Once all filter criteria are entered, click Go (F8) to display the results. The number of records received is displayed at the bottom of the section. The results for a field can be sorted in ascending or descending order by clicking on the field label in the column header. You can reverse the sort order by clicking the field label.
TIP: To perform another filter, click Filter Again.
TIP: To close the filter and display all unfiltered records, click the lowercase x in the upper
corner of the filter window to close the filter.
Appendix
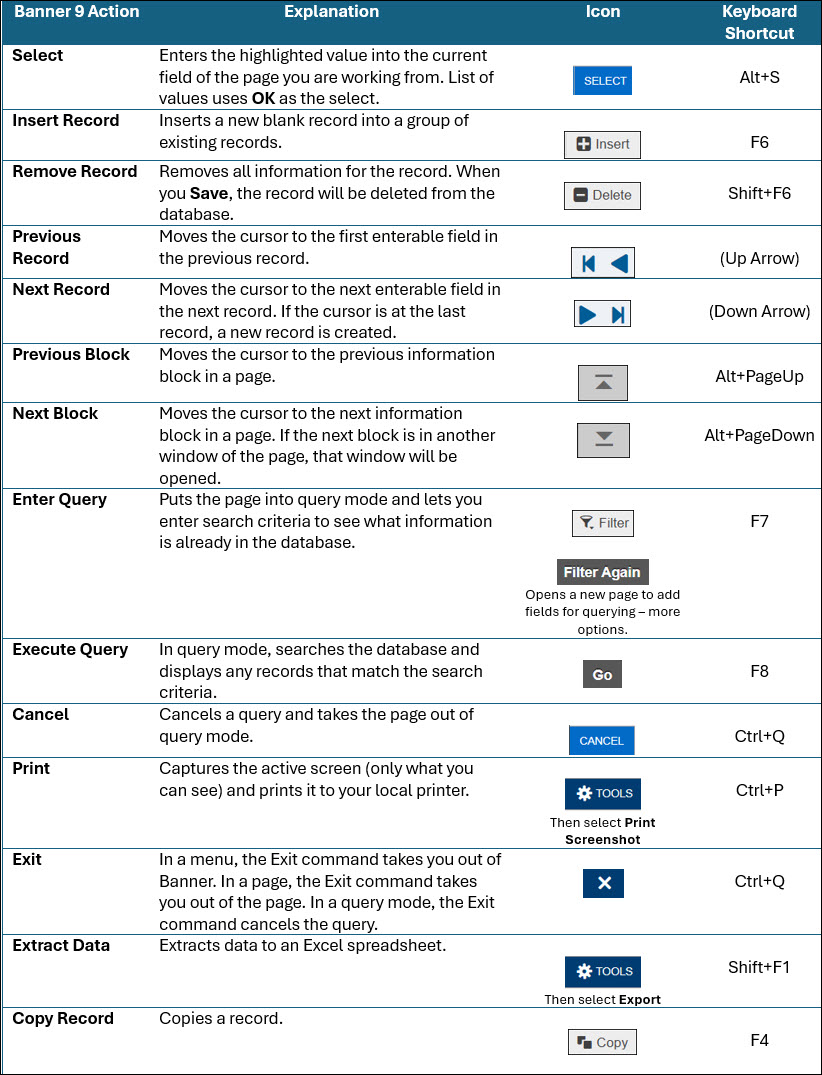
Banner 9 uses buttons to perform actions. A list of common buttons is listed below:
Button
Description
Add and Retrieve
Use the Add and Retrieve buttons to interact with Banner Document Management to properly store and review documents.
Go
Use the Go button to advance to the body of the page after populating the key block.
Save
Use the Save button to save changes on the page. The Save button is located on the bottom right side of the page.
Section Navigation
Use the Next Section button to navigate to the next section of data. Use the Previous Section button to navigate to the previous section of data. The Next Section and Previous Section buttons are located at the bottom left of each page.
Select and Cancel
Use the Select button to select and retrieve data from a called page to the current page. Use the Cancel button to return to the called page without retrieving any data. To go to a secondary or called page to retrieve data, the Select and Cancel are presented at the bottom of the page.
Start Over
Use the Start Over button to return to the key block of the page.
The following are common icons and keyboard shortcuts used in Banner 9.
Action
Banner 9
Help
CTRL + SHIFT + L
Menu
CTRL + M
Recently Opened Items
CTRL + Y
Search
CTRL + SHIFT + Y
Sign Out
CTRL + SHIFT + F
Cancel Action
ESC
Cancel Page, Close Current Page, or Cancel Search/Query
CTRL + Q
Choose/Submit
ENTER
Clear All in Section
SHIFT + F5
Clear One Record
SHIFT + F4
Clear Page/Start Over
F5
Copy
CTRL + C
Count Query Hits
SHIFT + F2
Cut
CTRL + X
Delete Record
SHIFT + F6
Duplicate Item
F3
Duplicate Selected Record
F4
Edit
CTRL + E
Execute Filter Query
F8
Exit
CTRL + Q
Expand/Collapse Drop-down Field
ALT + Down Arrow
Export
SHIFT + F1
First Page
CTRL + Home
Go
ALT + Page Down
Insert/Create Record
F6
Last Page
CTRL + End
Lookup/List of Values
F9
More Information
CTRL + SHIFT + U
Next Field/Item
Tab
Next Page Down
Page Down
Next Record
Down Arrow
Next Section
ALT + Page Down
Page Tab 1, Page Tab 2 …
CTRL + SHIFT + 1,
CTRL + SHIFT + 2 …
Paste
CTRL + V
Previous Field/Item
SHIFT + Tab
Previous Page Up
Page Up
Previous Record
Up Arrow
Previous Section
ALT + Page Up
Print
CTRL + P
Redo
CTRL + SHIFT + Z
Related Menu
ALT + SHIFT + R
Save
F10
Search/Open Filter Query
F7
Select on a Called Page
ALT + S
Start Over/Refresh/Rollback
F5
Toggle Multi/Single Records View
CTRL + G
Tools Menu
ALT + SHIFT + T
Undo
CTRL + Z
Zoom In
CTRL +
Zoom Out
CTRL –
Action
Banner 9
Help
CTRL + SHIFT + L
Menu
CTRL + M
Recently Opened Items
CTRL + Y
Search
CTRL + SHIFT + Y
Sign Out
CTRL + SHIFT + F
Cancel Action
ESC
Cancel Page, Close Current Page, or Cancel Search/Query


 2. Success Notification – Will display a checkmark in a circle when message is displayed.