BCIT is an Adobe Creative Campus – subscribers have access to thousands of fonts available from Adobe.
To add fonts to Adobe Creative Cloud:
- Open the Adobe Creative Cloud Desktop Application that is installed locally on your computer.
- If necessary, log in using your usual BCIT login credentials.
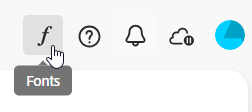
- Click on the fonts icon at the top right of the screen.

- Click the Browse more fonts button below the fonts icon. This will open the fonts.adobe.com website in your browser.
- In your browser, search for a font you want to add. When you’ve found one, click the Add Family button.

- Switch back to the Creative Cloud Desktop Application and you should now be able to see the font family you added under Added Fonts (you may need to select Added fonts in the left menu bar). It will now also be listed and available in other Adobe Apps.
- Note: To test this, launch another Adobe application, like Acrobat InDesign. Add text to your project and you should be able to select the added front family.
BCIT’s implementation is one shared license. If you add a font for coursework, it will be added and available to all BCIT subscribers – a useful feature for collaboration on projects.
More information about Adobe Creative Cloud at BCIT
-
Expiry, Access, and Migration Dates for Adobe Creative Cloud Subscriptions
-
Installing Adobe Software on your BCIT-issued or Personal Device for BCIT Employees
-
Known Issue: Change of Email Address Will Disrupt a BCIT Adobe subscription
-
Migrating your Adobe Assets out of Adobe Creative Cloud before your Subscription ends
-
Problem Installing Adobe Software – “You don’t have access to manage apps”