Employees may wish to use their own Mac computer while working at BCIT, and as such may need to be able to print to BCIT printers. Because a non-BCIT computer will not be joined to BCIT’s Active Directory, a few additional steps are required to get printers installed and configured. This KB Article explains the steps needed to connect to and configure BCIT printers from a Mac.
- From the Apple menu, select System Preferences.
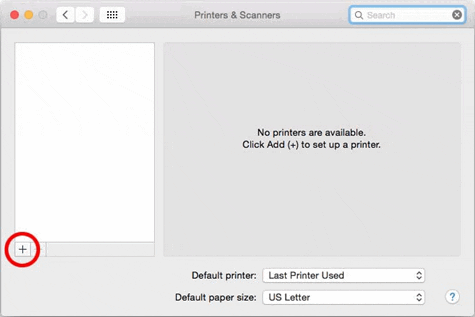
- Open Print and Fax.
- Click the + button to add a new printer.
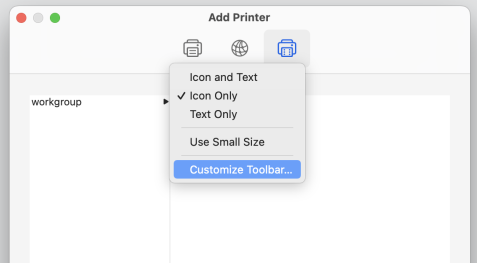
- Control‐click (or right‐click) the toolbar and select Customize Toolbar.
- Drag the Advanced icon onto the toolbar, click Done.
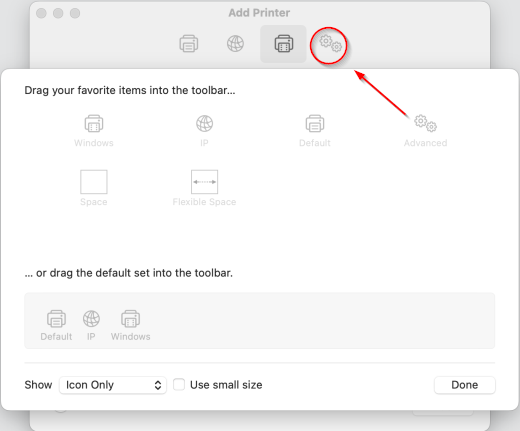
- On the toolbar, click the newly added Advanced button.
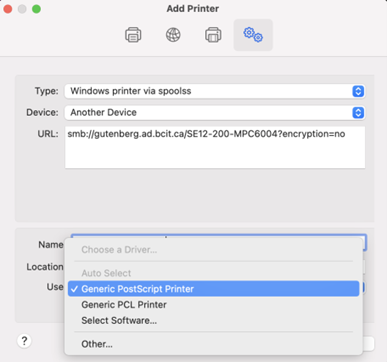
- From the Type drop‐down menu, select Windows printer via spoolss.
- In the URL: field, enter the address of the printer you want to install.
- The printer address will be the server name ‘smb://gutenberg.ad.bcit.ca/’ plus the print queue name. To add the printer SE12-200-MPC6004 use: smb://gutenberg.ad.bcit.ca/SE12-200-MPC6004?encryption=no
- If your printer name includes spaces, they must be replaced by the delimiter ‘%20’. To add SE12 200 LXMT642, use: smb://gutenberg.ad.bcit.ca/SE12%20200%20LXMT642?encryption=no
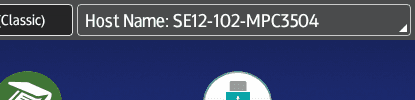
- Note: The print queue name can be found by looking on a Windows PC with the queue already mapped, or if it is a newer Ricoh device the printer name can be found in the System Message area at the top of the home screen:
- Note: Make sure to include the “?encryption=no” string after the printer name to ensure proper setup.
- From the Use drop down, select either Generic PostScript Printer or if you have downloaded the specific driver from the manufacturer’s website, use that.
- Click Add.
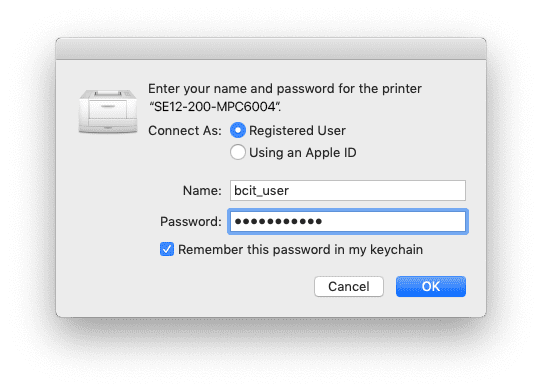
- The first time you send a job to the newly added printer, you will be prompted for a username and password.
- Important: Enter only the prefix for your BCIT email address (the part before @bcit.ca) and your usual BCIT password. Example: If your BCIT email address were asmith948@bcit.ca, you would enter asmith948 as the username.
- Check the box labeled “Remember this password in my keychain” in order to prevent this message from appearing every time.