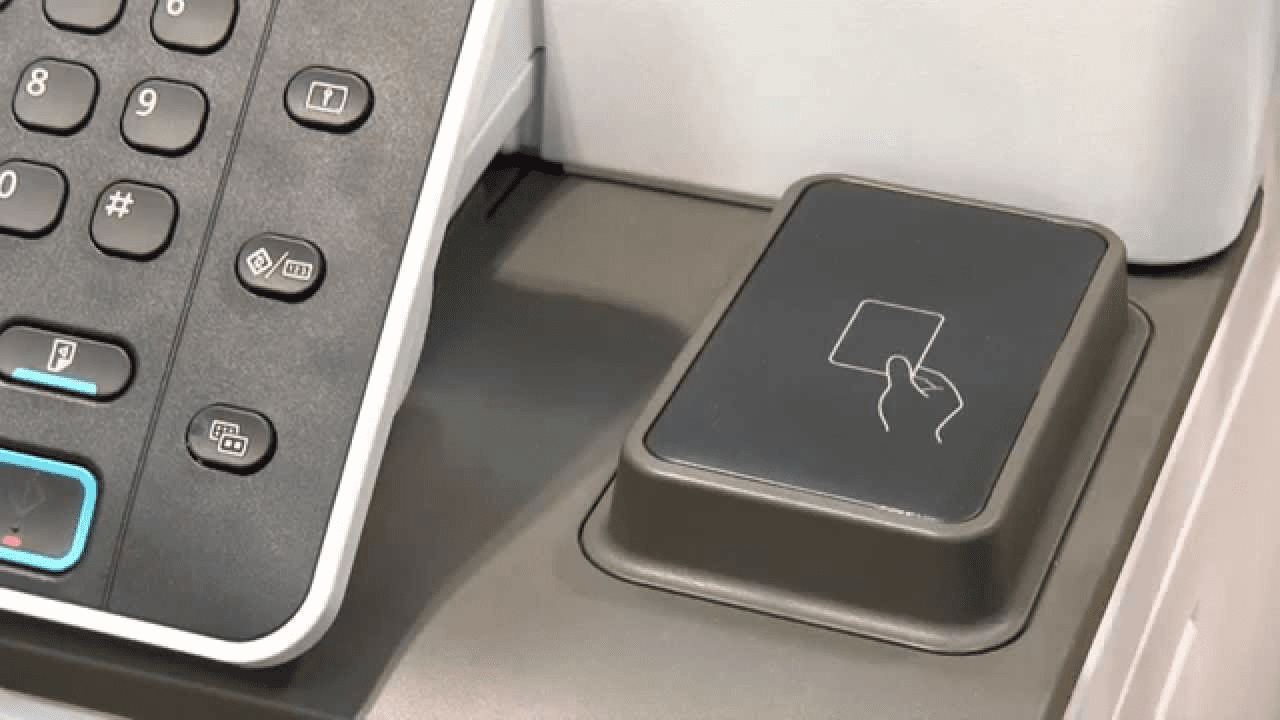
PaperCut is the software that BCIT uses to allow faculty and staff to print to and scan from most network printers/multi-function devices across its campuses. If you are using a PaperCut-enabled Ricoh MFD (Multi-Function Device) for the first time, you will want to associate your BCIT ID card with your account. This will allow you to login by simply tapping your card near the card reader located on the right-side of the operator panel.
You will need to login in order to access printing, copying, scanning and fax features. You will only need to associate your card once, but you may need to repeat these steps if you are issued a new BCIT ID card in the future.
If you do not have your card, you can still login by typing your usual BCIT login credentials using the on-screen keyboard.
This article will explain how to associate your BCIT ID card and then login and access the features of the MFD.
You may also need to add the printer to your computer:
Associate your BCIT ID card
The first time you use a PaperCut enabled Ricoh MFD you will want to associate your BCIT ID card with your account.
- Touch the screen on the MFD if the screen is black.
- Tap your BCIT ID card to the card reader on the right side of the MFD.
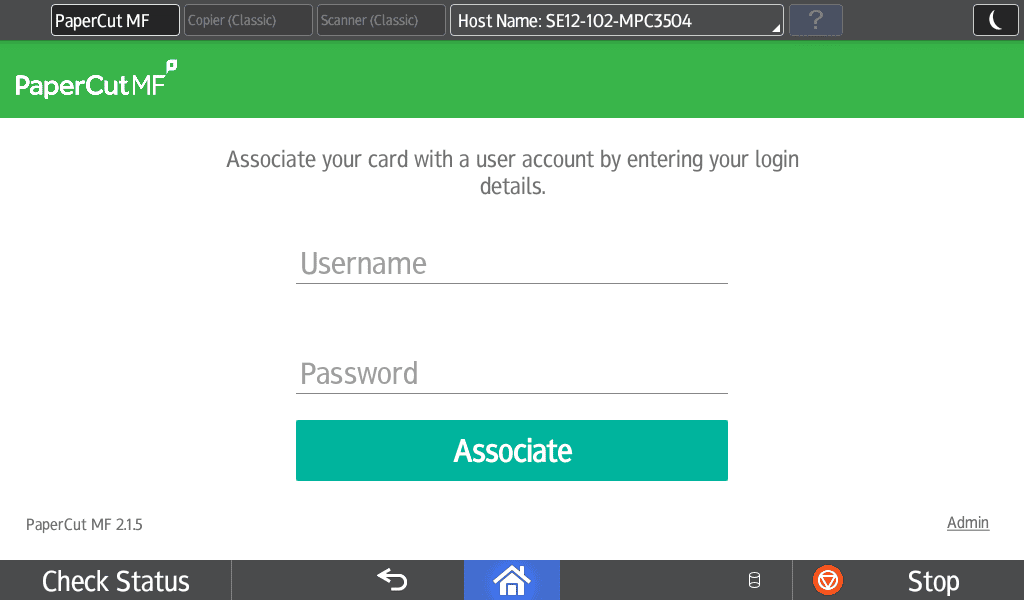
- On the “Associate your card” screen, enter your usual BCIT login credentials (BCIT email address and password). Press Associate when done.
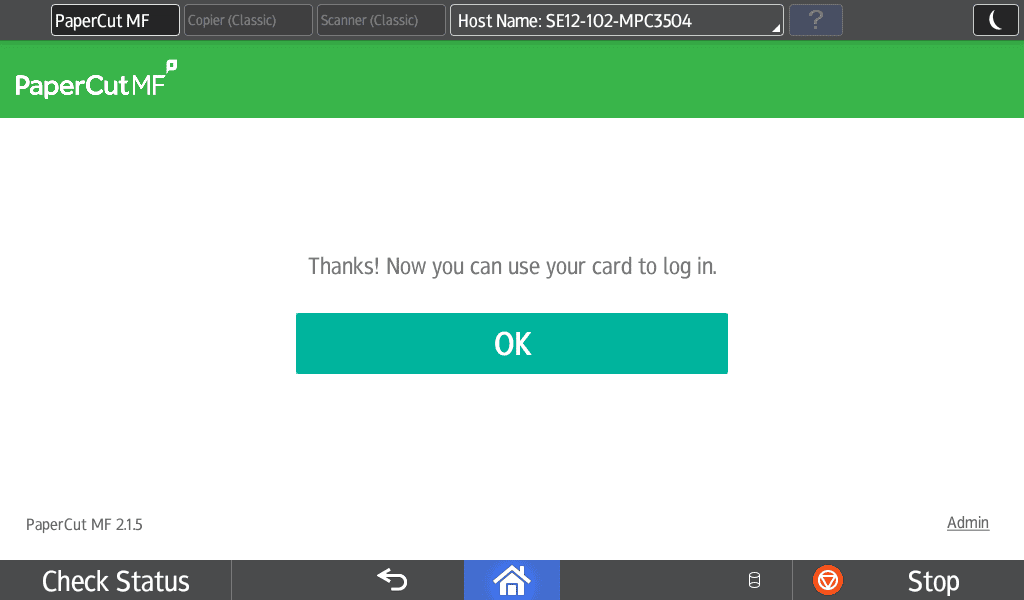
- Your card is now associated with your BCIT account.
Logging in and accessing MFD features
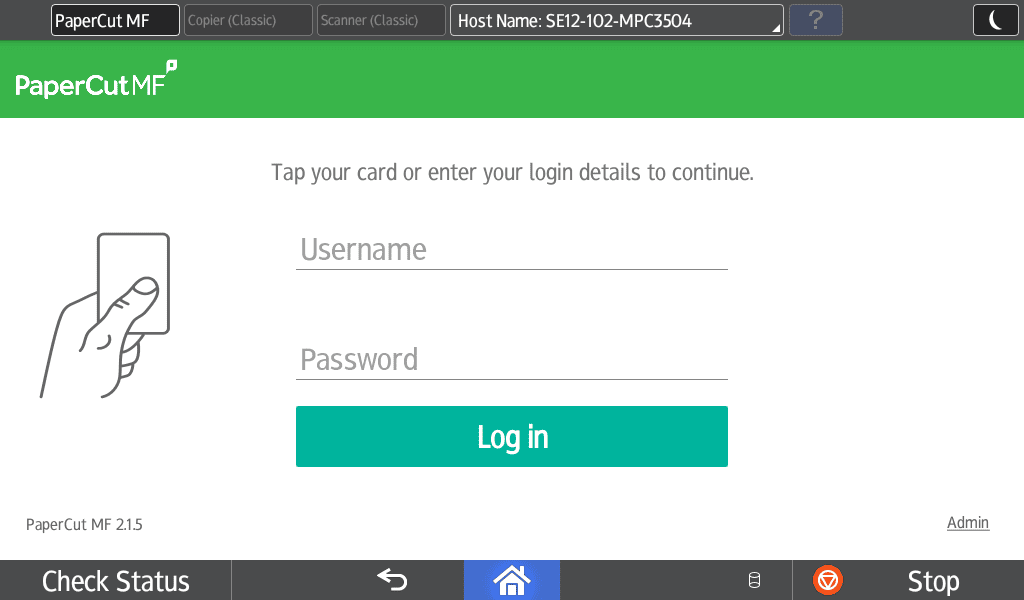
Once your BCIT ID card has been associated with your account, you can use it to login every time by simply tapping it to the card reader to the right side of the operator panel.
- Touch the screen on the MFD if the screen is black.
- Tap your BCIT ID card to the card reader on the right side of the MFD.
- Note: if you do not have your BCIT ID card, you can login by typing your BCIT email address and password using the on-screen keyboard.
- Note: if you do not have your BCIT ID card, you can login by typing your BCIT email address and password using the on-screen keyboard.
- Once logged in, select Print Release to see your print jobs or Device Functions to use scanning, copying, and faxing (if applicable).
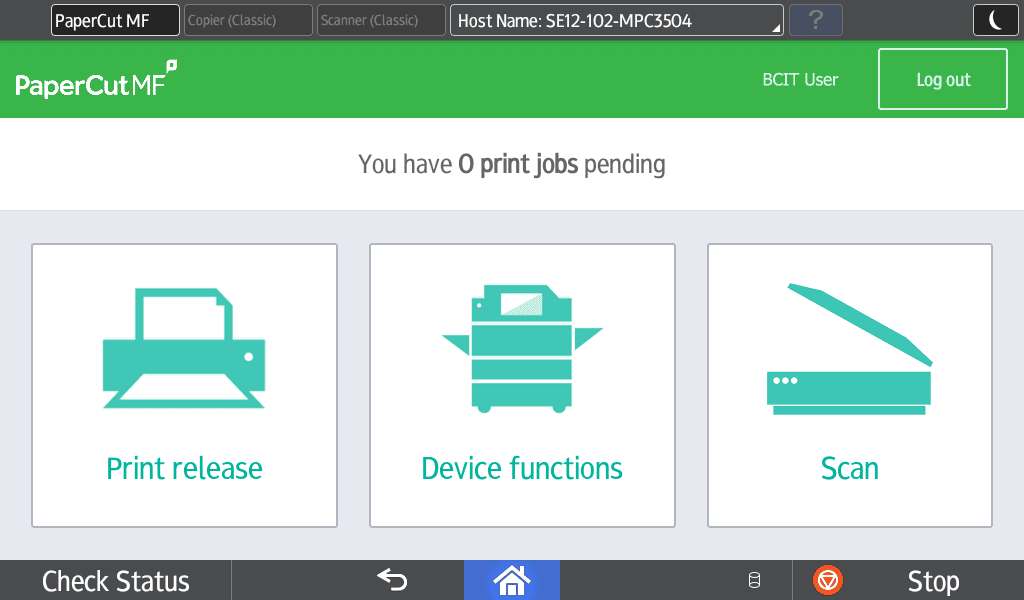
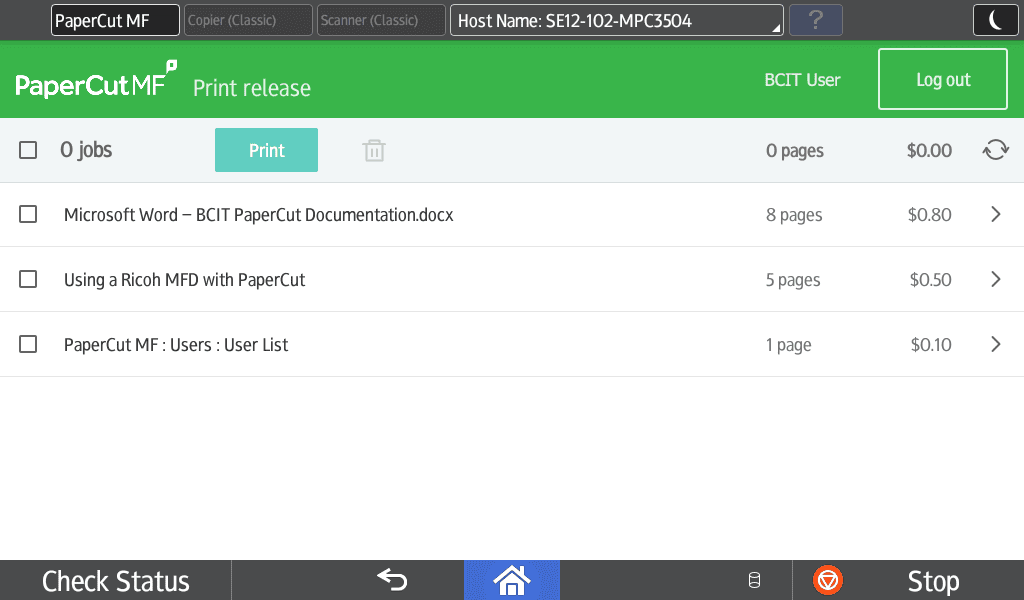
- At the Print Release screen, you can print or delete your held documents.
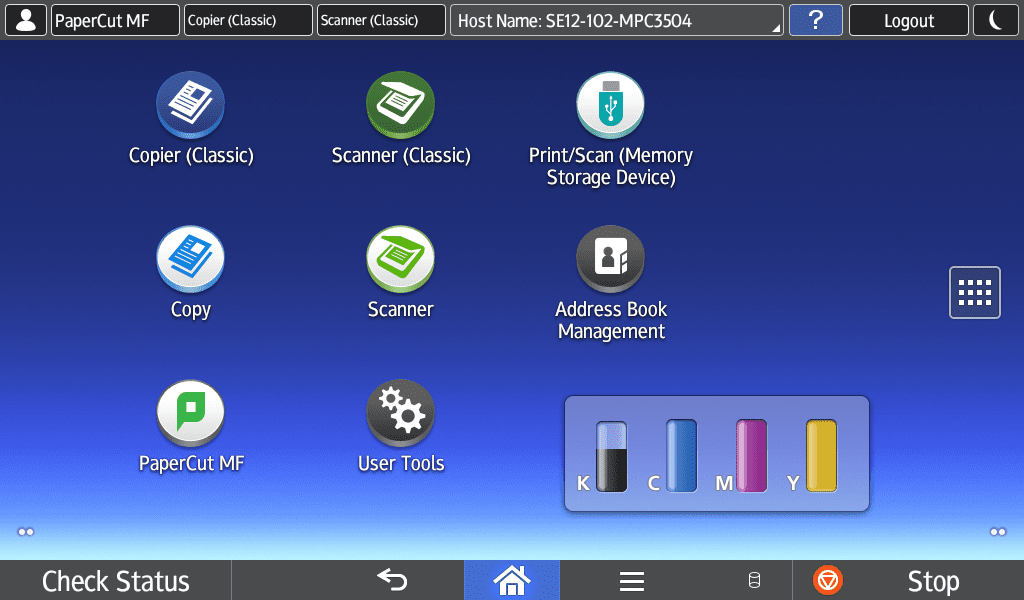
- At the Device Functions screen you can access Copy, Scanning and Fax features (if applicable). While using Scanner features, your email address is automatically added to the recipients list when you are logged in. Also, emails will automatically show as being sent from your own BCIT.ca email address.
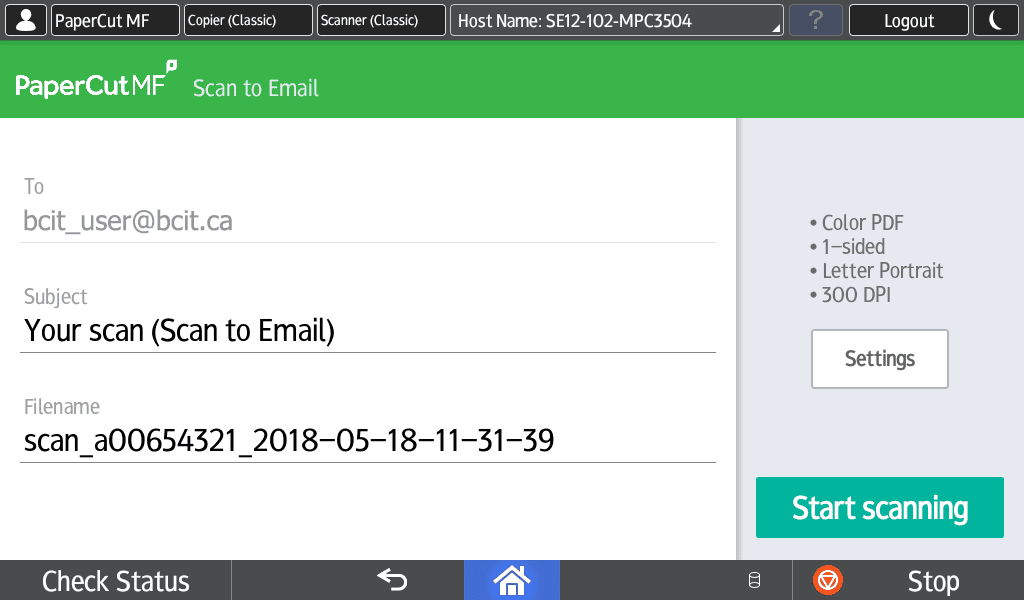
- Use the Scan function to quickly access PaperCut’s Integrated Scan to Email feature. This new feature provides quick access to simplified scanning directly to your email address and is available right from the PaperCut home screen.
You can logout at any time by pressing the Logout button at the top-right of the screen, or by tapping your card again. If at any point you are lost, try pressing the Home or Back buttons at the bottom of the screen.