myVPN is the preferred VPN client
myVPN should be the first choice for students, staff, and faculty to connect to BCIT’s secure network to access common resources. There is no approval or request process needed to use myVPN. All that is required is that you are a current student, staff, or faculty at BCIT.
For most of us, this means myVPN is the best way to access BCIT resources remotely.
You will need to fill out the request form for approval before your account will have AccessAnywhere access enabled.
How to request and fill out the AccessAnywhere application.
First Time connection for AccessAnywhere VPN on MacOS
After your AccessAnywhere VPN access has been set up you can follow the instructions below to setup to AccessAnywhere VPN on your MacOS computer:
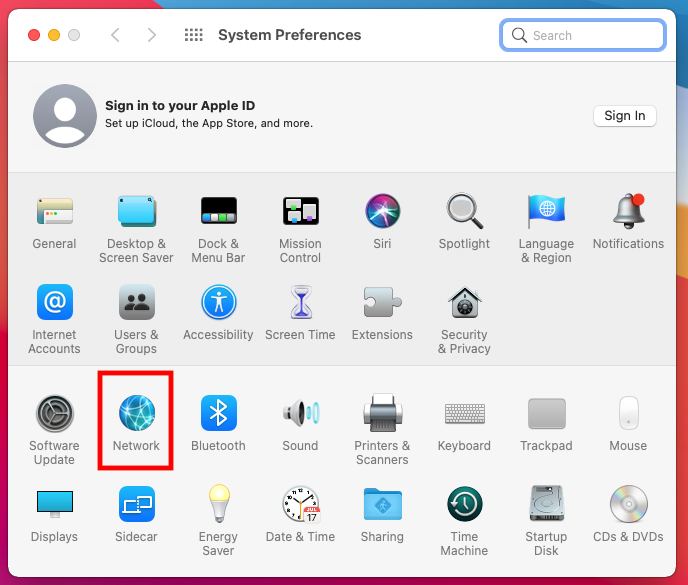
- Click on the Apple icon on the top left and select System Preferences.

- Click on the Network icon.
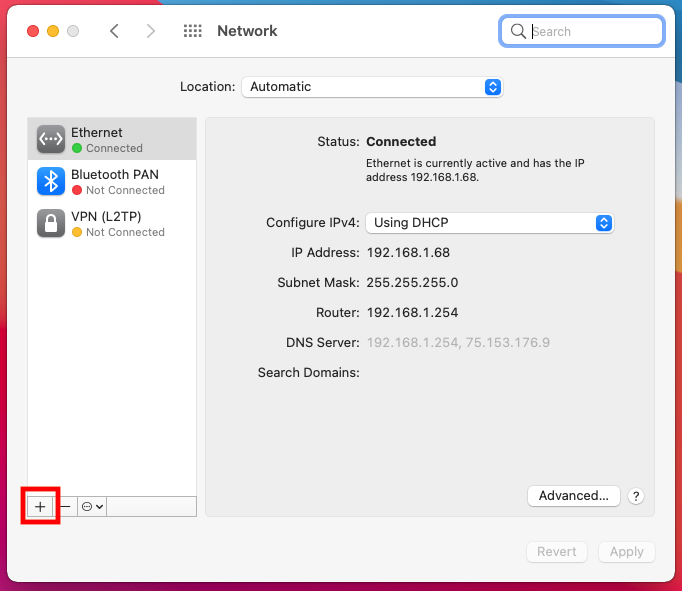
- Click on the plus + symbol to add a new connection.
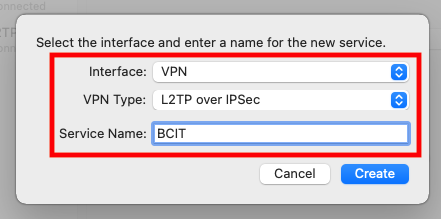
- Select the interface and name it:
- Select VPN for the Interface drop-down.
- Select L2TP over IPSec in the VPN type drop-down.
- The Service Name can be BCIT.
Click Create.
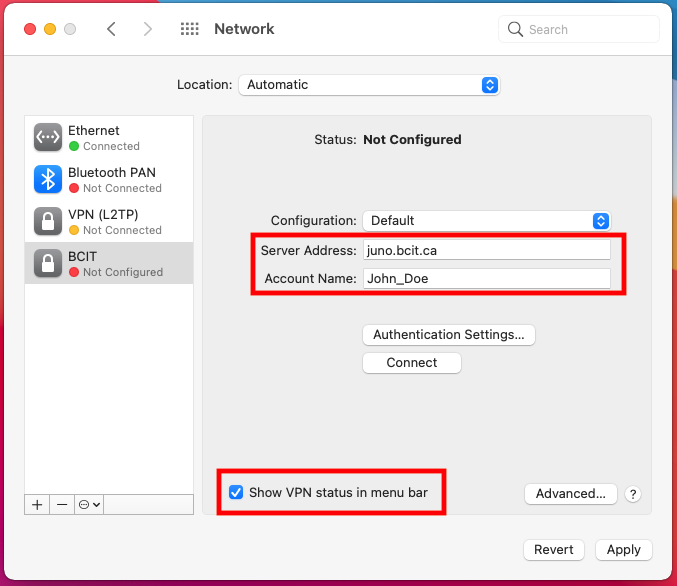
- Fill out the configuration fields:
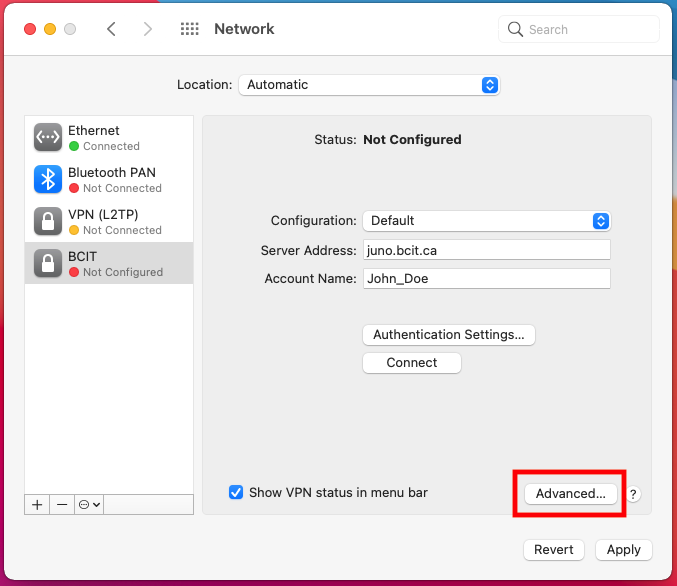
- Type juno.bcit.ca in the Server Address field.
- Type your BCIT email prefix (the part before @bcit.ca) in the Account Name field.
- For example: If your primary BCIT email address were “gfamily28@bcit.ca”, your BCIT email prefix would be “gfamily28”. If your primary BCIT email address were “John_Doe@bcit.ca”, your BCIT email prefix would be “John_Doe”.
- Check the Show VPN status in menu bar checkbox.
- Click on the Authentication Settings button.
- Fill out the Authentication fields:
- Under “User Authentication”, type your usual BCIT password into the Password field.
- Under “Machine Authentication”, type bcit-vpn in the Shared Secret field.
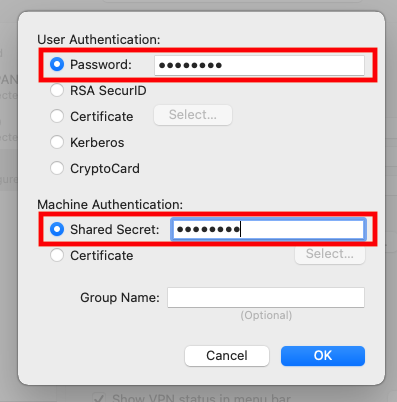
Click OK.
- Click the Advanced button.
- On the Options tab, ensure Send all traffic over VPN connection is checked.
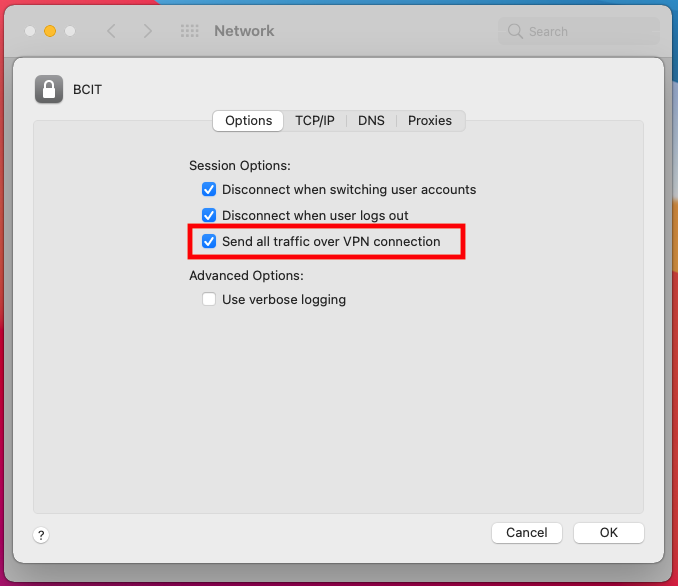
- Click on the DNS tab.
- Add a Search Domain:
- Click on the plus + symbol at the bottom left of the Search Domains window, and type in ad.bcit.ca in the now-active Search Domains box.
- Note: The DNS servers window should remain blank.
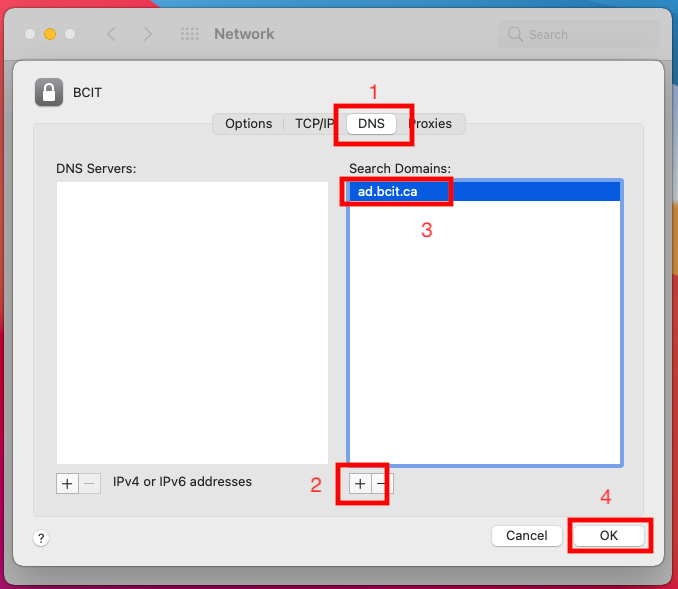
Click OK
- Click Apply and then Connect.
You are now connected to AccessAnywhere.
Connecting to AccessAnywhere VPN
Once the above steps are completed you will be able to connect to AccessAnywhere VPN anytime using the below steps:
Known issues
Can connect to AccessAnywhere VPN but cannot access any bcit.ca sites
Ensure that the User name entered in the setup steps is only your BCIT email prefix (everything before the @bcit.ca). The username must not have @bcit.ca in it in order for the connection to work properly.
Restarting applications
Some applications may not function properly if you keep them open while connecting to AccessAnywhere. There have been reports that this happens to Cognos. Be sure to close applications before connecting to AccessAnywhere and restart them after AccessAnywhere has connected.