There are hundreds of software titles available in AppsAnywhere, but most classes and programs require students to use only a few of those. One way for instructors to reduce confusion for their students is to compile an App List for their course or program and share it with their students.
Creating an App List
The video below shows the basic steps to create an App List. If those instructions are insufficient, detailed written instructions can be found below the video.
To create an App List within AppsAnywhere:
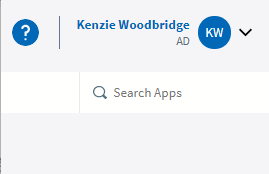
- Click on the drop-down menu by your name in the top-right corner and choose App Lists.
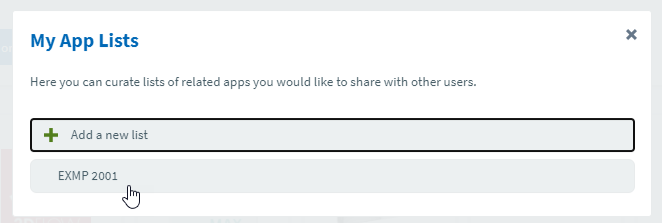
- In the “My App Lists” pop-up that appears, click the Add a new list button.
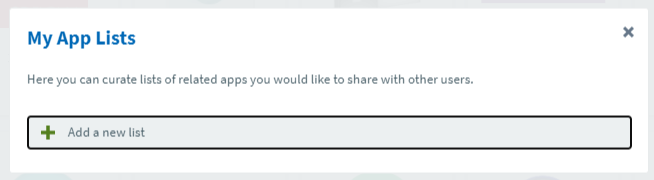
- Type in the name for your new App List and click Create.
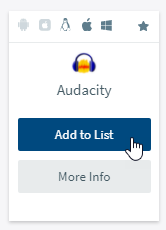
Recommended: if the App List applies to a specific course, use the course number as the start of the name (e.g., “COMP 3617”, “BCST 2234”, etc.), regardless of whatever else you add to it. Remember that students may have multiple App Lists provided to them and may also create their own, so try to make it easy for them to know which is the one for your course. - You can now hover your mouse over tiles and click Add to List to add Apps to the list. If you make a mistake, the same button changes to “Remove from List” and you can click it to remove the App.
 Tip: You can reduce the number of Apps to choose from with the usual filters across the top, including the “Categories” and “Favourites” filters. This means that if you first “Favourite” all the Apps you’d want to include for all App Lists you create, you can then very quickly add only those Apps you’d want for each App List without having to scan through the hundreds available in AppsAnywhere.
 - When you have added all needed Apps to the App list, click the Show only apps in this list to review the list and ensure it is correct. If correct, click the Save button.
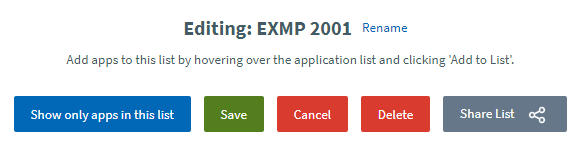 Note: Only after you have clicked the Save button will the Share List button change colour and becomes clickable.
At this point you have created the App List successfully.
Sharing an App List with others
To share an App List with students or colleagues, in AppsAnywhere:
- Click on the drop-down menu by your name in the top-right corner and choose App Lists.
- Click on the previously created App List you’d like to share in the list.
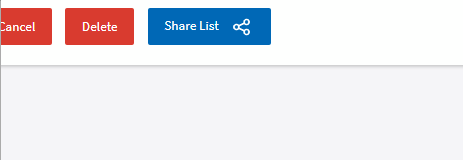
- Click the Share List button and then click the Copy to Clipboard icon next to the web address.
- You can now use the copied address to add a link to your App List in your Learning Hub course, in an email to students or colleagues, in a Loop post, or however else you’d like to communicate it. All the recipient needs to do is go to the web address you provided and it will be added as an available filter for them in AppsAnywhere.
Note: Creating an App List doesn’t automatically make that App List available to you, the creator, as a filter. Going to the copied web address yourself will add it as a filter for you, just as it does for anyone you share it with.