AppsAnywhere is BCIT’s software delivery platform. Through AppsAnywhere, you can access all the software needed for your coursework without ever needing to visit a BCIT student computer lab. The very first time you connect to AppsAnywhere on a device you will need to follow the steps below to ensure that AppsAnywhere will work correctly (even if you’ve connected to AppsAnywhere on another device previously).
Note: These instructions apply to a Windows environment. If your computer is a Mac you will need to follow instead the instructions for accessing AppsAnywhere on a Mac. You may also need to consider setting up a Windows environment on your Mac computer to be able to use most of the software in AppsAnywhere.
Setting up AppsAnywhere the first time you use it
To complete the initial setup:
- In a web browser, go to the AppsAnywhere site and login using your usual BCIT credentials.
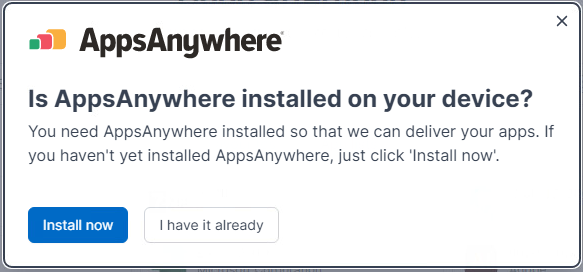
- AppsAnywhere will ask if it is already installed on your device. Click on the Install now button to start the installation process.

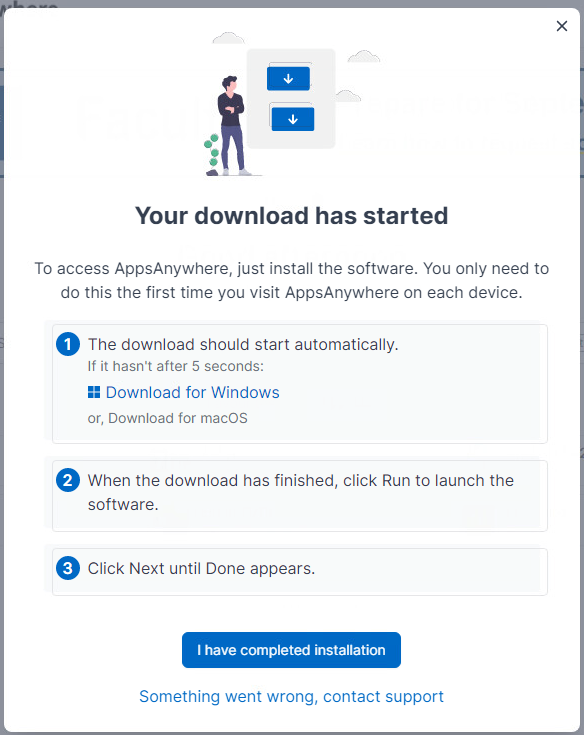
- The Appsanywhere client download will start. When the download is complete, navigate to your downloads and double click the downloaded package.

- Follow the steps as prompted by the installer to install AppsAnywhere. Depending on your computer’s security settings, you may be asked to confirm whether you want to allow the installer to make changes to your computer.
- Close the installer when you see the confirmation that the installation was successful.
- In your browser, click the I have completed installation button.

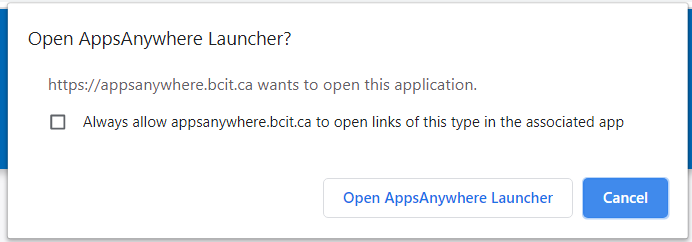
- A pop-up will ask if you want to Open AppsAnywhere Launcher. Click the button to do so.

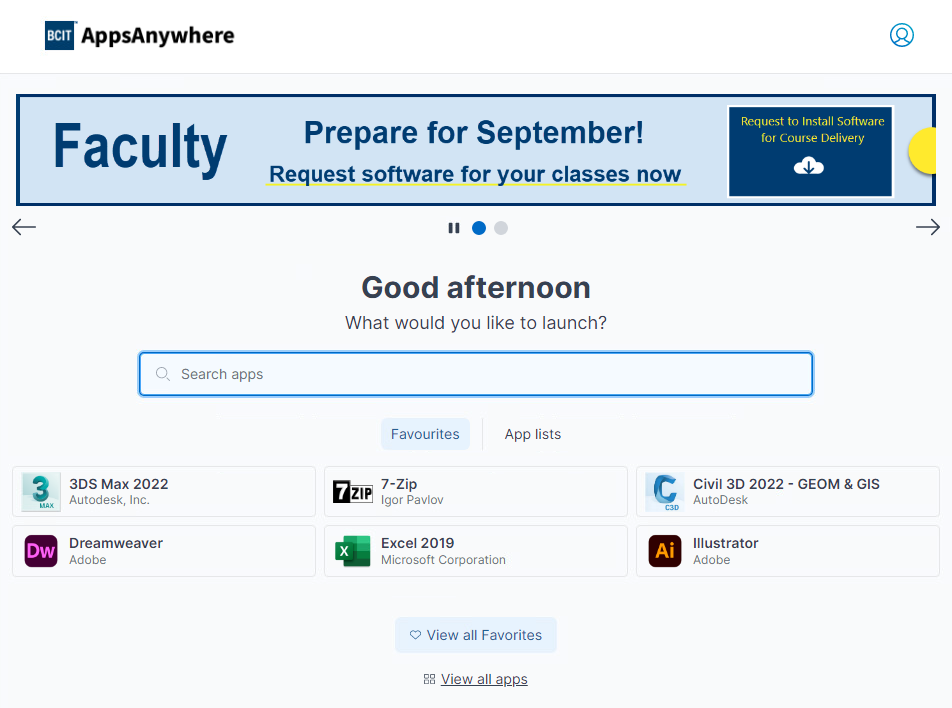
- After a few seconds the validation process will complete and you will see all available applications. You can search for an app to launch or “View all Apps”.
