This guide will assist you in the necessary steps to start using Apple Classroom.

Classroom is an app for teachers, available for supported iPad devices and Mac computers, to hold classes in a schoolroom, remotely, or through a combination of nearby and remote locations (called hybrid classes).
When teaching in class, you can launch a specific app, website, or textbook page. You can also send documents to and receive them from your students, and share student work locally on a TV, monitor, or projector using Apple TV. Finally, you can see which apps students are working in and, at the end of the class, view a summary of how students spent their time.
One of the requirements needed to use Apple Classroom is an Apple ID signed into iCloud on the device the instructor or student is wanting to use.
Instructors / Student Employees
Instructors and Student Employees, (anyone who signs in with a @bcit.ca account) will receive an email with their Apple ID and temporary Apple ID Password. When you sign in with your Managed Apple ID for the first time, use the temporary password your administrator provides you. After you sign in, you will be prompted to set up a new password. You must complete your password setup before you can sign in to some Apple services such as Apple Classroom.
You must use a standard password that includes eight or more numbers and letters and two factor authentication.
Unlike personal Apple ID’s they are managed through BCIT so if you’re having difficulty with password resets it can be done via submitting a ticket.
Students
Students that sign in with a my.bcit.ca account have been fully integrated into Azure. This means when they sign into iCloud, they will use the same credentials they use to access other BCIT devices/services.
Check your BCIT inbox and look for the subject Set Up Your Managed Apple ID.
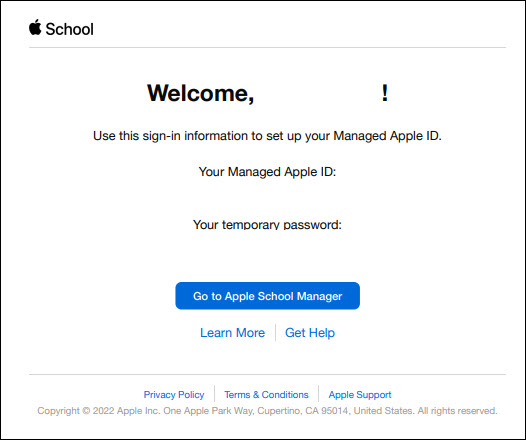
Navigate to System Preferences and sign in using your bcit.ca account and temporary password. It will then prompt for a trusted phone number. This will be required when you sign into a different Mac at BCIT.

Verify the code, then create a new password. Your current password is the temporary password from the email.

You are now setup and ready to use Apple Classroom!
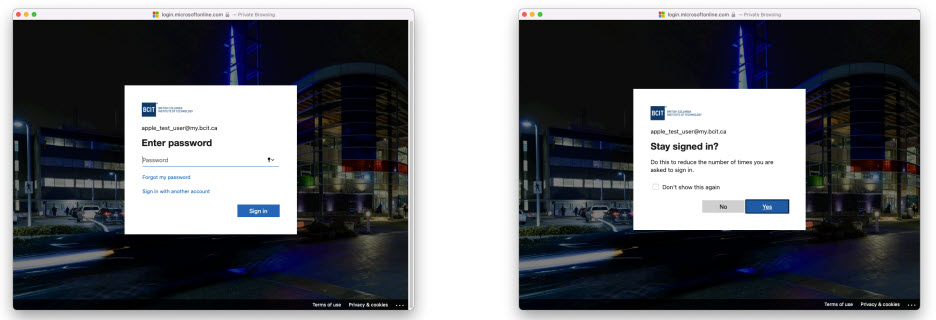
Navigate to System Preferences and sign into iCloud using your my.bcit.ca account.

You will then be redirected to sign in using your my.bcit.ca account.
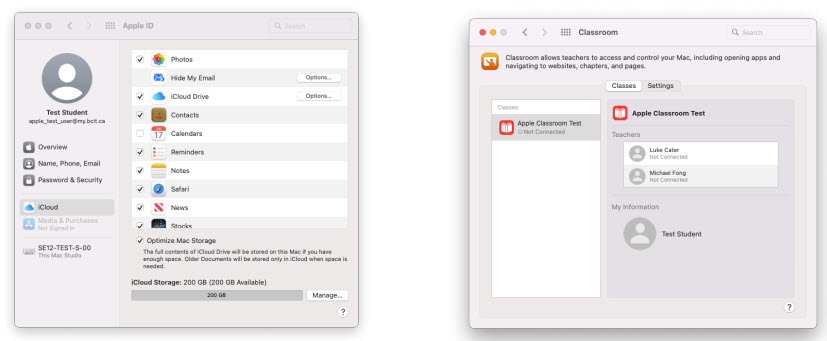
After a few seconds you will be signed into iCloud. You will be able to see what Classes have been made available to you for Apple Classroom and change setting to automatically join or keep as manual.
The Classroom App is automatically installed on Instructor stations at BCIT. For users wishing to use BYOD devices, it can be done by downloading the Classroom App from the Mac App Store.
In either case, you will need to sign into iCloud through System Preferences to start using Classroom.
When launching the App you will have been given pre-populated classes to get started with.
If you wish to create new classes tailoring to a specific set of students, this can be done by creating a new class by clicking the + icon.
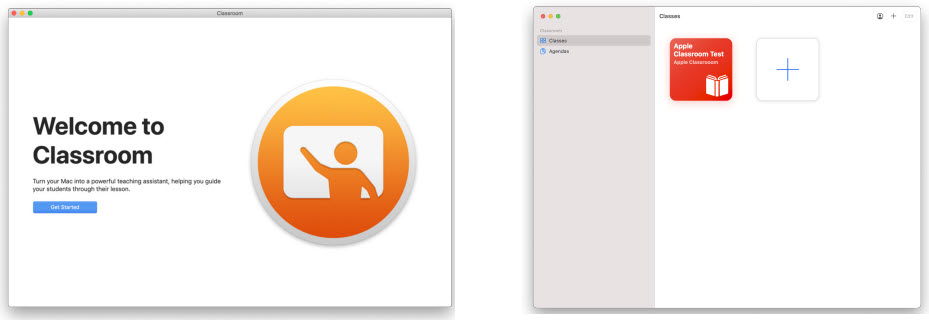
Once created, you will be able to start the class and add the students you wish to attend.
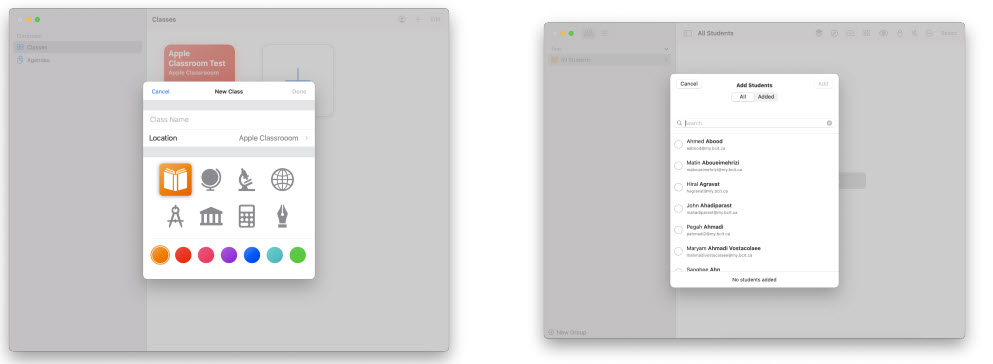
NOTE: Only manually add classes can be edited.
You can control how and when students can use their device—including sharing files or viewing their screen—to make sure they stay on task.
View multiple students’ screens
In Classroom, select a class in the sidebar.
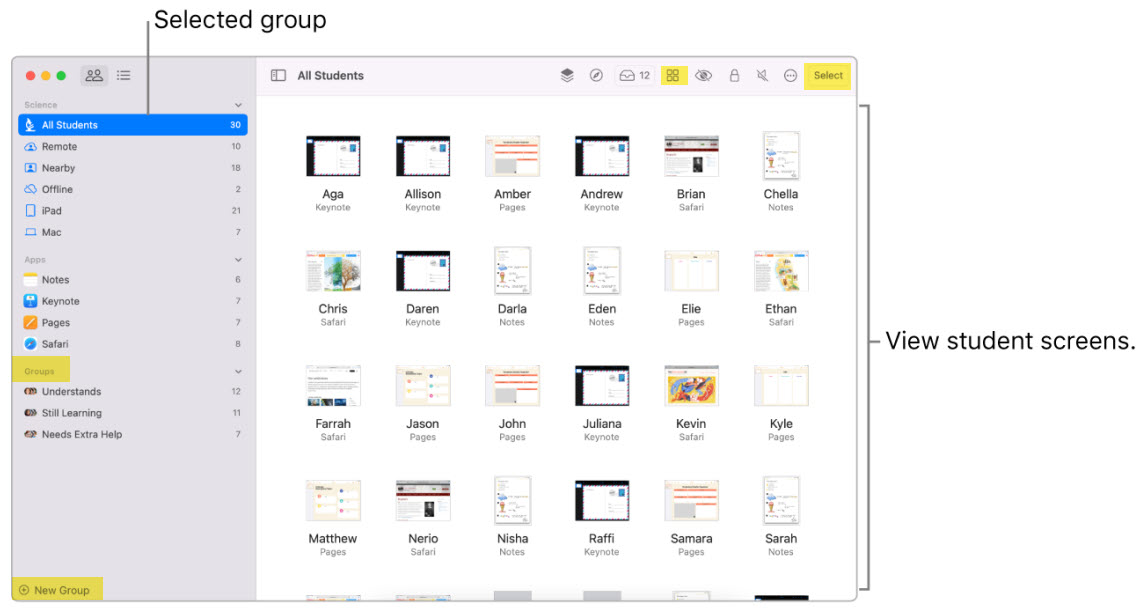
- Select All Students in the sidebar.
- Under the Groups section, select a specific group in the sidebar.
- Manually create a group by clicking on New Group, and then select it in the sidebar.
- Click Select in the upper-right corner of the screen, select specific students, then click Done.

- In the row of actions, click on the Students icon to view the list of students.
Press Command-Plus Sign (+) to zoom in and Command-Minus Sign (-) to zoom out.
You can also use a trackpad or access zoom in and zoom out from the View menu.
When you’re finished viewing the screens, click on the Students icon.
View a single student’s screen
- Select the student.
- The Actions window appears.
- Click on the Binoculars icon.
Press Command-Plus Sign (+) to zoom in and Command-Minus Sign (-) to zoom out.
You can also use a trackpad or access zoom in and zoom out from the View menu.
When you’re finished viewing the screens, click Done.
The Class Summary pane lets you view information about each student’s use of their device during the class.
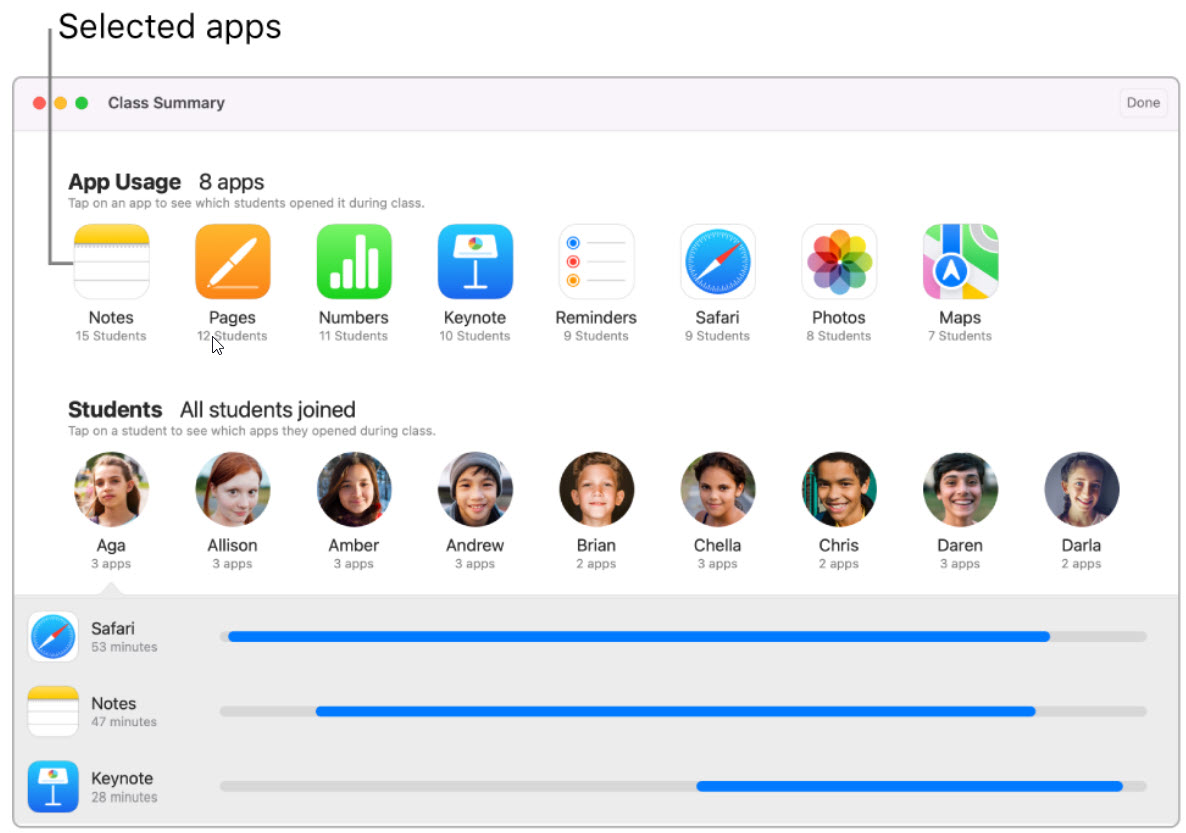
The Class Summary pane appears automatically when you end a class. You can click each item and view:
- App usage: Which apps were used by the students and the length of time the students used them during class.
- Items shared: Documents or websites being shared by the students.
- Student list: The list of students that participated in the class.
When a class is made available for a student, the Classroom preferences appear in System Preferences on the student’s Mac. From there, depending on the type of class, the student can choose their My Card contact or manually enter their first and last name, and a photo that they can change at any time.
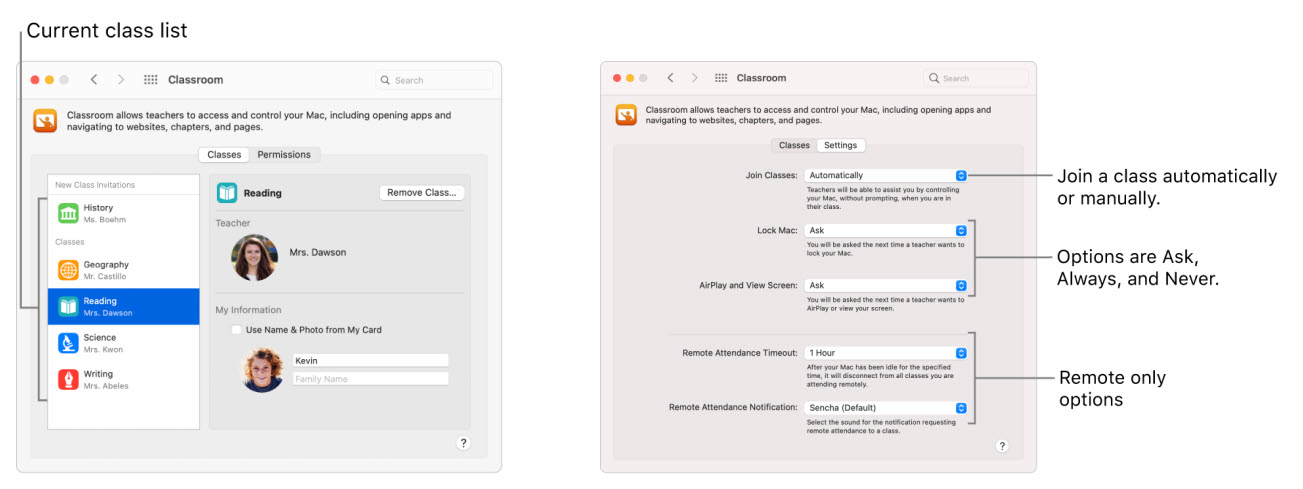
For remote classes, students can also set the remote attendance timeout and the remote attendance notification sound.
Join classes automatically
If a student chooses Join Classes Automatically, they won’t be prompted to join the class and you can perform actions automatically. If the student leaves the area where the class is being held, for example, at the end of a period, their Mac disconnects from the class. The next time you conduct the class, the student will be prompted to join it.
Join classes manually
When a student sets the Join Classes setting to Manually, the student will appear when you start the class and displays their currently active app. The student is prompted to join the class when you perform your first action, such as open or lock device. The student can tap Allow, Always Allow, or Deny:
- Allow: The action completes, and the student is prompted again when you perform any other action.
- Always Allow: The action completes, and you’re allowed to perform the action repeatedly, again without prompting the student the action is paired with.
- Deny: The action doesn’t complete, and the student is prompted the next time you attempt to perform any action.