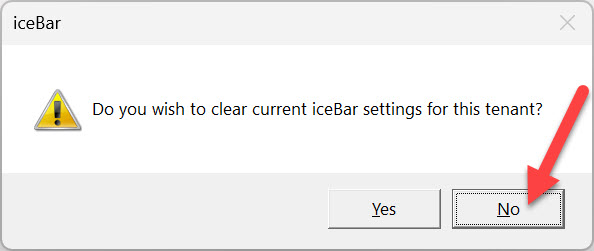
This article is designed to assist you with Frequently Asked Questions, provide an overview of basic navigation within iceBar, and cover some of the user settings. Whether you’re new to the system or need a quick reference, this guide will help you navigate common tasks and understand how to use iceBar efficiently.
BCIT is transitioning its Contact Centers from the Cisco Unified Contact Center Express (using Finesse and Jabber) to a modern solution integrated with Microsoft Teams and iceBar. This migration is part of BCIT’s broader strategy to modernize communications infrastructure and retire aging, end-of-life systems. The new Teams-enabled Contact Center is designed specifically for departments that handle high volumes of inbound or outbound calls requiring advanced call routing and management features.
Note: Most departments and staff not using Contact Center functionality will not be affected by this change.
Frequently Asked Questions
Below are some frequently asked questions about the transition to the new Teams-enabled Contact Center and how it might affect your department.
Important
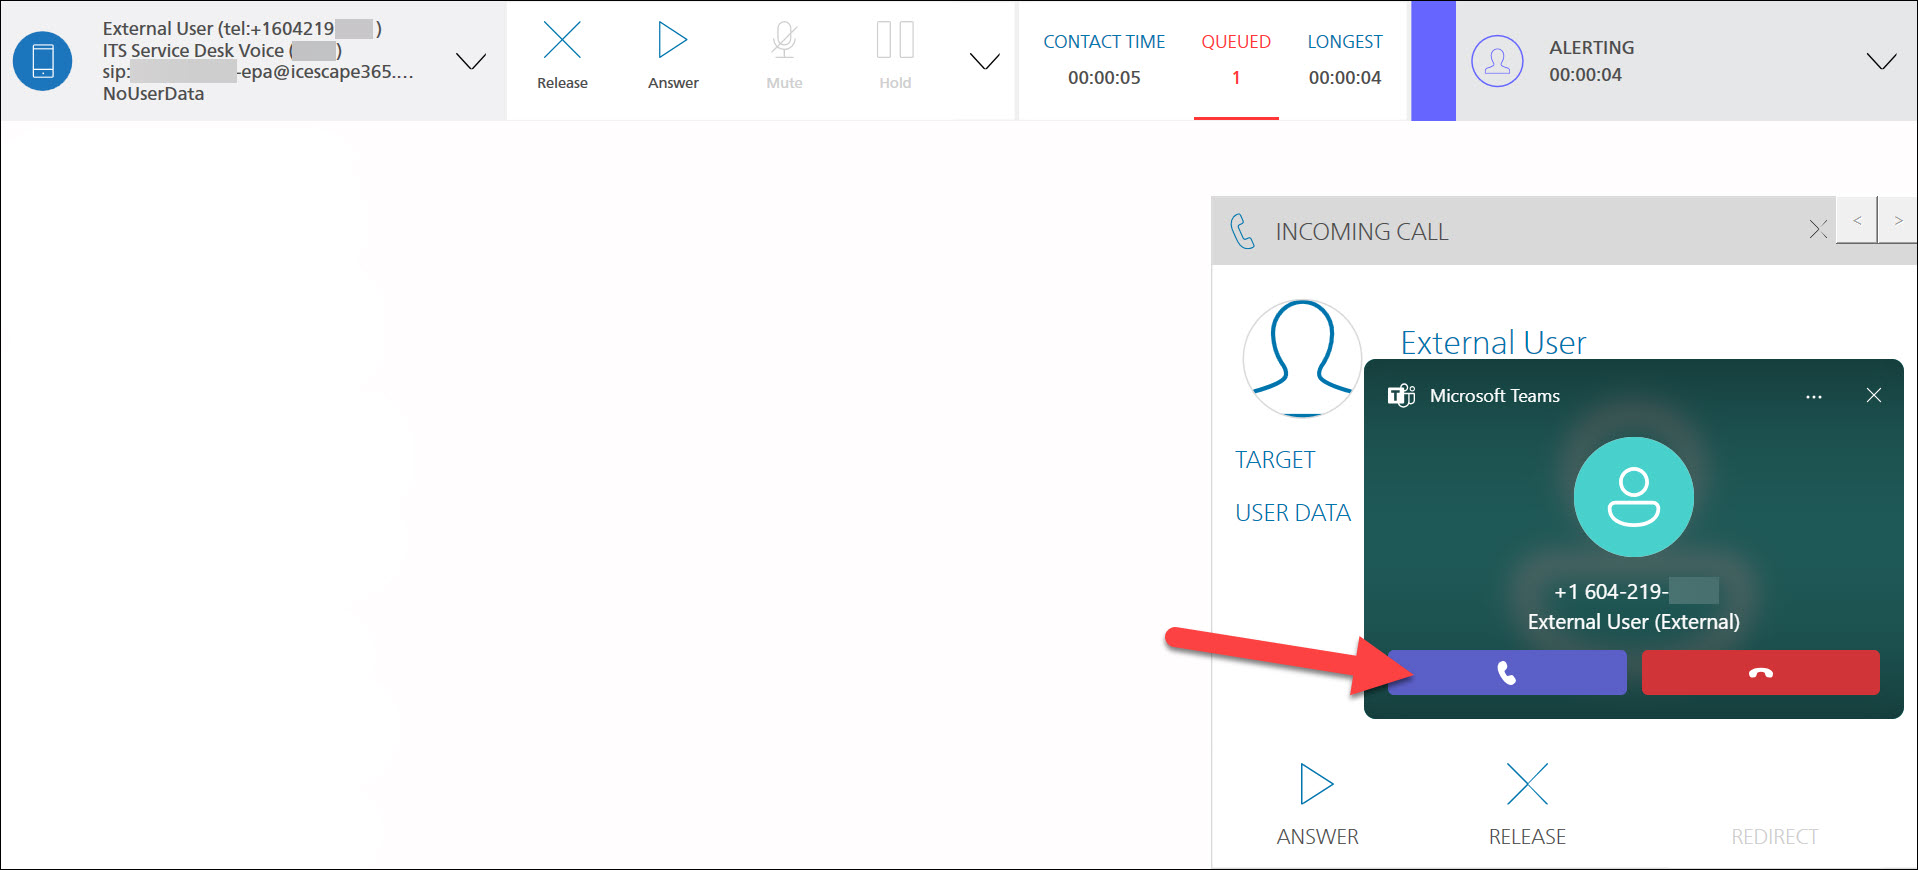
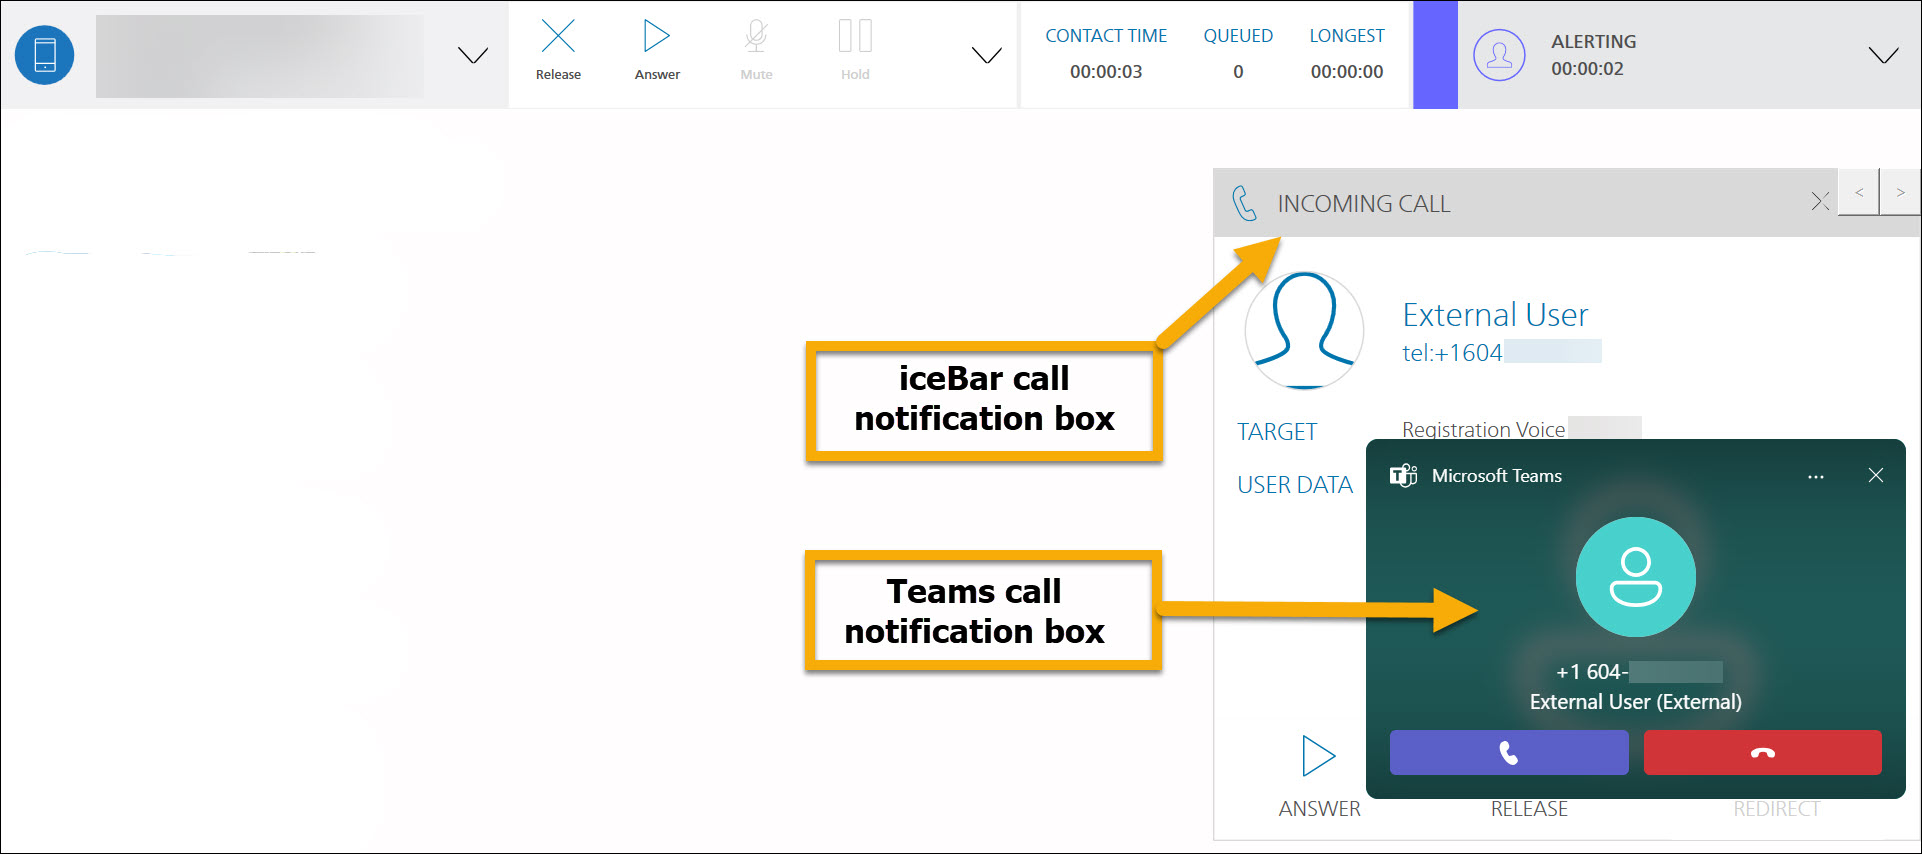
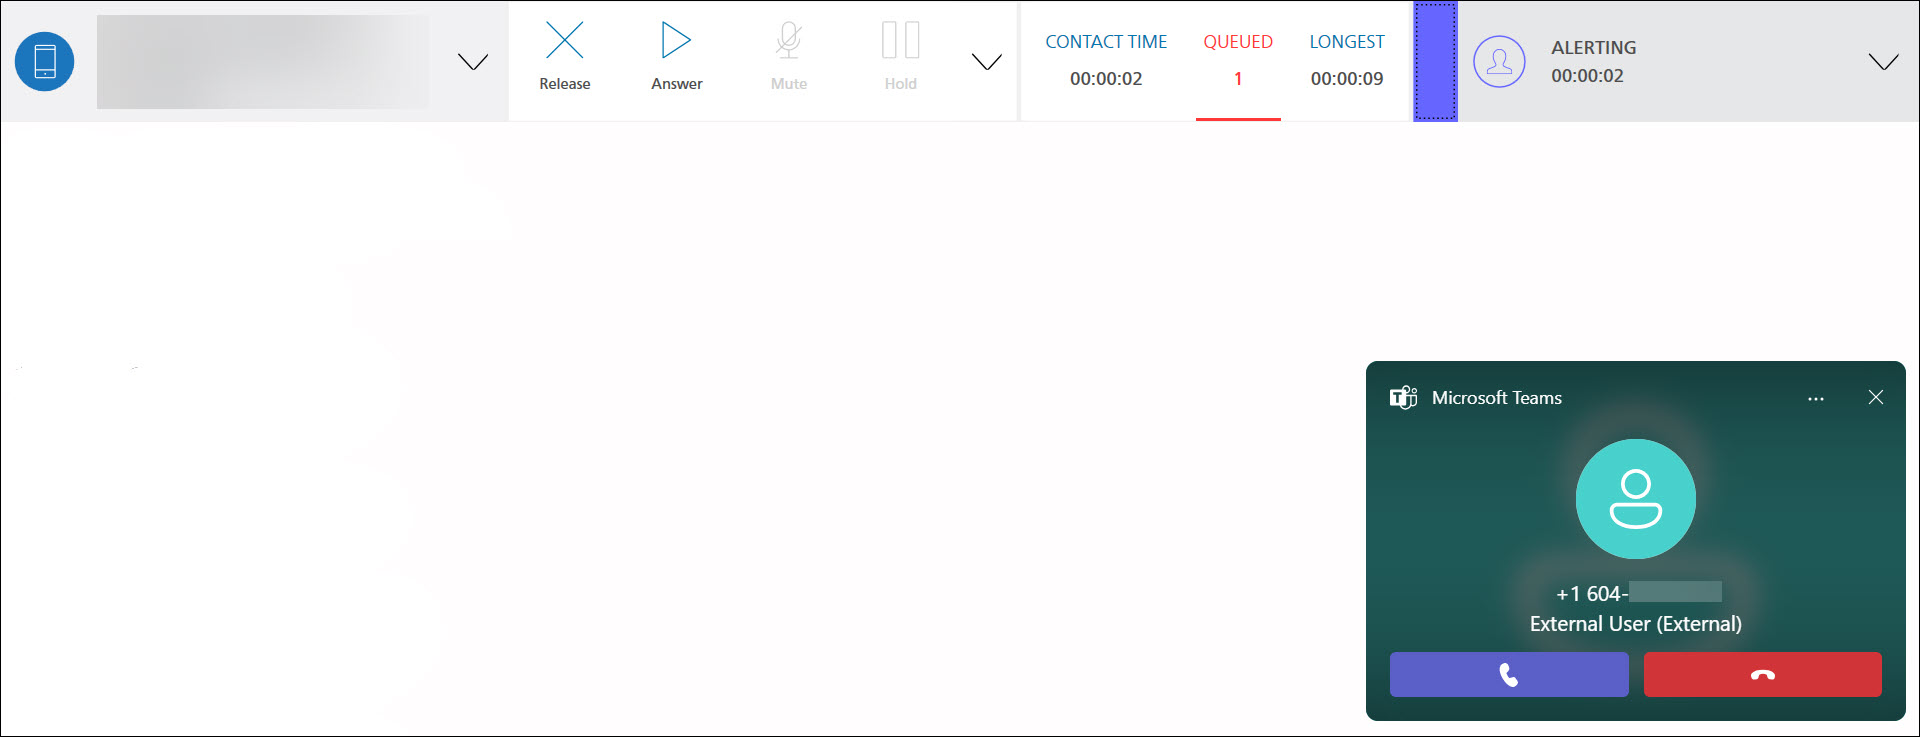
Keep Microsoft Teams open alongside the iceBar application, as both are interconnected and rely on each other for full functionality:
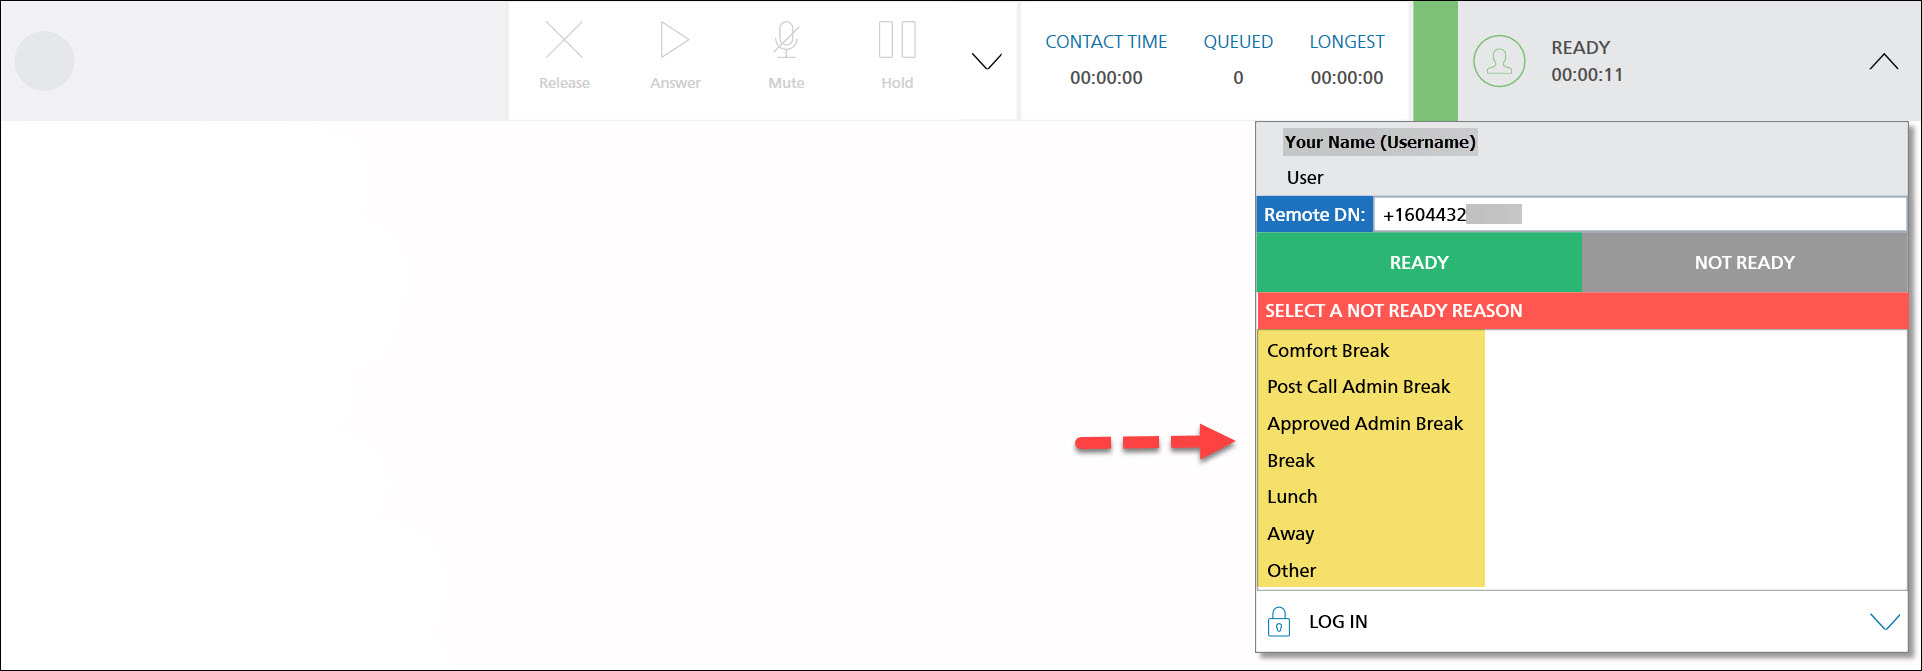
- Ensure your Teams status is set to “Available” to receive calls.
- Adjust your call settings to prevent unanswered calls from going to personal voicemail. This ensures the iceBar system rings long enough to recognize when an agent in READY mode doesn’t answer, allowing the call to return to the queue.
- Click the three dots next to your profile picture.
- Select Settings > Calls.
- Under “Ring for this many seconds before redirecting,” set it to 40 seconds.
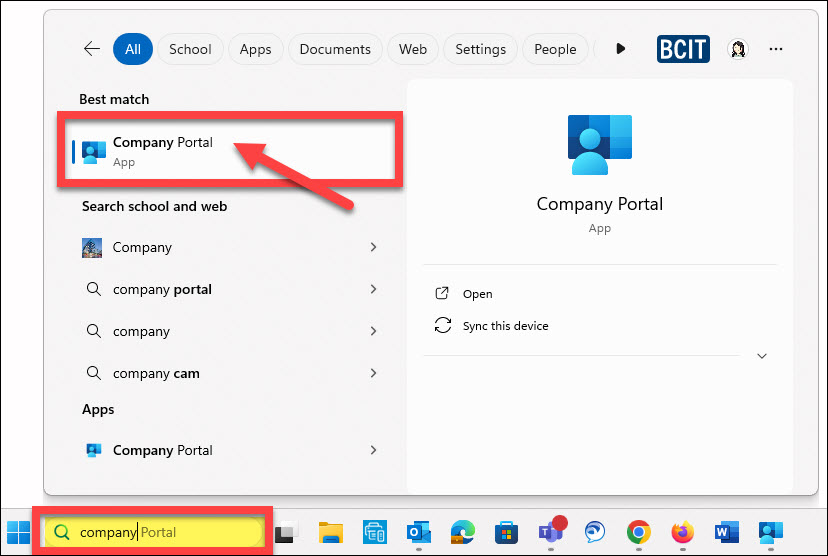
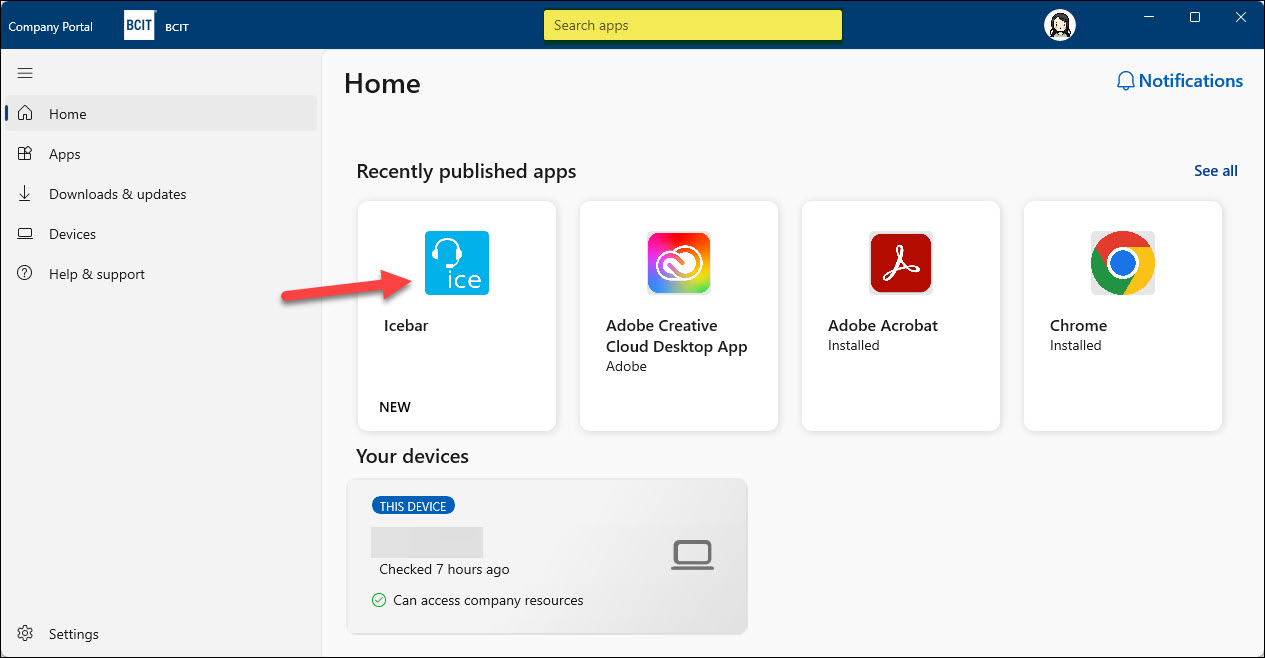
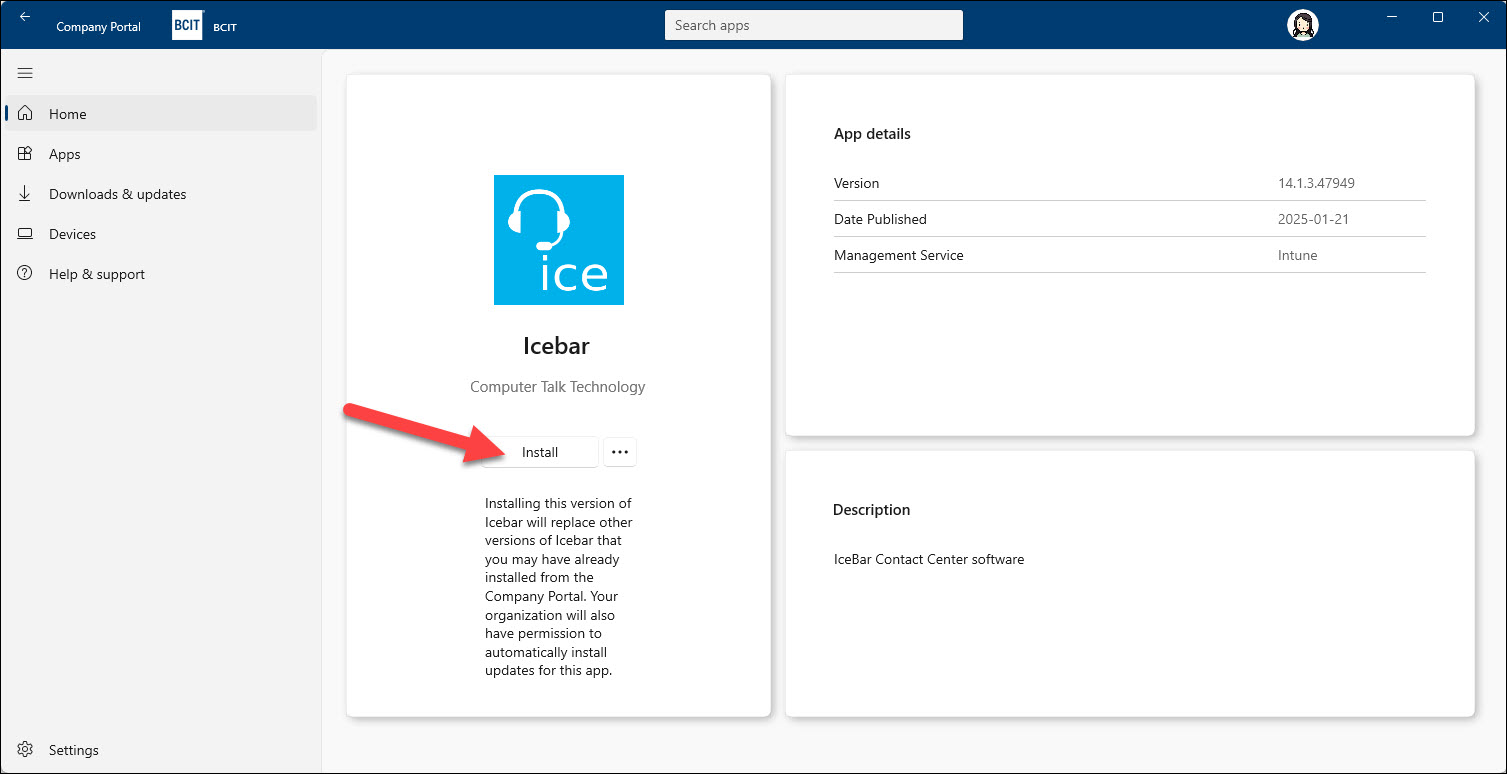
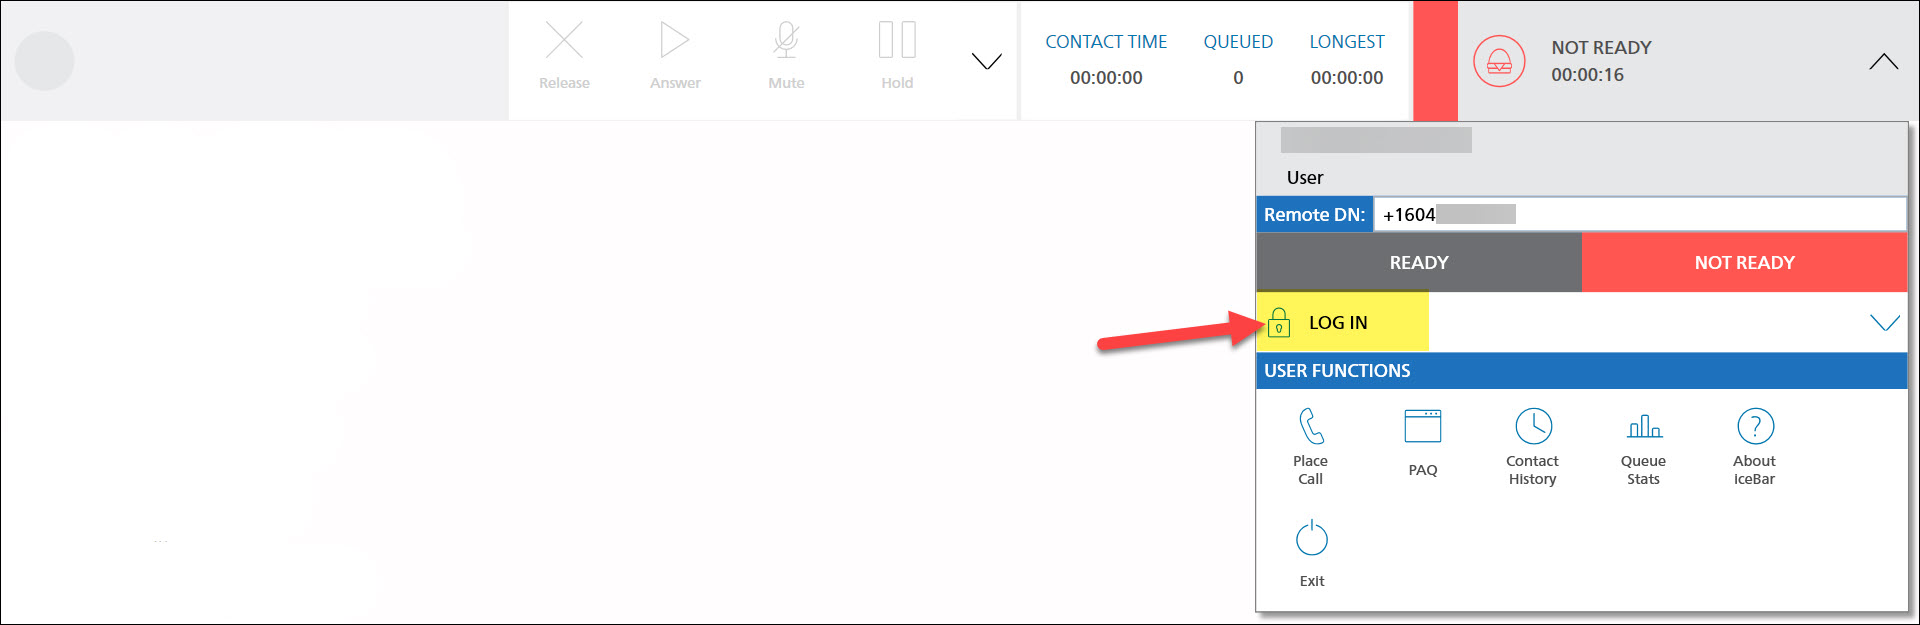
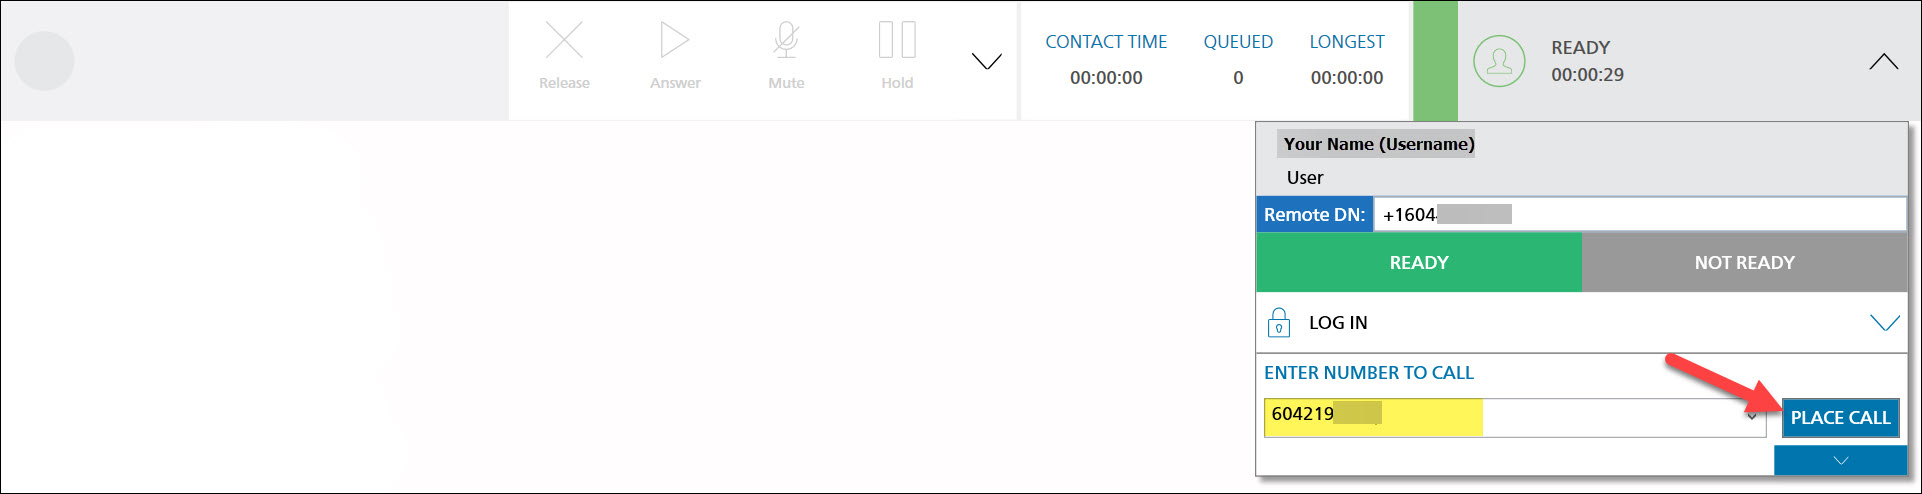
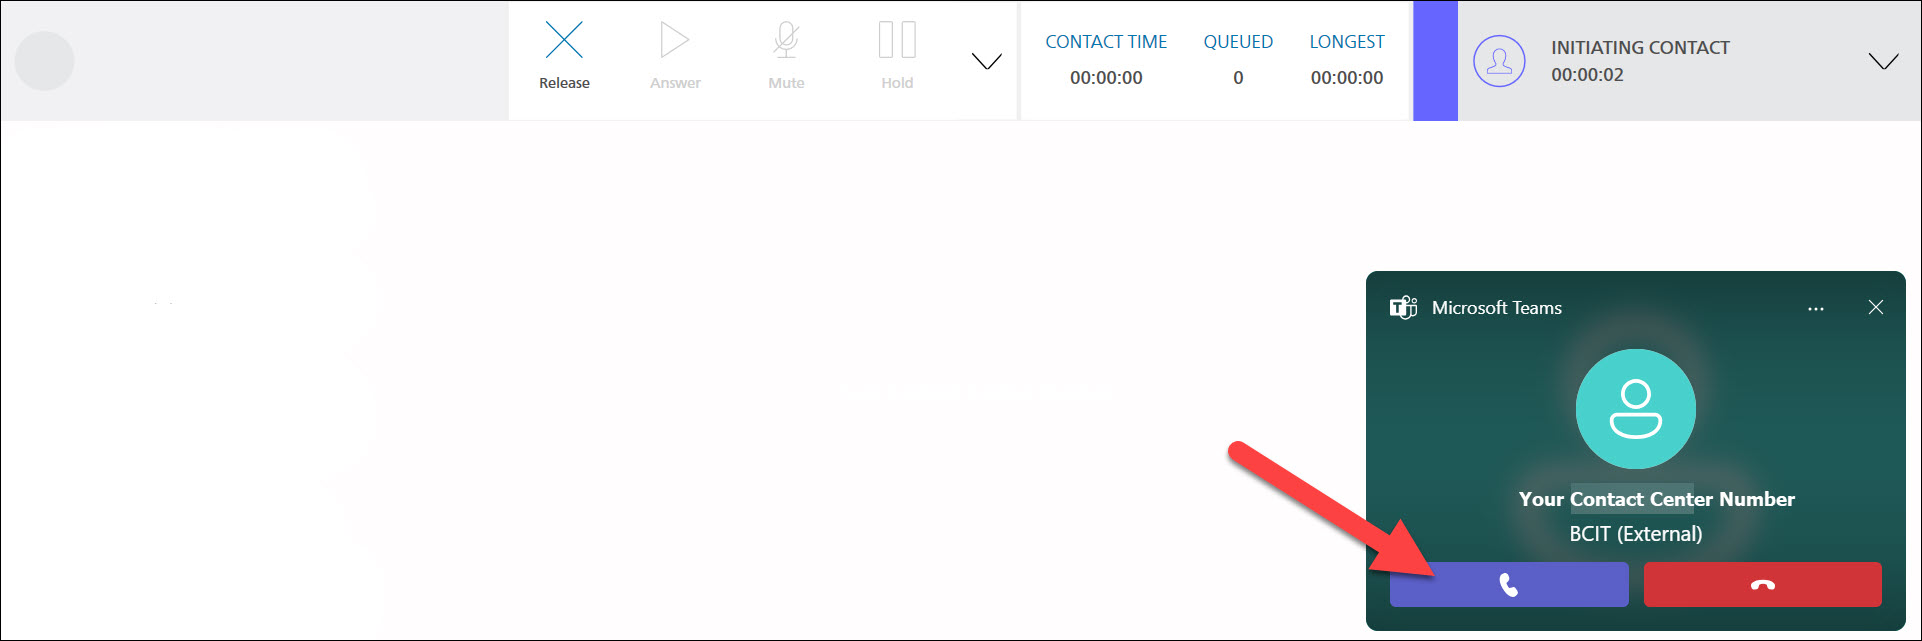
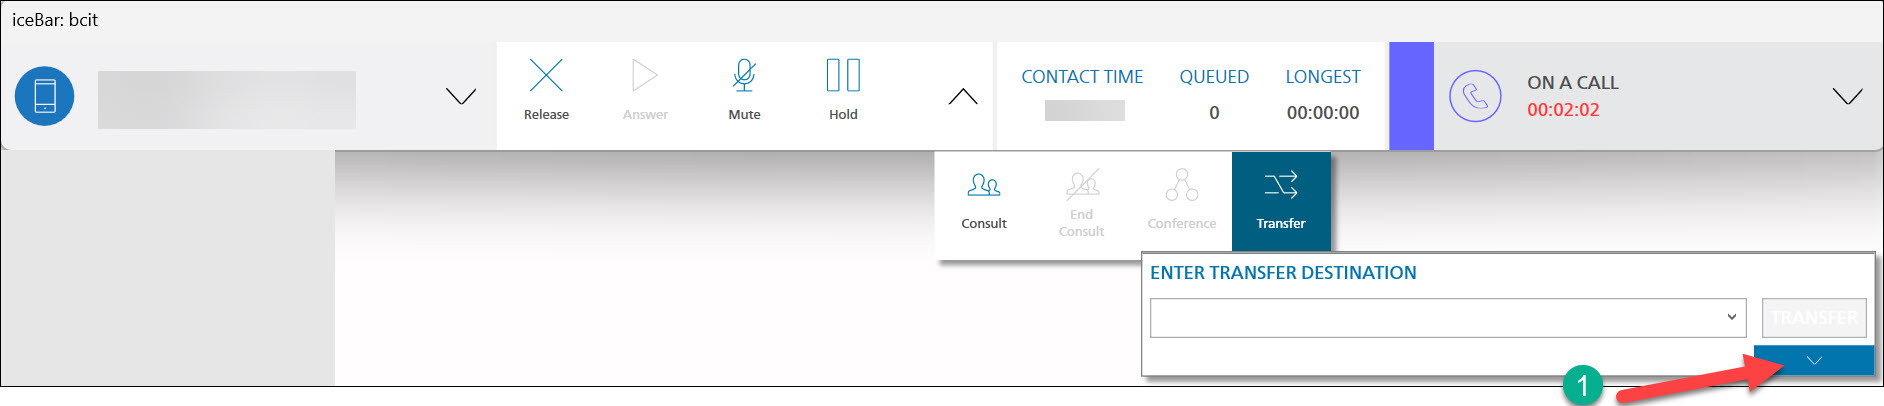
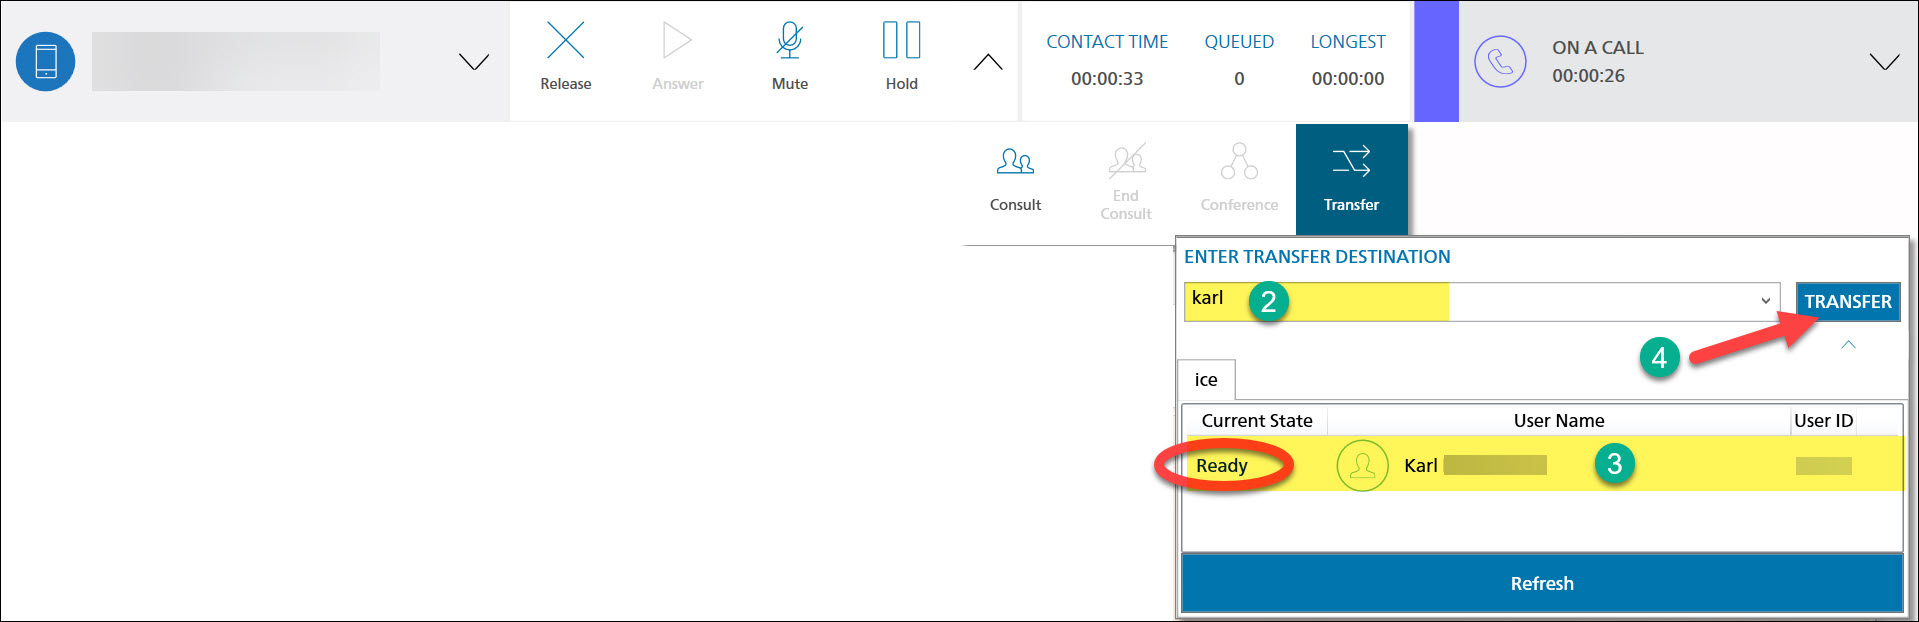
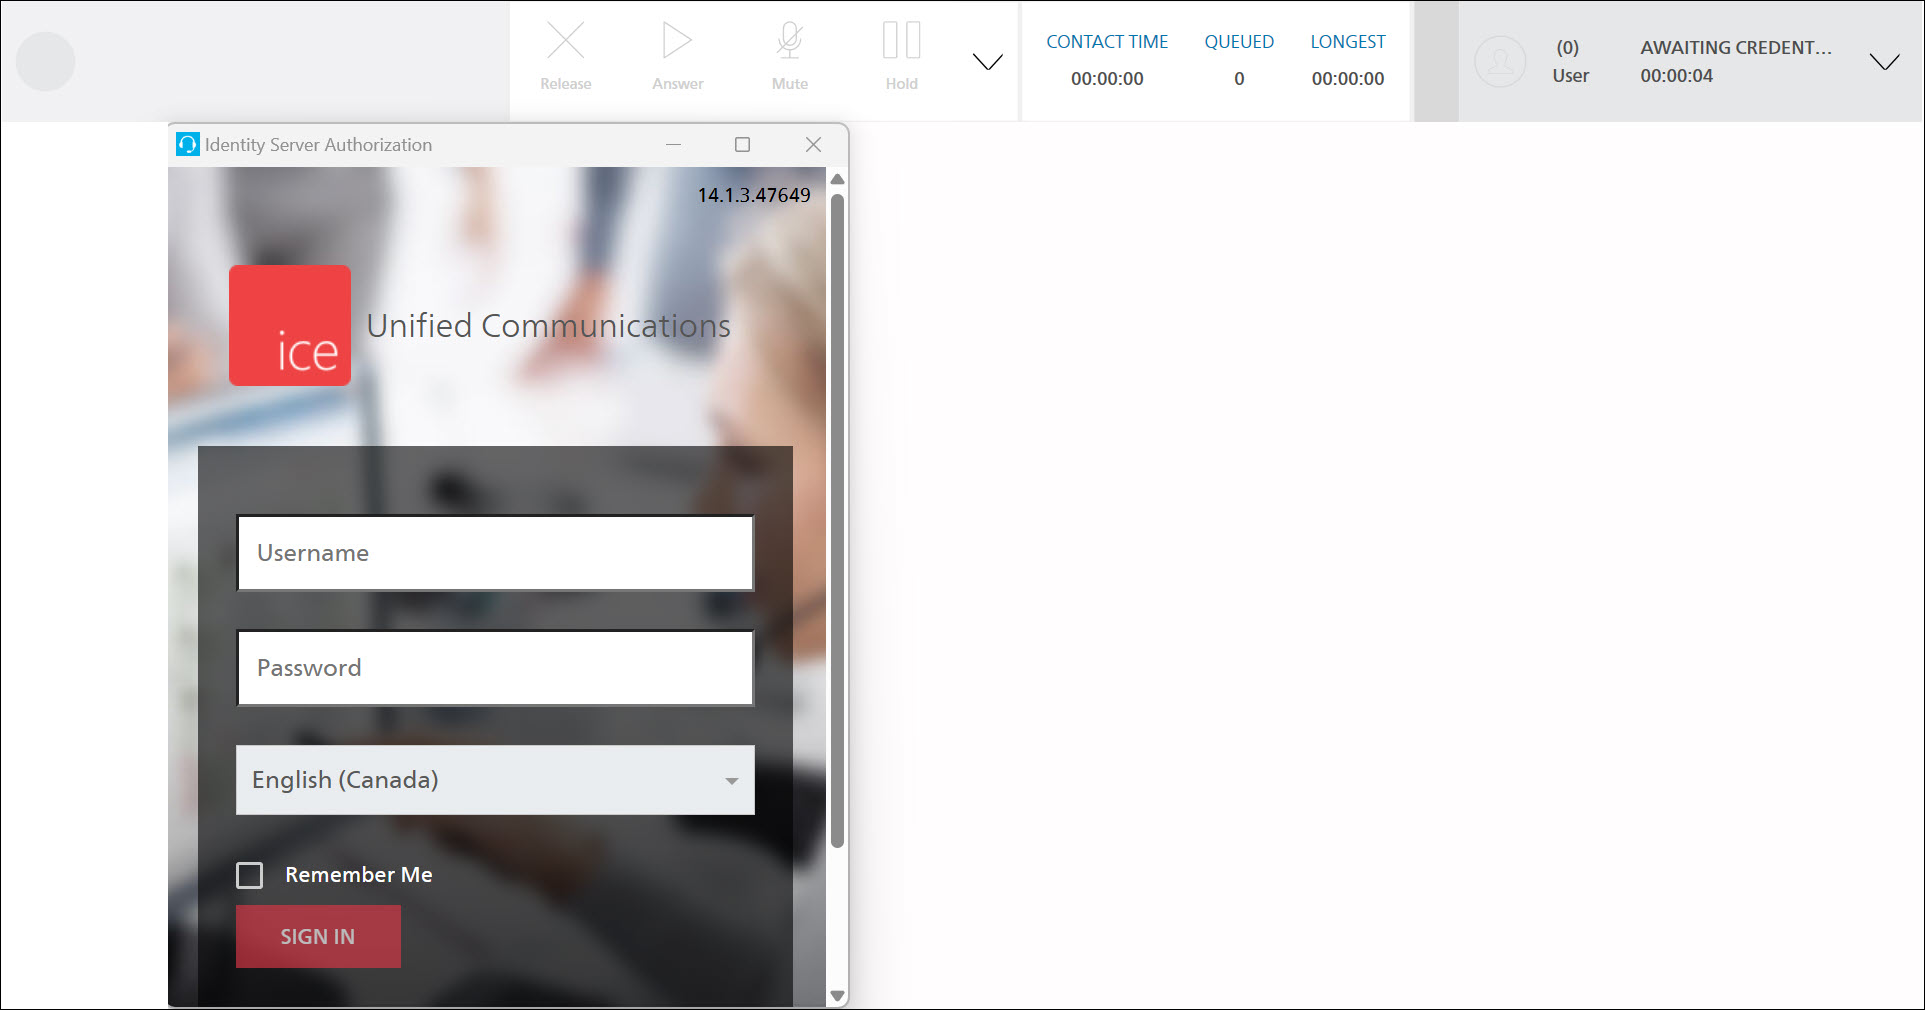
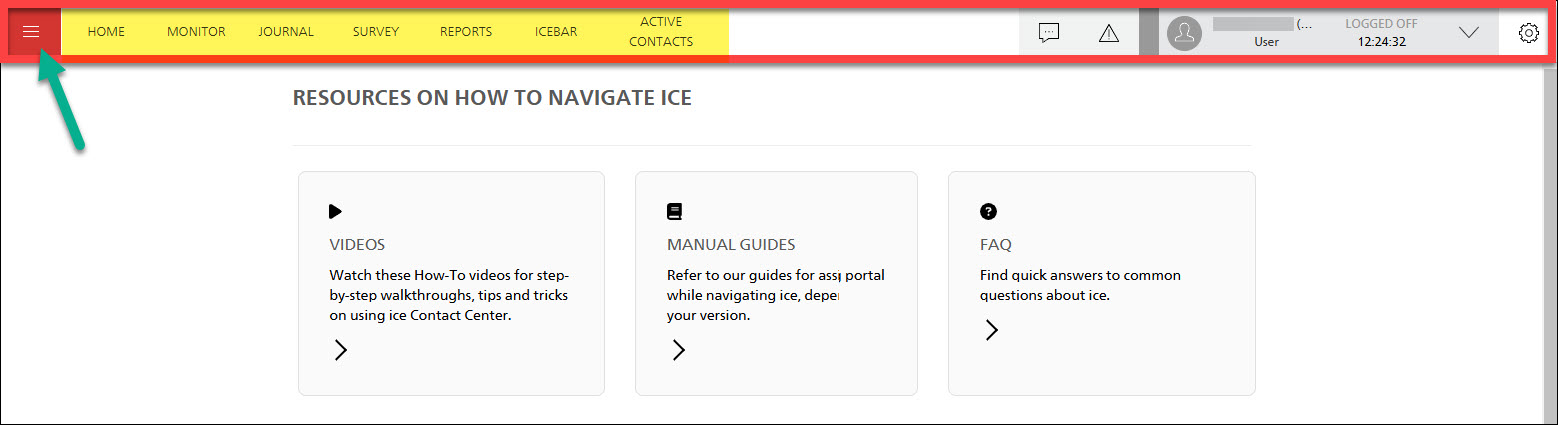
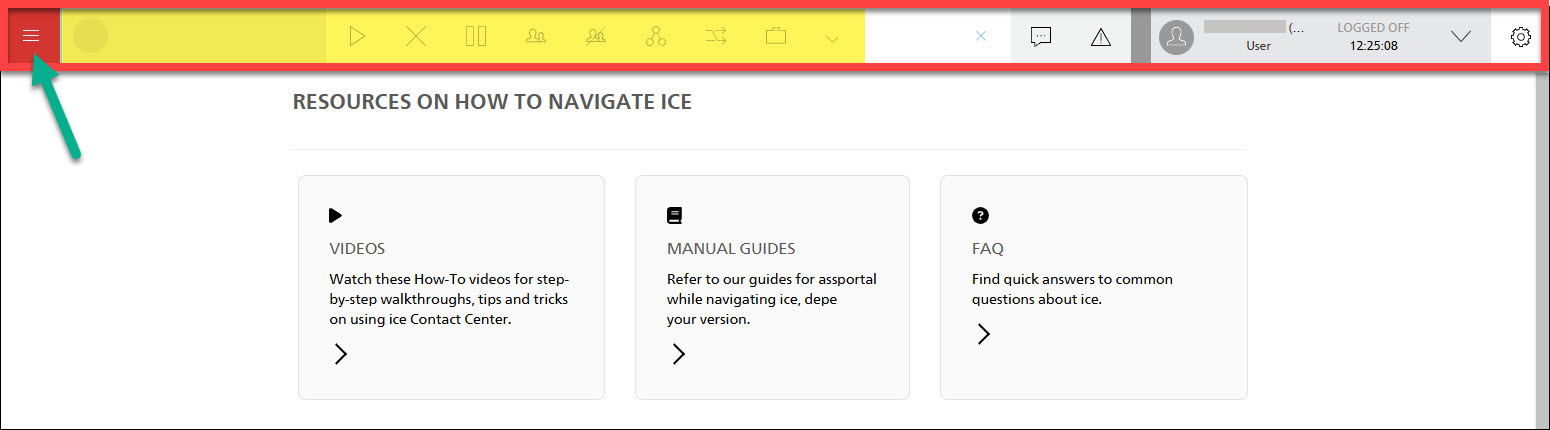
Getting started with iceBar and Teams
This section explains how to use iceBar through the desktop application, providing an overview of essential functions and basic navigation in both iceBar and Microsoft Teams to help you get started with the new Contact Center tools.
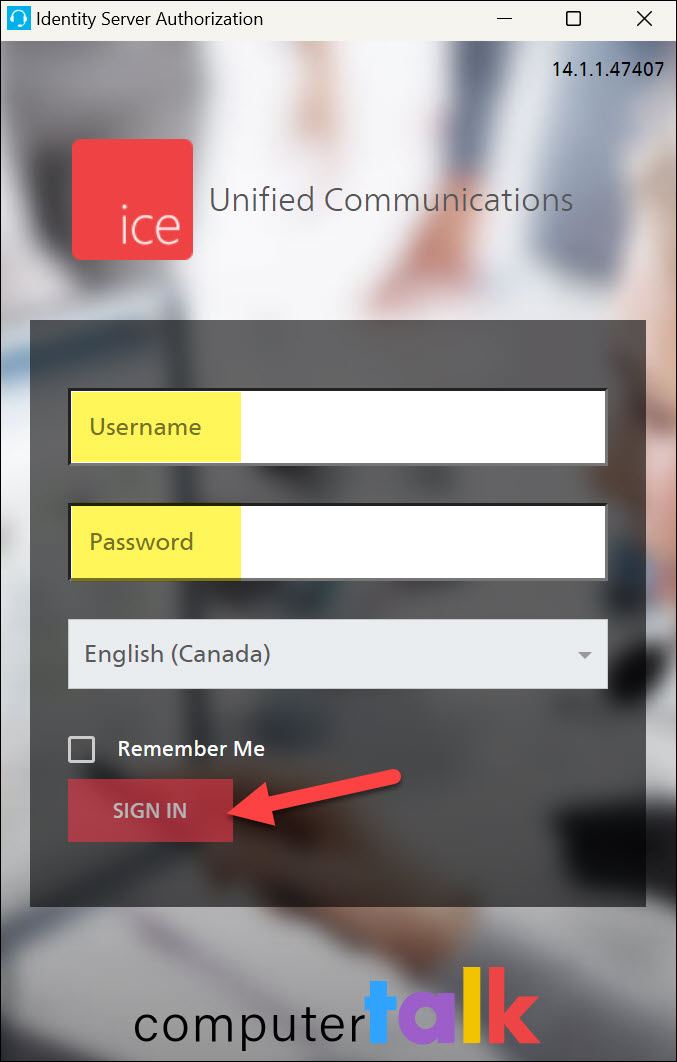


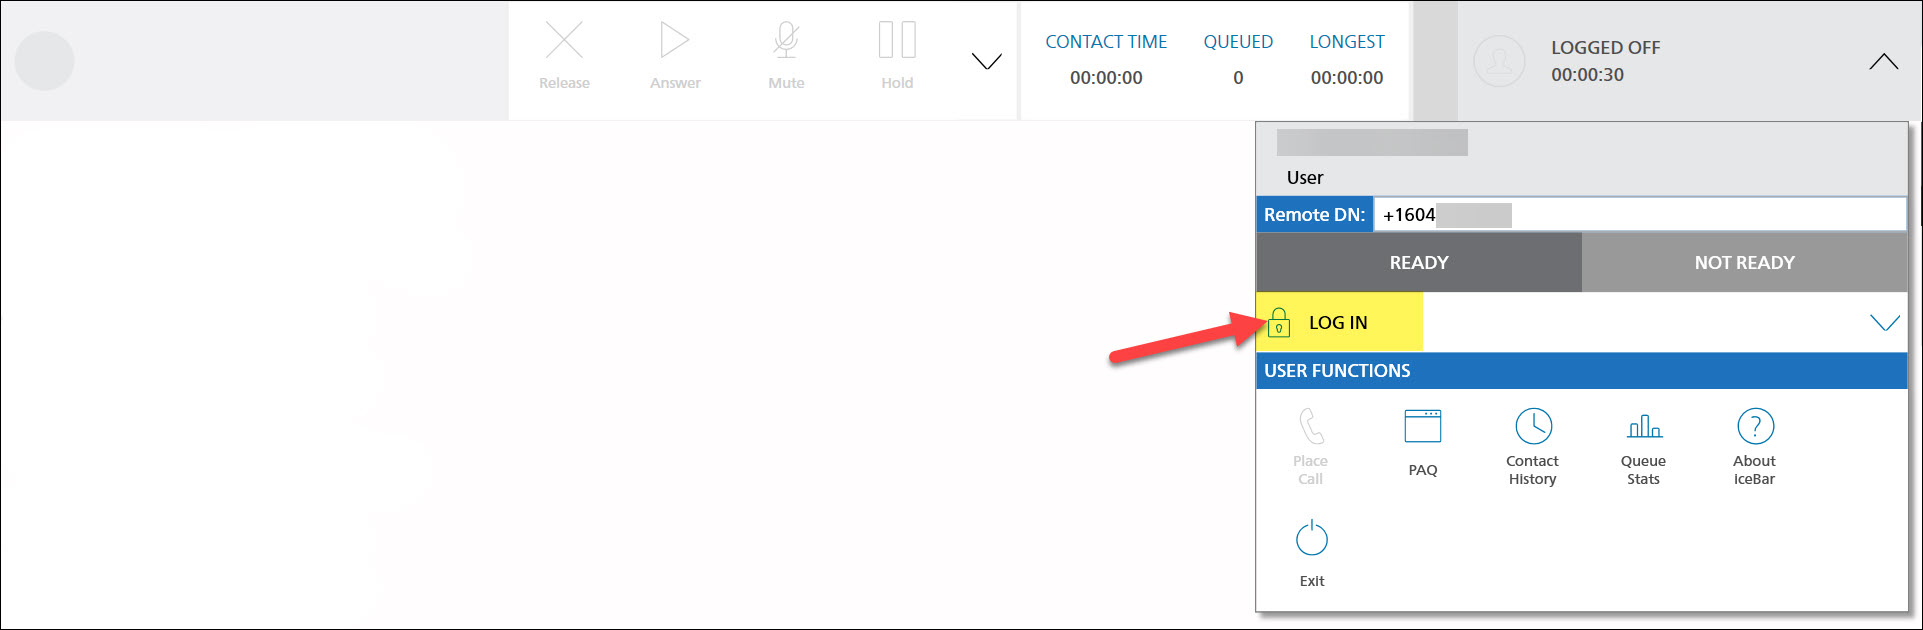
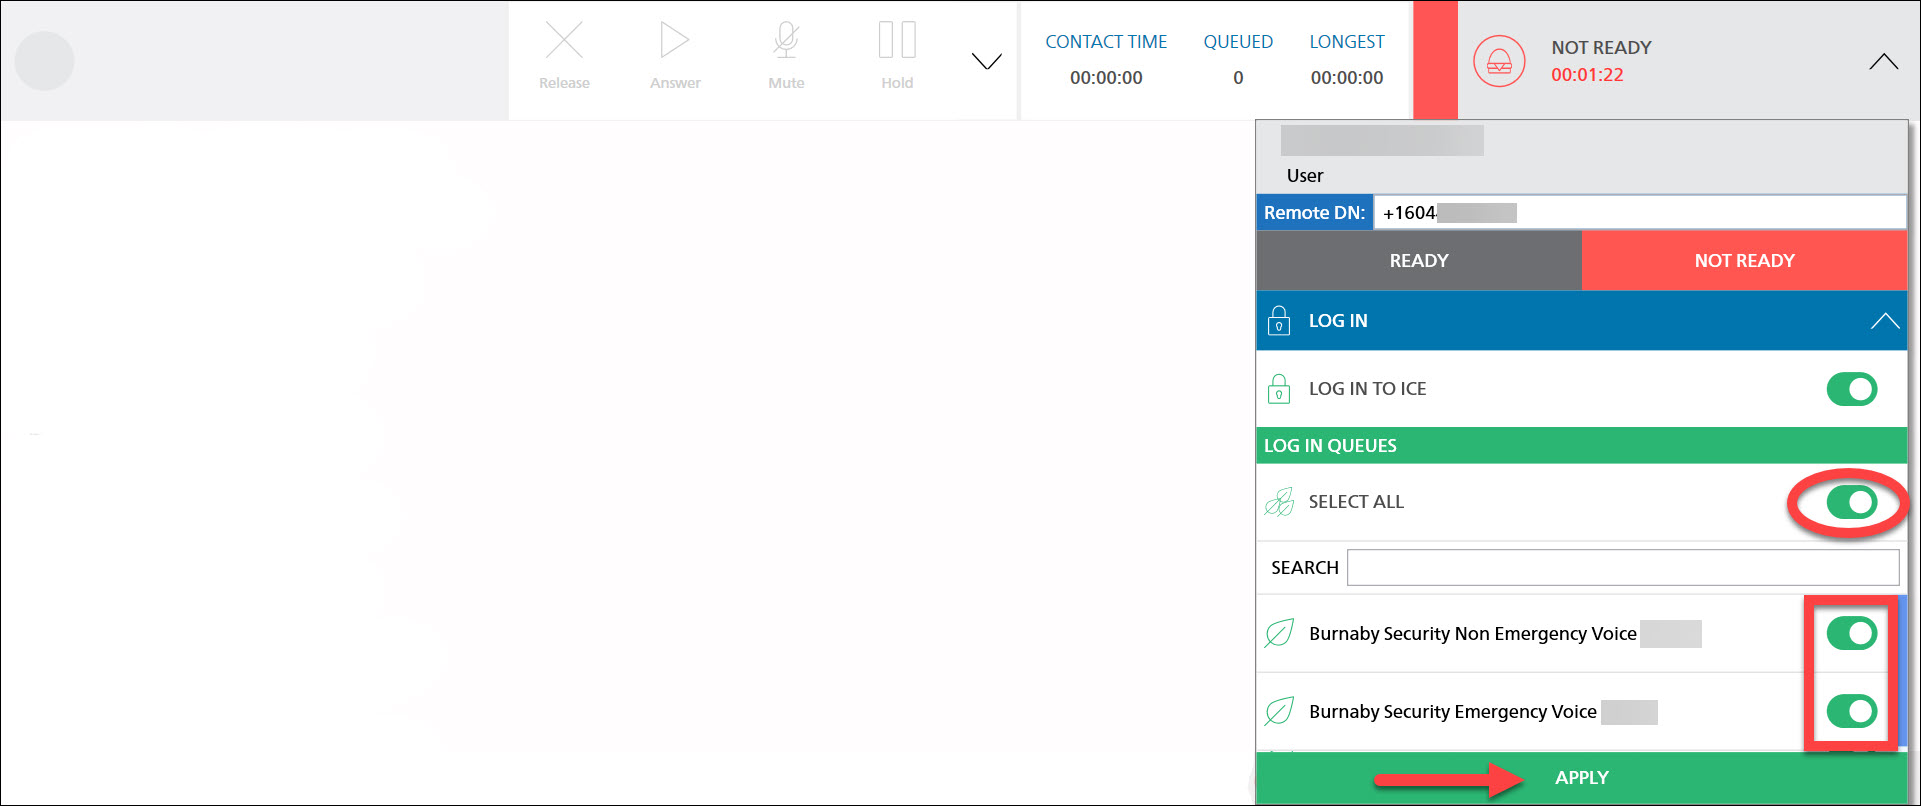
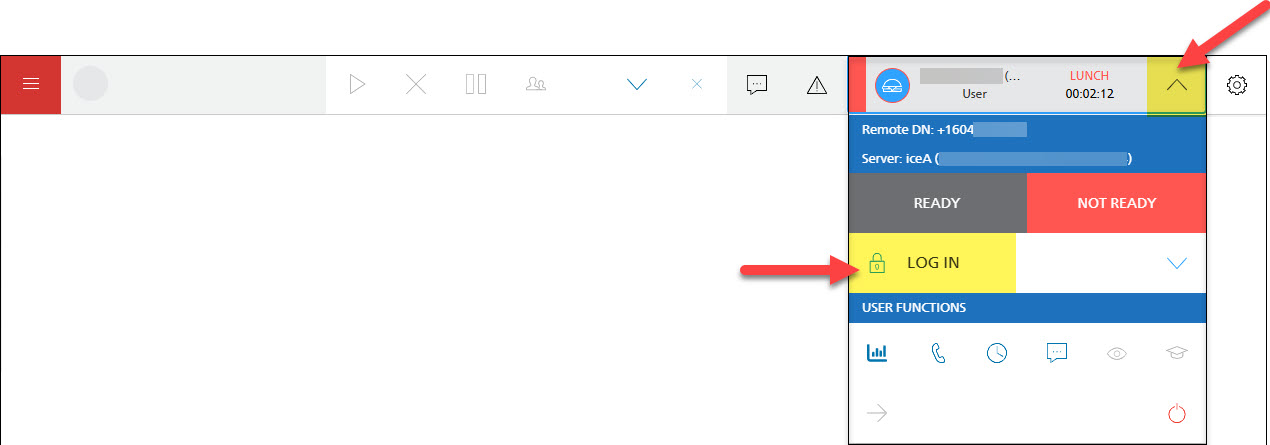
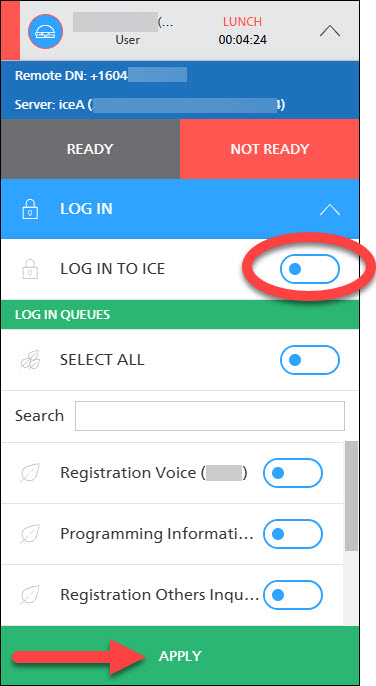
 Note: You won’t receive calls until you sign into your queue(s).

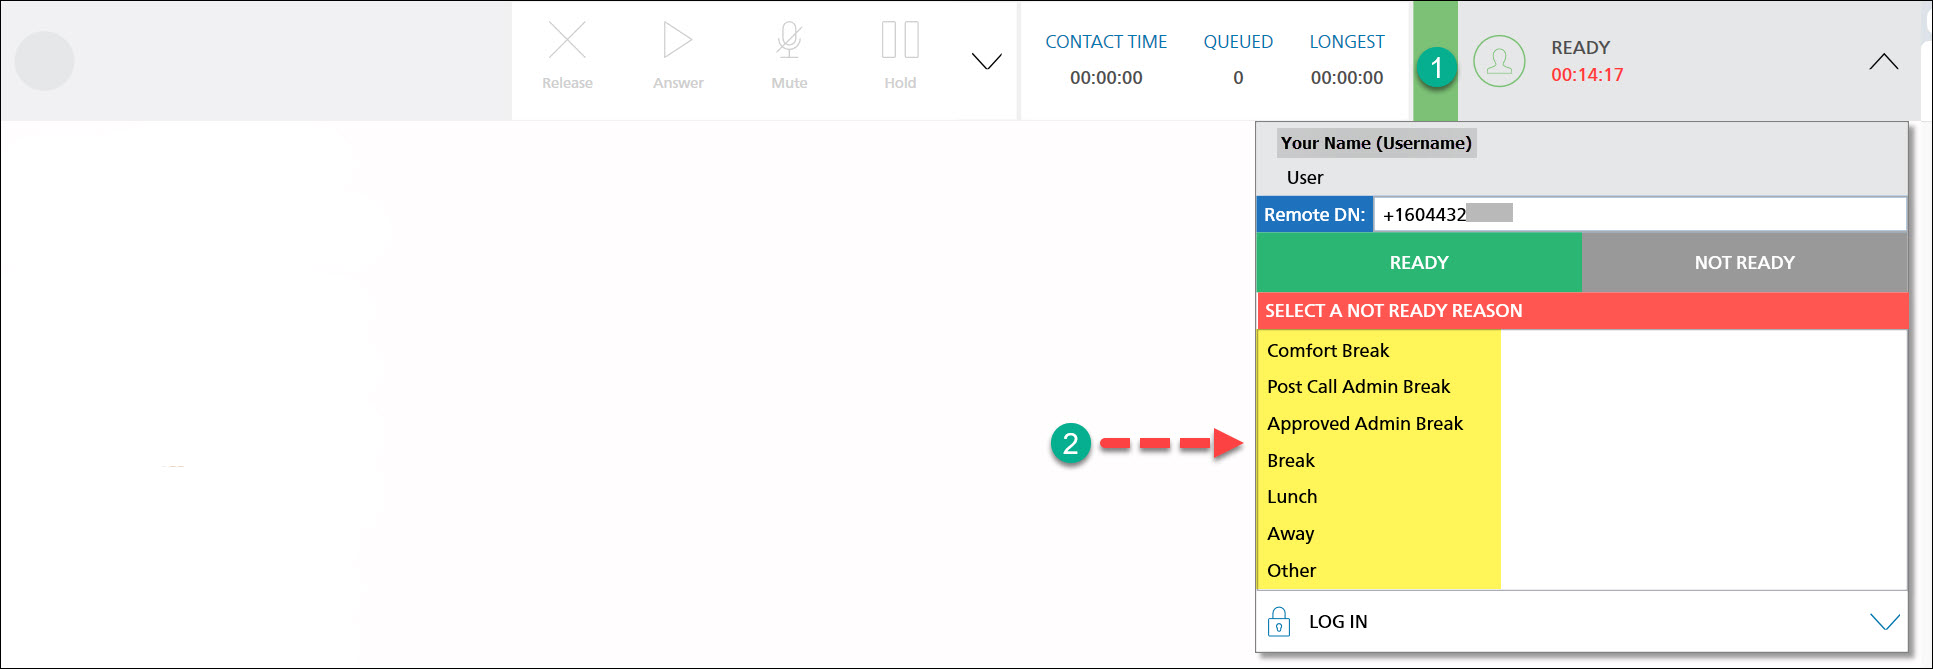


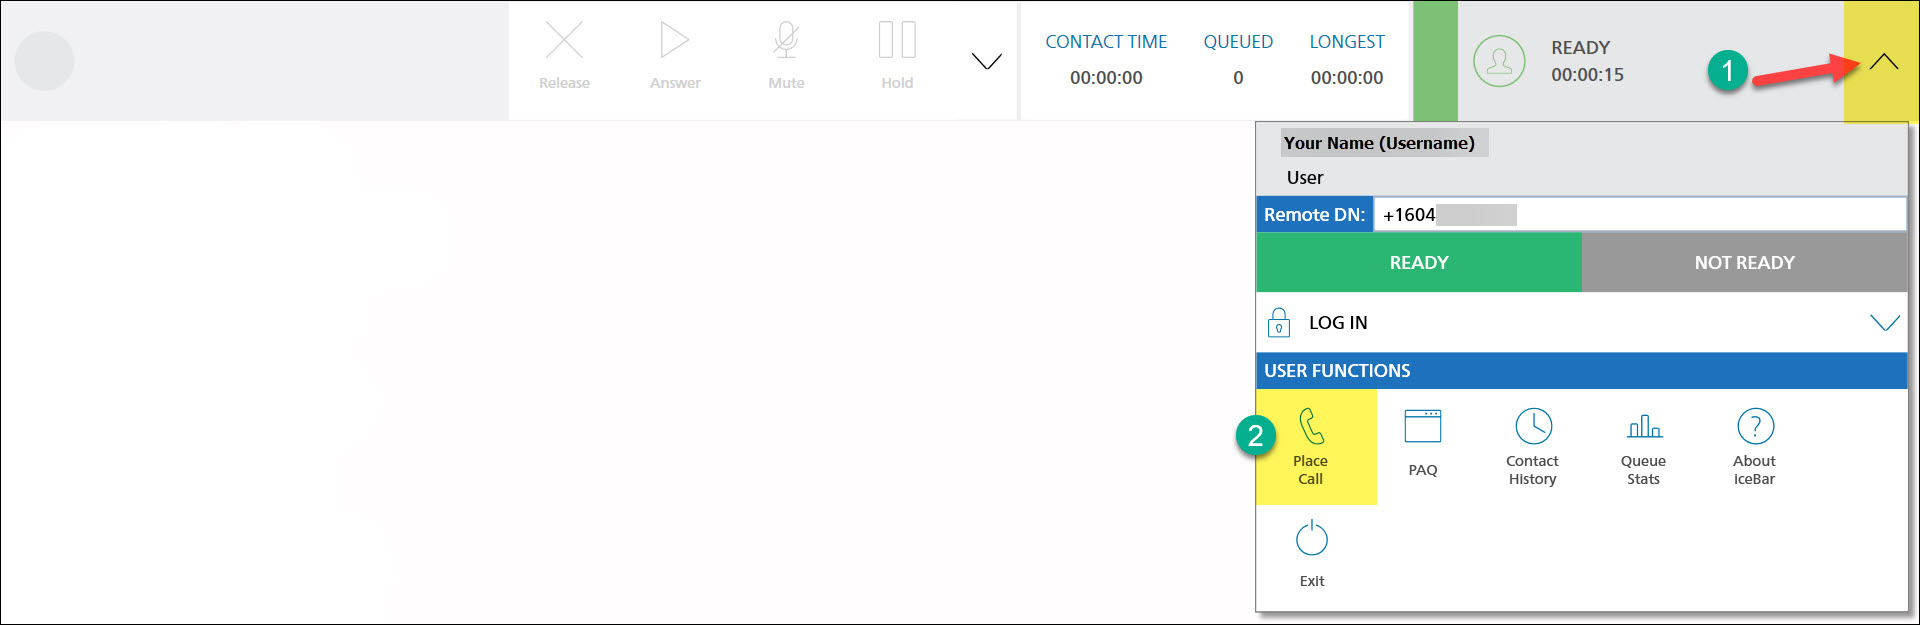


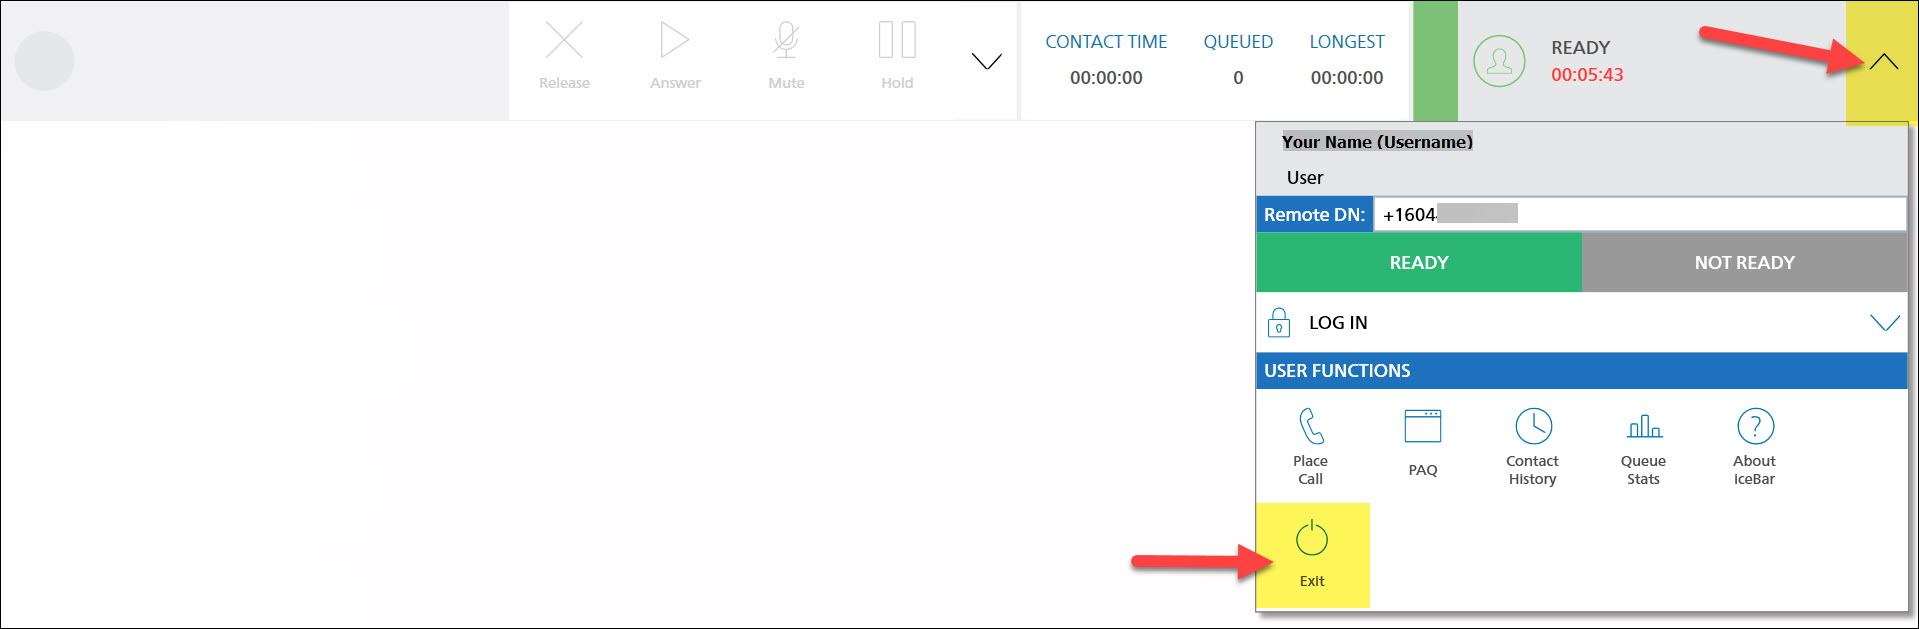
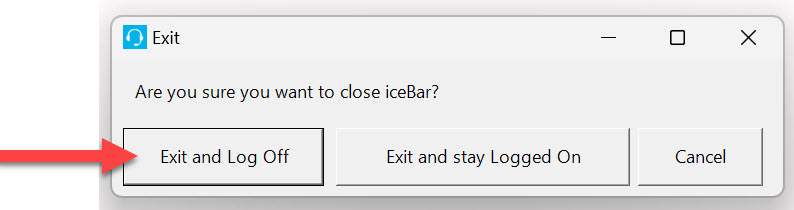
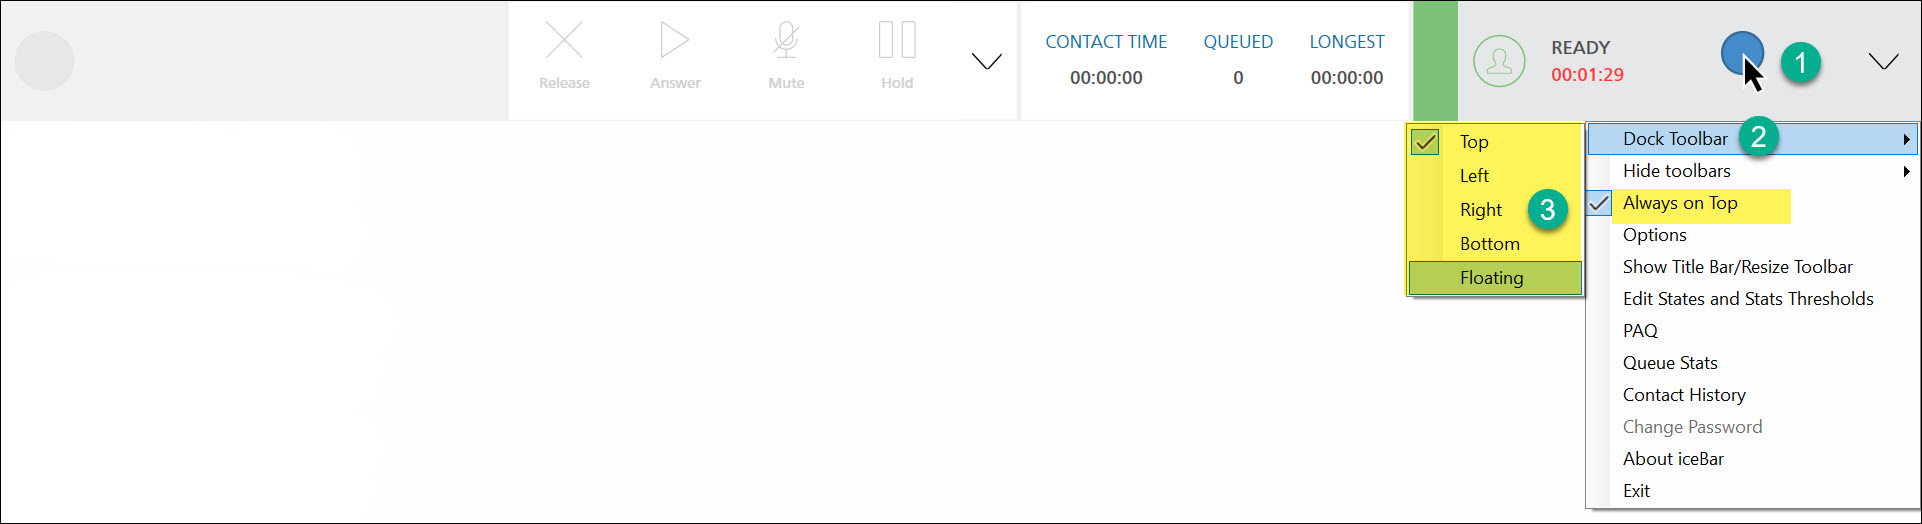
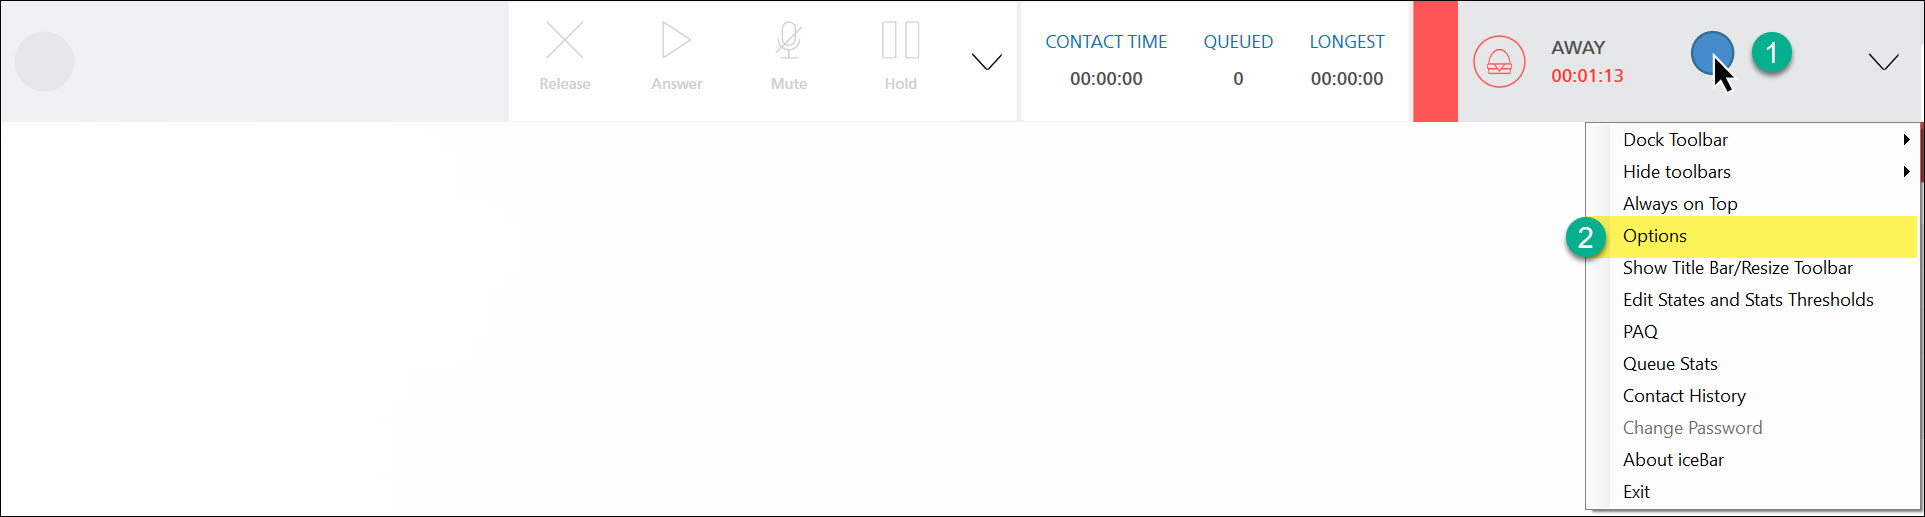
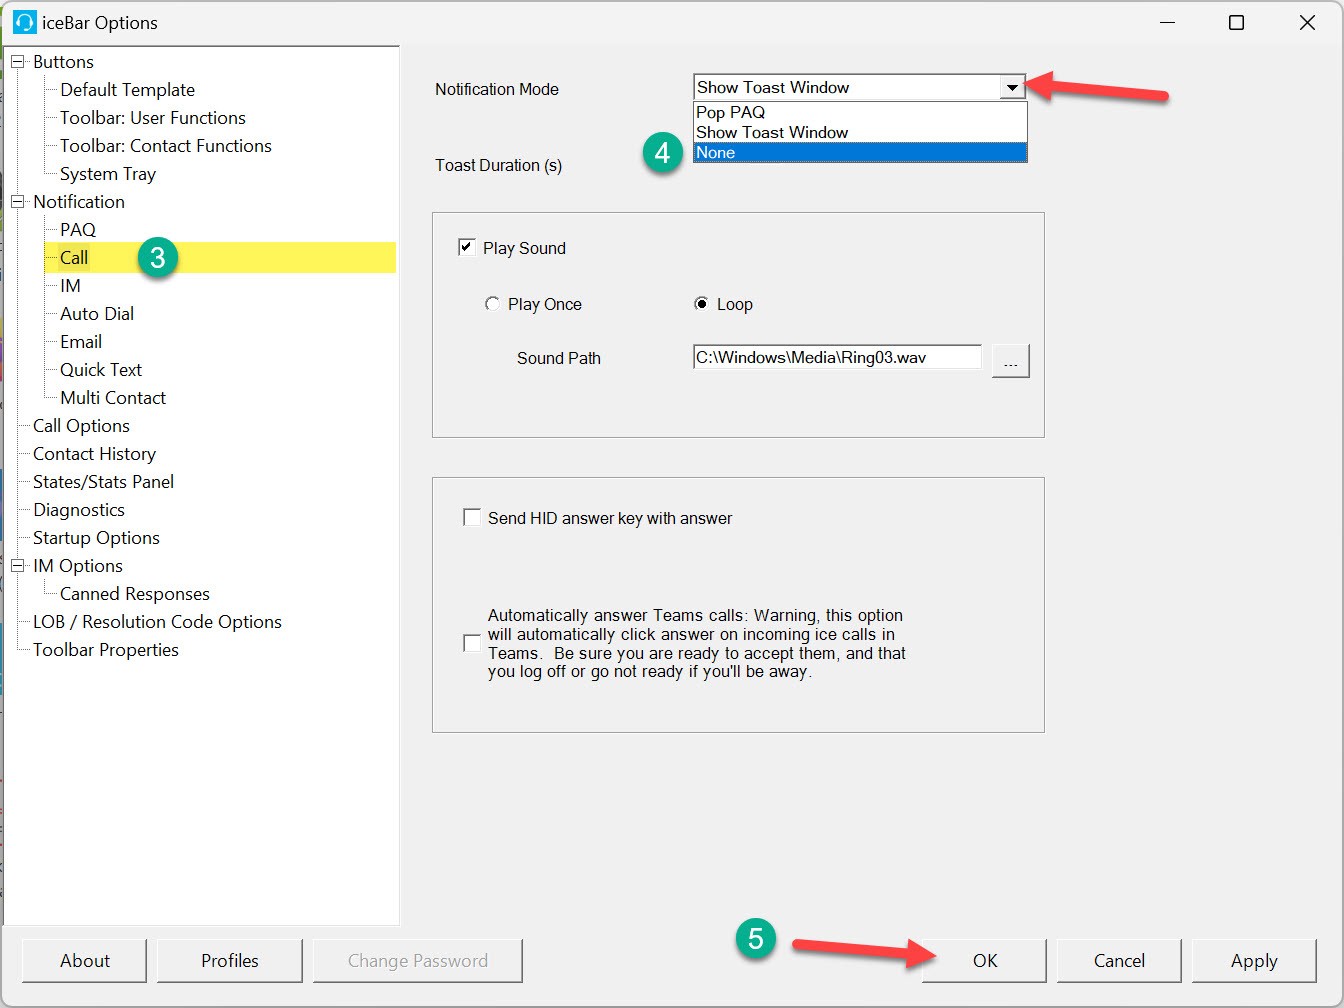
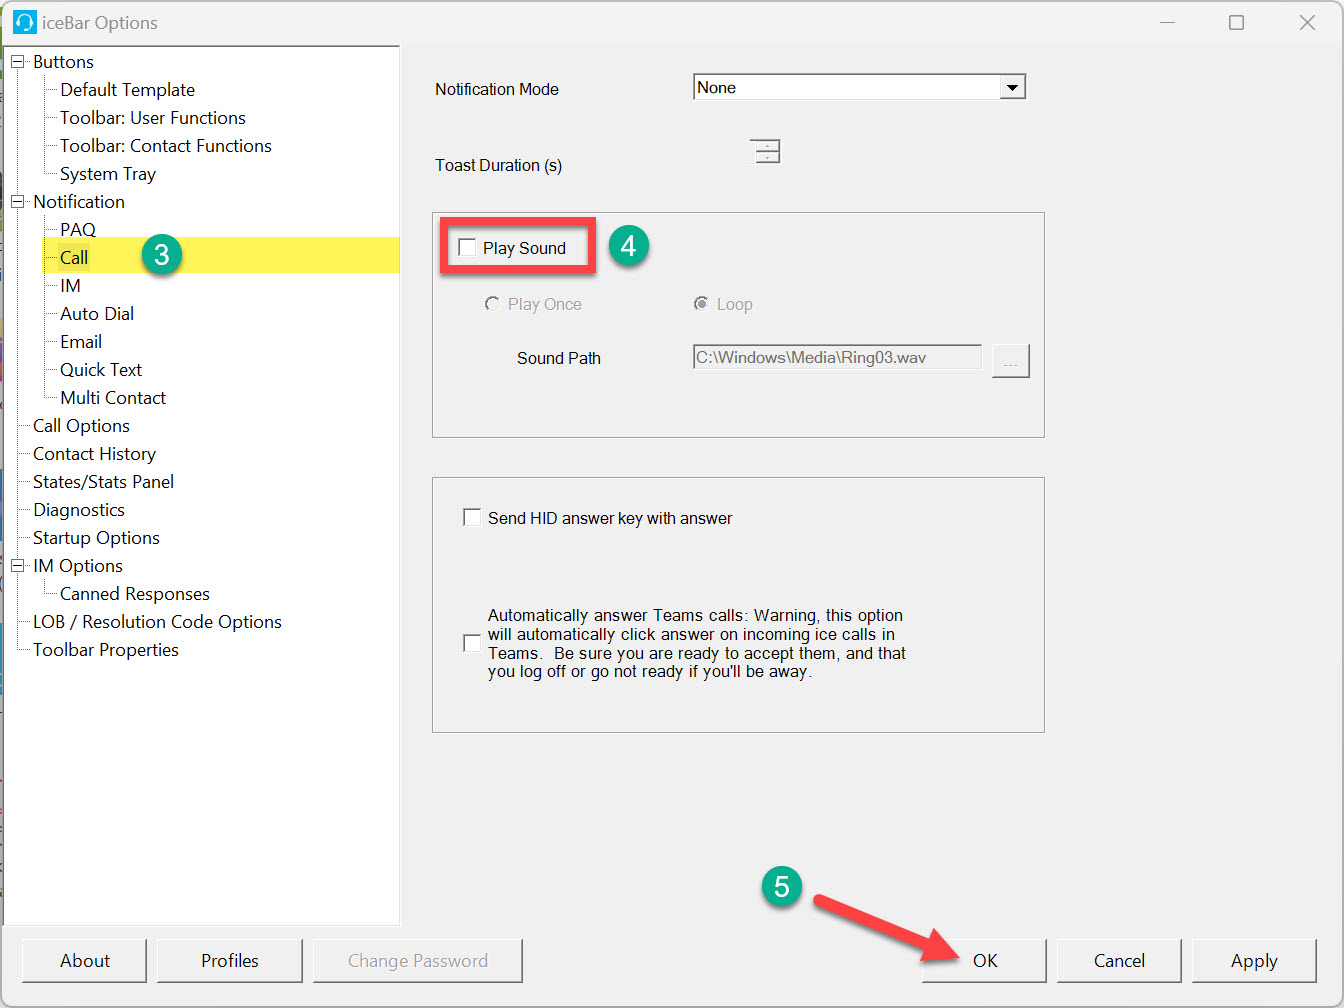
User Settings
You can adjust the following user settings to optimize your IceBar for maximum efficiency and comfort.
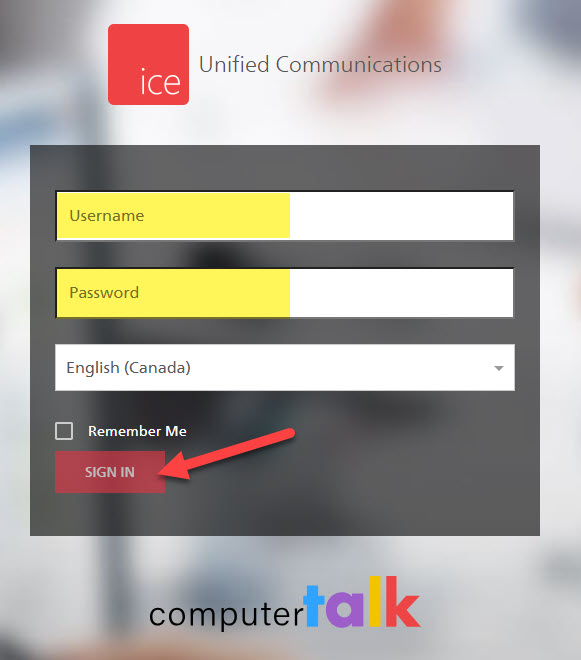
Accessing iceBar from a Browser
In addition to accessing iceBar through the desktop application, you can also sign in to iceBar using a web browser. This section focuses solely on the steps to log in from a browser, as the essential functions and navigation of iceBar have already been covered in the previous section.
Note: If you choose to access iceBar through a browser, please note that some buttons may be located in different areas compared to the desktop application. To identify what each button does, simply hover your mouse over it to view a tooltip with its function.
Where to get further assistance or report an issue
If you have any further concerns, contact the ITS Service Desk or submit a ticket via the ITS Service Catalogue. When submitting a ticket, please provide a detailed description to ensure proper assignment.