BCIT offers network printing services for Faculty & Staff across all BCIT campuses. This article explains how to add a BCIT network printer to your BCIT-issued device, how the printing system works, and how to troubleshoot common issues.
Printing from BCIT-issued and personal devices
This section will explain how to print to BCIT-issued Windows or Mac devices and personal devices.
- Click the Windows button on your taskbar
- In the Search Bar, search for ‘Company Portal’
- Once the Company Portal launches, click on Apps on the left-hand menu
- In the search bar, search for ‘Printers’
- Locate the Printer Installer tile and click on the Install button
- A window will open up with a list of printers. Scroll through the list to find the printer you need to add and double-click the printer.

-
- You can type part of your printer’s name in the “Search” box to quickly find your printer.
- Note that printers are named by building, room number and printer model:
BCIT Campus Format for Building Name Burnaby Campus SW01, NE01, etc. Building numbers are always two digits (i.e., SE06 instead of SE6) Annacis Island Campus AIC Aerospace Technology Campus ATC Marine Campus BMC Downtown Campus DTC Mathissi Place (CARI) MP - On newer Ricoh models, the printer name can be found in the “System Message area” at the top of the device’s home screen.

The printer you installed will now appear in the list of available printers.
-
- Applications running when a new printer is added may need to be restarted before the new printer is recognized.
- Additional printers may be added by repeating the above instructions.
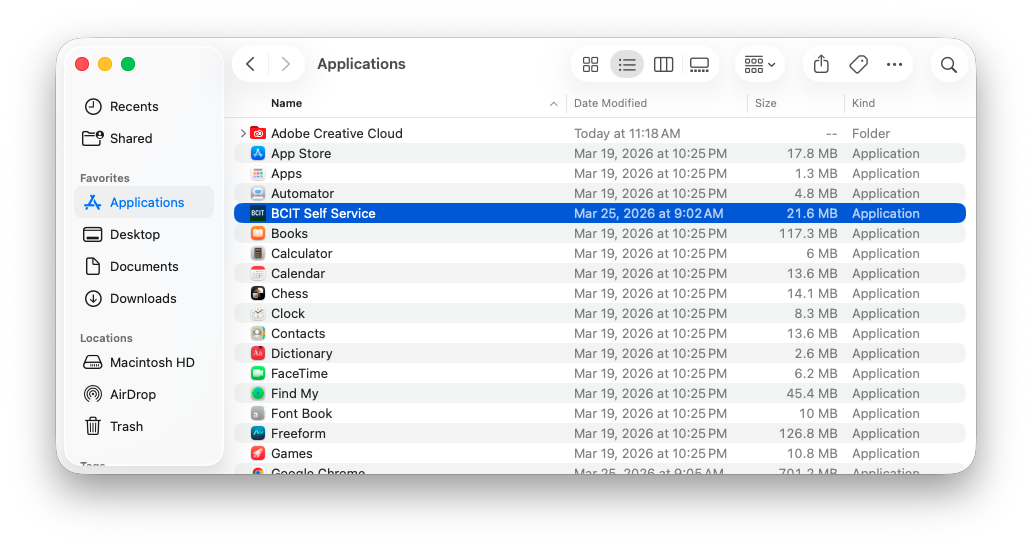
- Click on the Finder app

- In the left-hand menu, click Applications, then open BCIT Self Service.
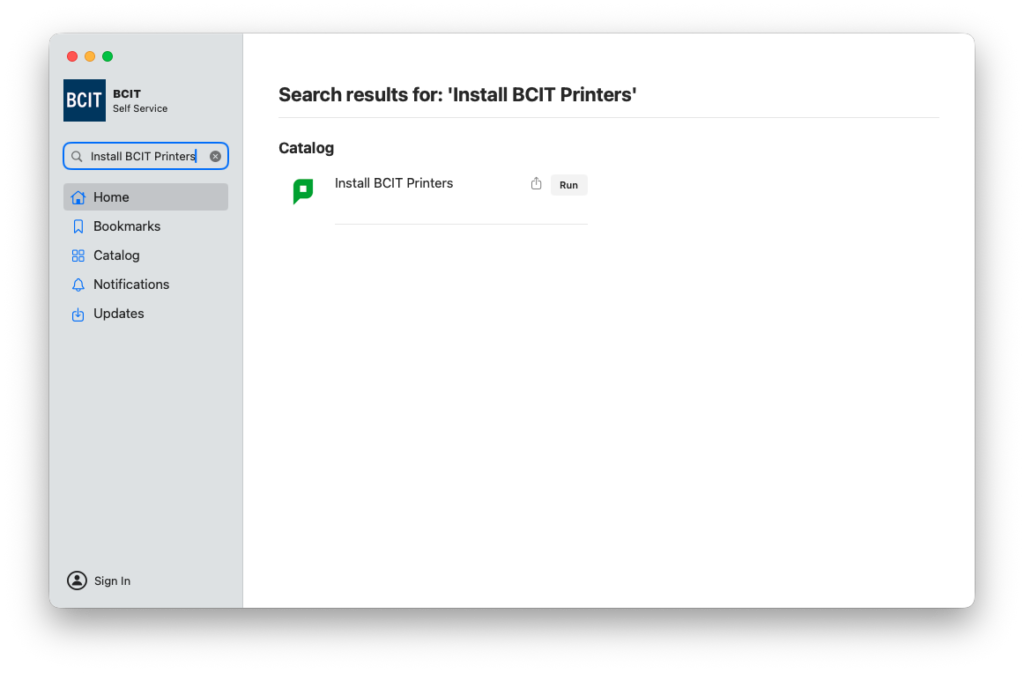
- In the search bar (left-hand side), type “Install BCIT Printers.”
- From the results, click Run.
- From the results, click Run.
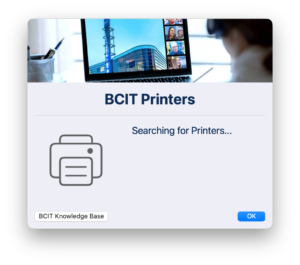
- A pop-up window will appear while it scans for available BCIT printers.
- Note: You must be on campus or connected via GlobalProtect VPN for this step to work.
- Note: You must be on campus or connected via GlobalProtect VPN for this step to work.
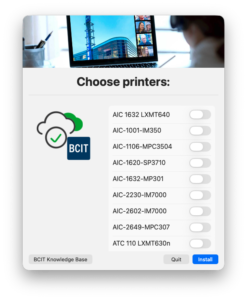
- Once the scan is complete, scroll through the list and select the printer(s) you want to install.
- The first time you print to a newly added printer, you will be prompted to enter your login credentials:
- Username: Your BCIT email prefix (the part before @bcit.ca)
- Password: Your usual BCIT password
- Example: If your email is asmith948@bcit.ca, enter asmith948 as the username
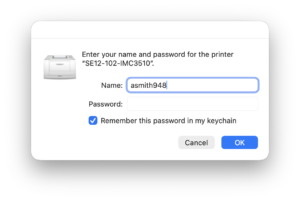
- Check the box “Remember this password in my keychain” to avoid being prompted each time you print.
Employees who wish to use a personal Windows device can connect a BCIT printer on their personal device with a few additional steps. To add a printer, ensure you are connected to the BCIT network on wireless or via network cable.
- Click the Windows Start button at the bottom left of your screen and type:
\\gutenberg.ad.bcit.ca
- Press enter.

- Enter your usual BCIT employee login credentials (must be in the form of AD\Username ) and ensure that you check the Remember my credentials button, then click Okay.
- Once you are authenticated, a file explorer window will open displaying a list of printers.
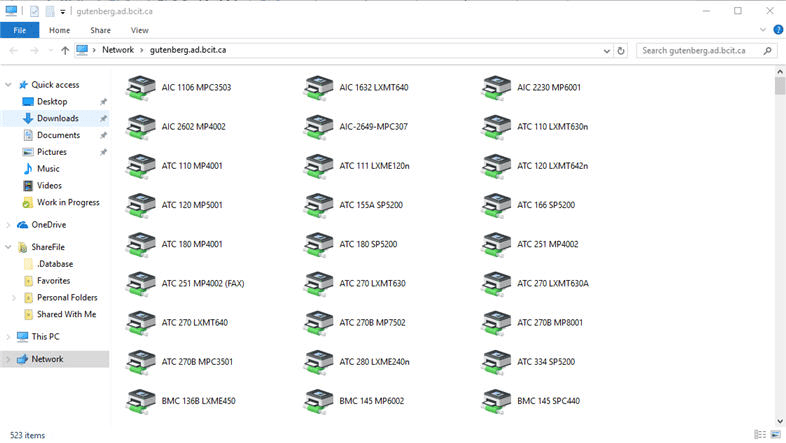
- Scroll through the list to find the printer you need to add and double-click the printer.
- You can type part of your printer’s name in the “Search” box to quickly find your printer.
- Note that printers are named by building, room number and printer model:
BCIT Campus Format for Building Name Burnaby Campus SW01, NE01, etc. Building numbers are always two digits (i.e., SE06 instead of SE6) Annacis Island Campus AIC Aerospace Technology Campus ATC Marine Campus BMC Downtown Campus DTC Mathissi Place (CARI) MP - On newer Ricoh models, the printer name can be found in the “System Message area” at the top of the device’s home screen.
- The printer you installed will now appear in the list of available printers.
- Applications running when a new printer is added may need to be restarted before the new printer is recognized.
- Additional printers may be added by repeating the above instructions.
Employees may wish to use their own Mac computer while working at BCIT, and as such may need to be able to print to BCIT printers. Because a non-BCIT computer will not be joined to BCIT’s Active Directory, a few additional steps are required to get printers installed and configured. This article explains the steps needed to connect to and configure BCIT printers from a Mac.
- From the Apple menu, select System Preferences.
- Open Print and Fax.
- Click the + button to add a new printer.
- Control‐click (or right‐click) the toolbar and select Customize Toolbar.
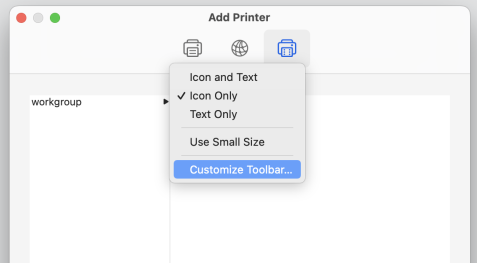
- Drag the Advanced icon onto the toolbar, click Done.
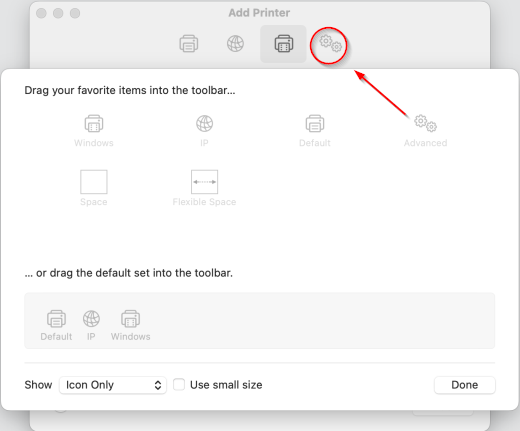
- On the toolbar, click the newly added Advanced button.
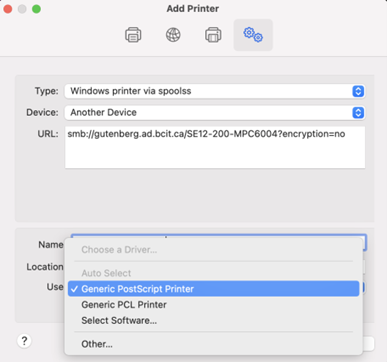
- From the Type drop‐down menu, select Windows printer via spoolss.
- In the URL: field, enter the address of the printer you want to install.
- The printer address will be the server name ‘smb://gutenberg.ad.bcit.ca/’ plus the print queue name. To add the printer SE12-200-MPC6004 use: smb://gutenberg.ad.bcit.ca/SE12-200-MPC6004?encryption=no
- If your printer name includes spaces, they must be replaced by the delimiter ‘%20’. To add SE12 200 LXMT642, use: smb://gutenberg.ad.bcit.ca/SE12%20200%20LXMT642?encryption=no
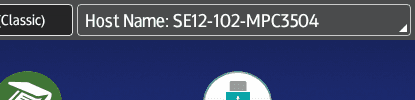
- Note: The print queue name can be found by looking on a Windows PC with the queue already mapped, or if it is a newer Ricoh device the printer name can be found in the System Message area at the top of the home screen:
- Note: Make sure to include the “?encryption=no” string after the printer name to ensure proper setup.
- From the Use drop down, select either Generic PostScript Printer or if you have downloaded the specific driver from the manufacturer’s website, use that.
- Click Add.
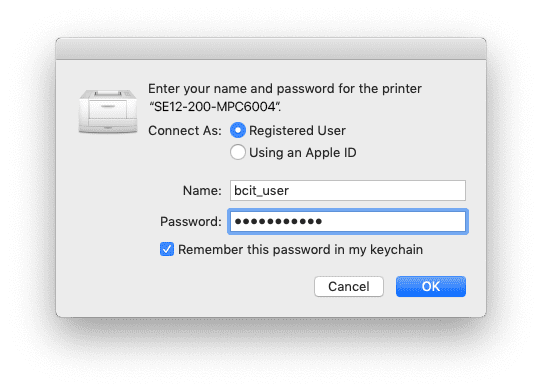
- The first time you send a job to the newly added printer, you will be prompted for a username and password.
- Important: Enter only the prefix for your BCIT email address (the part before @bcit.ca) and your usual BCIT password. Example: If your BCIT email address were asmith948@bcit.ca, you would enter asmith948 as the username.
- Check the box labeled “Remember this password in my keychain” in order to prevent this message from appearing every time.
Using PaperCut for printing
PaperCut is a print release software that is enabled on certain printers at the various BCIT campuses. Once a print job is sent to a PaperCut enabled printer, you will need to first associate your BCIT ID card to the PaperCut software if it is your first time printing to a PaperCut printer and then release the job at the printer before the print job is printed.
This section will explain how to associate your BCIT ID card to the PaperCut software, release a print job and utilize other MFD (multi-function device) features on PaperCut enabled printers.
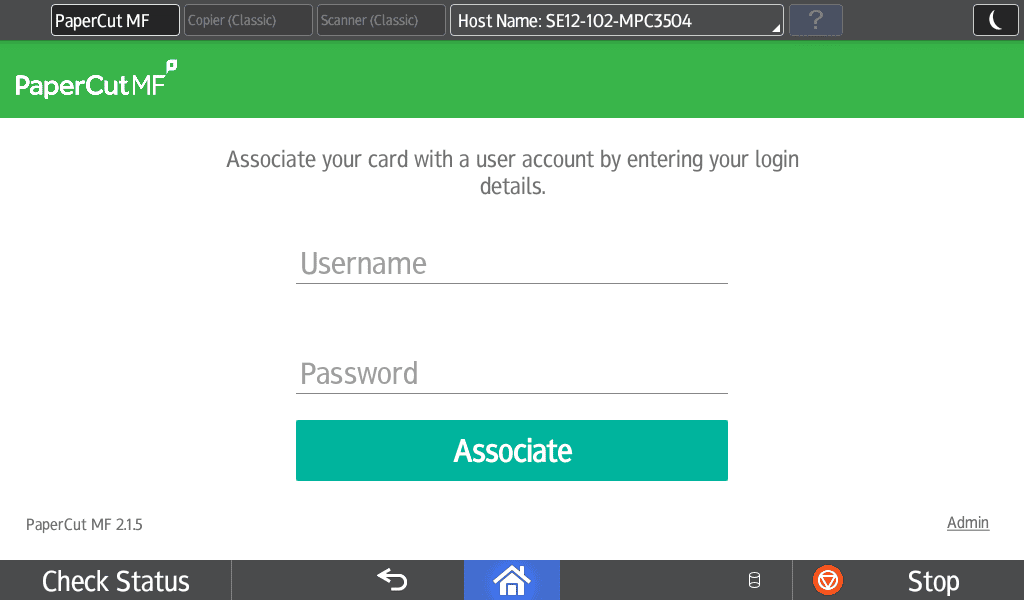
The first time you use a PaperCut enabled Ricoh MFD you will want to associate your BCIT ID card with your account.
- Touch the screen on the MFD if the screen is black.
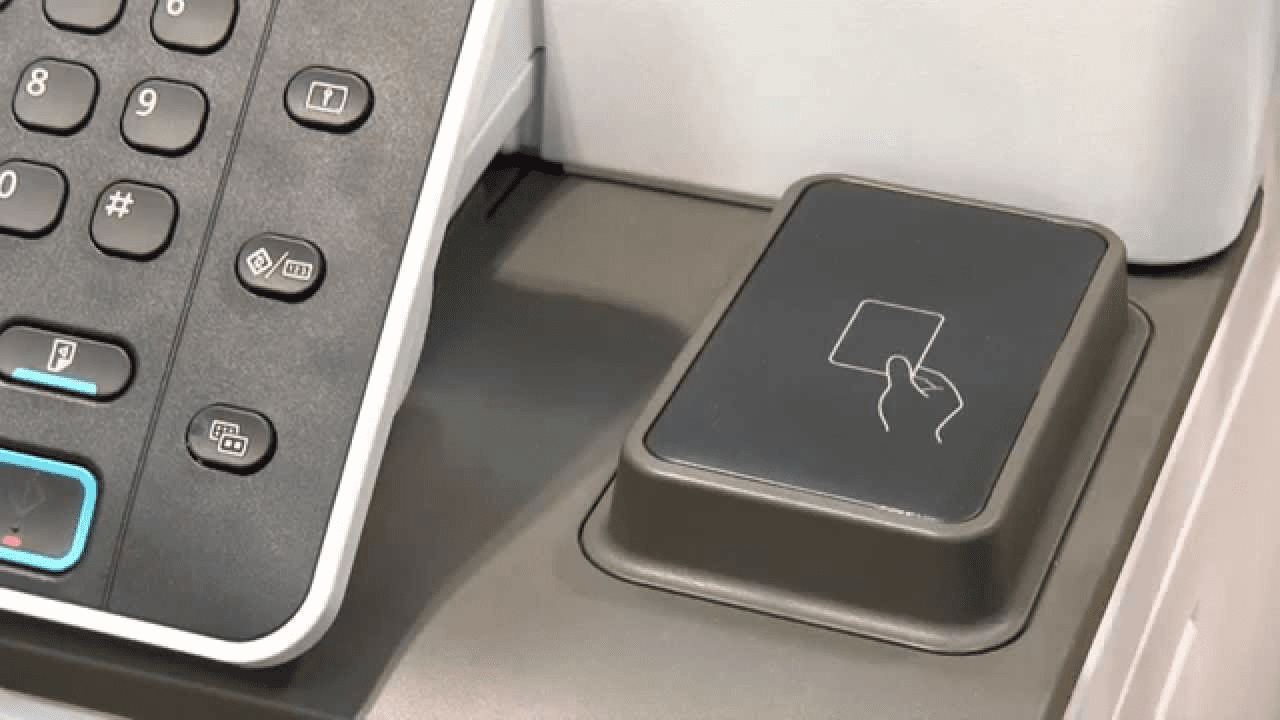
- Tap your BCIT ID card to the card reader on the right side of the MFD.
- On the “Associate your card” screen, enter your usual BCIT login credentials (BCIT email address and password). Press Associate when done.
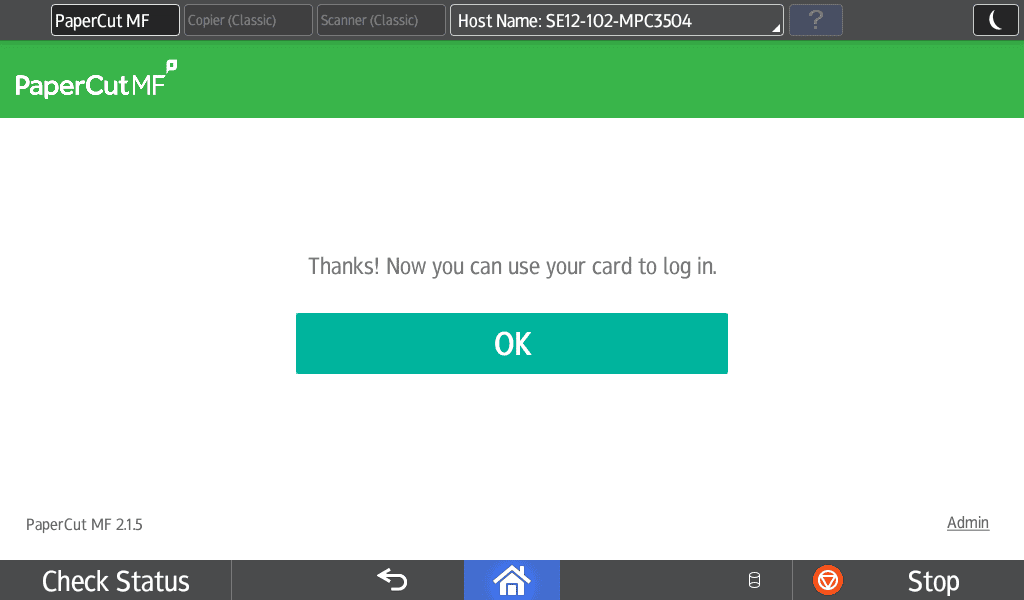
- Your card is now associated with your BCIT account.
Once your BCIT ID card has been associated with your account, you can use it to login every time by simply tapping it to the card reader to the right side of the operator panel.
- Touch the screen on the MFD if the screen is black.
- Tap your BCIT ID card to the card reader on the right side of the MFD.
- Note: if you do not have your BCIT ID card, you can login by typing your BCIT email address and password using the on-screen keyboard.
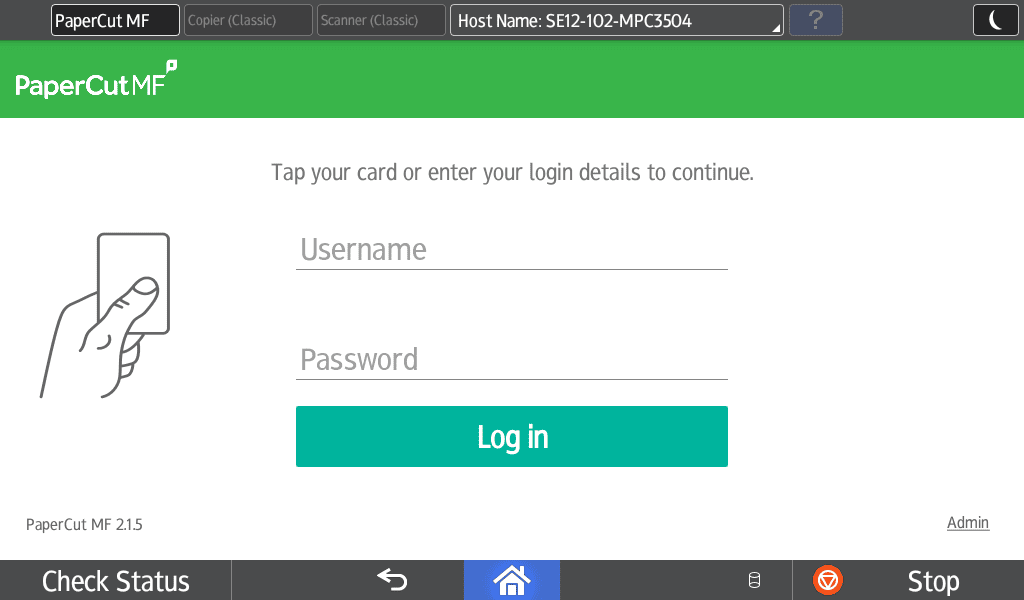
- Note: if you do not have your BCIT ID card, you can login by typing your BCIT email address and password using the on-screen keyboard.
- Once logged in, select Print Release to see your print jobs or Device Functions to use scanning, copying, and faxing (if applicable).
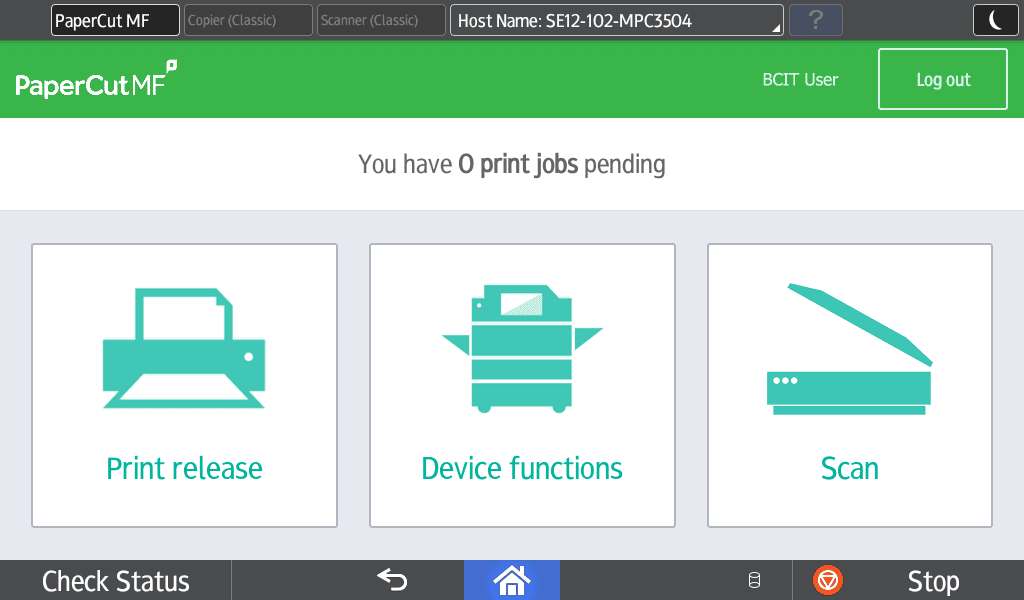
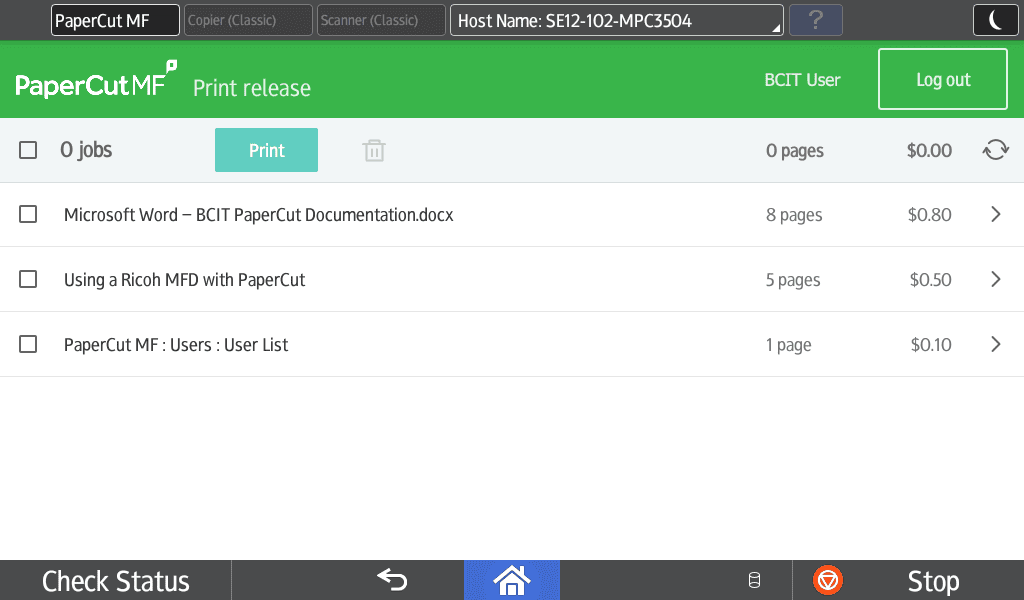
- At the Print Release screen, you can print or delete your held documents.
You can logout at any time by pressing the Logout button at the top-right of the screen, or by tapping your card again. If at any point you are lost, try pressing the Home or Back buttons at the bottom of the screen.
Once your BCIT ID card has been associated with your account, you can use it to login every time by simply tapping it to the card reader to the right side of the operator panel.
- Touch the screen on the MFD if the screen is black.
- Tap your BCIT ID card to the card reader on the right side of the MFD.
- Note: if you do not have your BCIT ID card, you can login by typing your BCIT email address and password using the on-screen keyboard.
- Note: if you do not have your BCIT ID card, you can login by typing your BCIT email address and password using the on-screen keyboard.
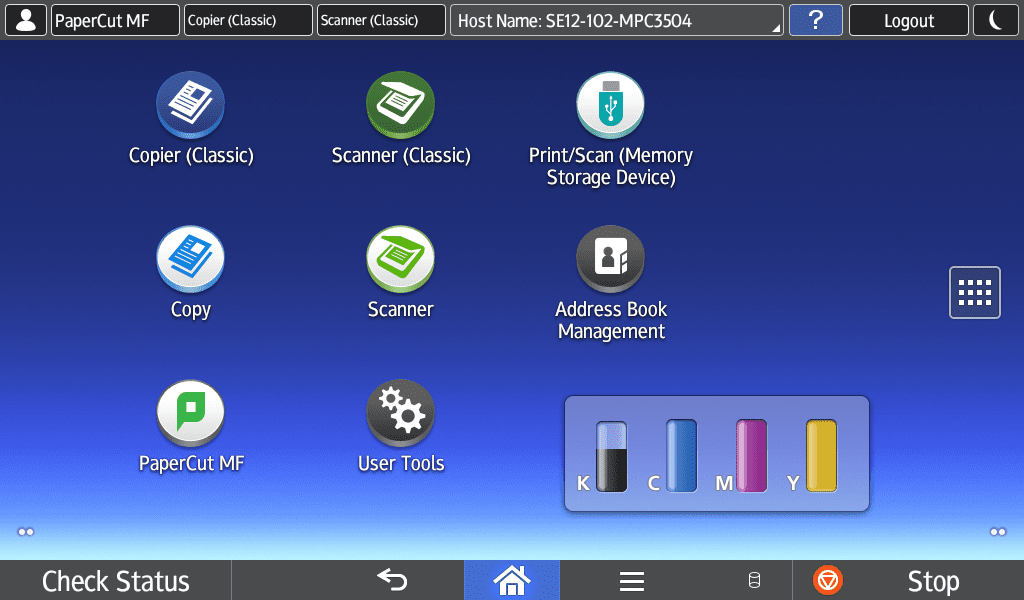
- Once logged in, select Device Functions to use scanning, copying, and faxing (if applicable).
- At the Device Functions screen you can access Copy, Scanning and Fax features (if applicable). While using Scanner features, your email address is automatically added to the recipients list when you are logged in. Also, emails will automatically show as being sent from your own BCIT.ca email address.
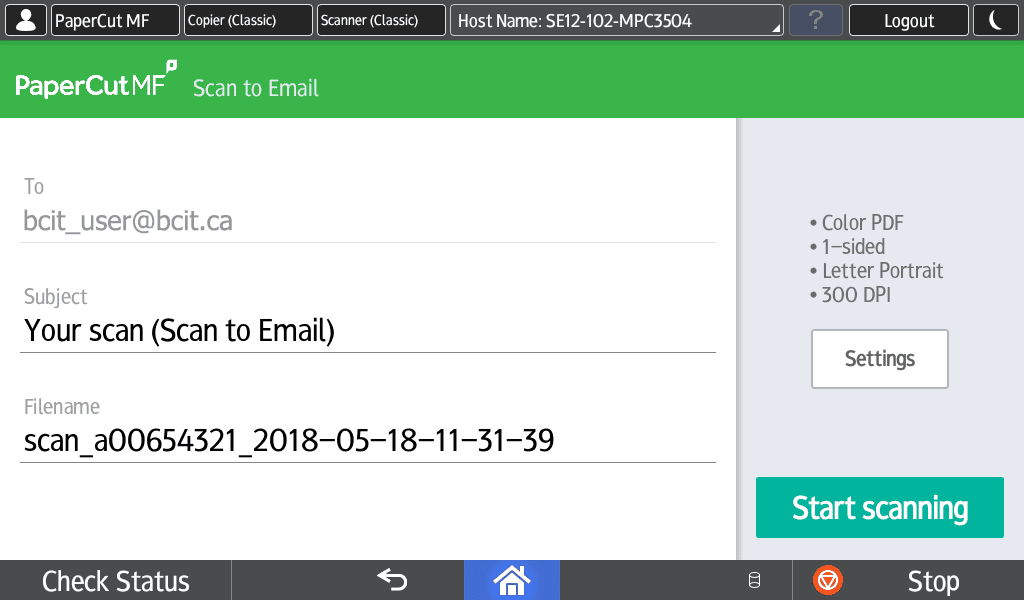
- Use the Scan function to quickly access PaperCut’s Integrated Scan to Email feature. This new feature provides quick access to simplified scanning directly to your email address and is available right from the PaperCut home screen.
You can logout at any time by pressing the Logout button at the top-right of the screen, or by tapping your card again. If at any point you are lost, try pressing the Home or Back buttons at the bottom of the screen.
Troubleshooting Common Printing Issues
This section outlines common printing issues and troubleshooting including how to request printing supplies and how printers are serviced.
Faculty and Staff are responsible for replacing their own basic consumables such as toner, paper, staples, toner waste bottles etc… Please contact the purchaser of the printer for your department to inquire about ordering more supplies.
If there are physical issues with the printer including:
-
Physical malfunctions like repeated jamming, print quality issues, tray malfunctions, etc
-
‘Functional Problem’ error messages with error codes
Faculty and staff can place a service call directly with Ricoh Support at 1-800-267-9469 with the device SN. This information is labelled on the front of every device. Alternatively, you can create an account on MyRicoh.ca and submit service request online.
Please note this applies to Ricoh printers only. Any other brand of printer (Lexmark, Canon etc) are not supported through the Ricoh Support contract. To arrange for a replacement printer, please contact Corporate Services.
For any network related issues to printing, please submit a ServiceNow Ticket.
Once a job is sent to a printer, you can monitor its status by double clicking on the printer icon in the system tray – this will tell you if the job is processing or is paused to be released. If no job is sent, verify you are connected to the network (either via network cable or wireless).
If you are connected to the network and the job is still not being sent, we recommend deleting the printer and re-adding it to verify it is installed correctly.
Windows updates can sometimes prevent the spooler from starting/stopping or restarting. This will prevent printer changes from being applied. If there are pending Windows updates, the computer should be “restarted” before making any changes.
Most of the printers on campus are capable of double-sided printing and have this option enabled by default. We encourage you to use this option as the default for your printing.
Follow the steps below to setup double-sided or single-sided printing on a Ricoh Multifunction Printer (MFP) or Lexmark printer.
Setting up double-sided printing in Windows 10
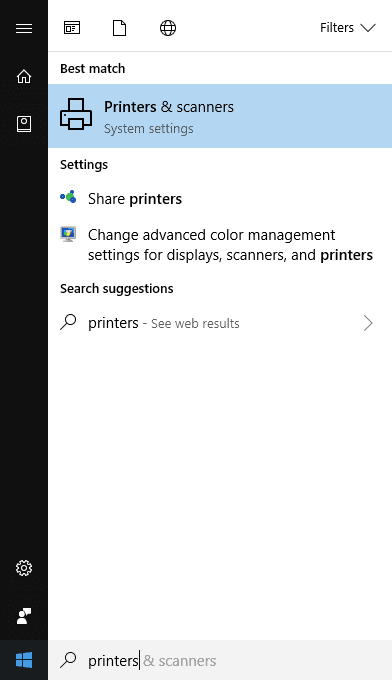
- Click the Start button and search for “Printers”.
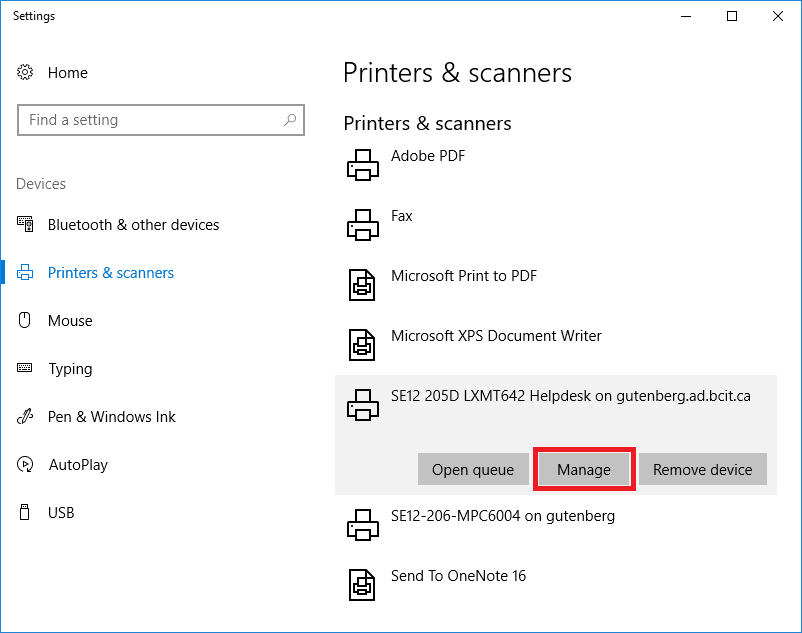
- Click on the printer you would like to modify and select Manage.
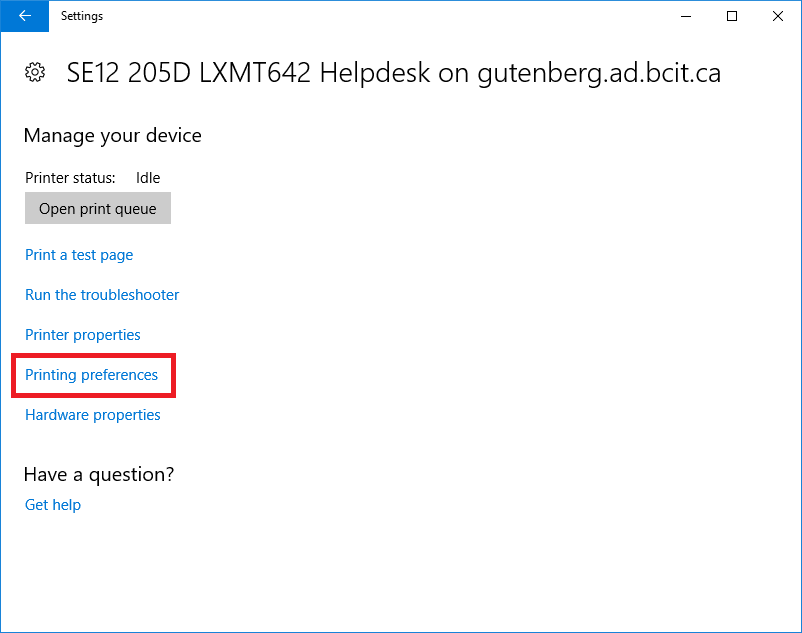
- Select Printing preferences.
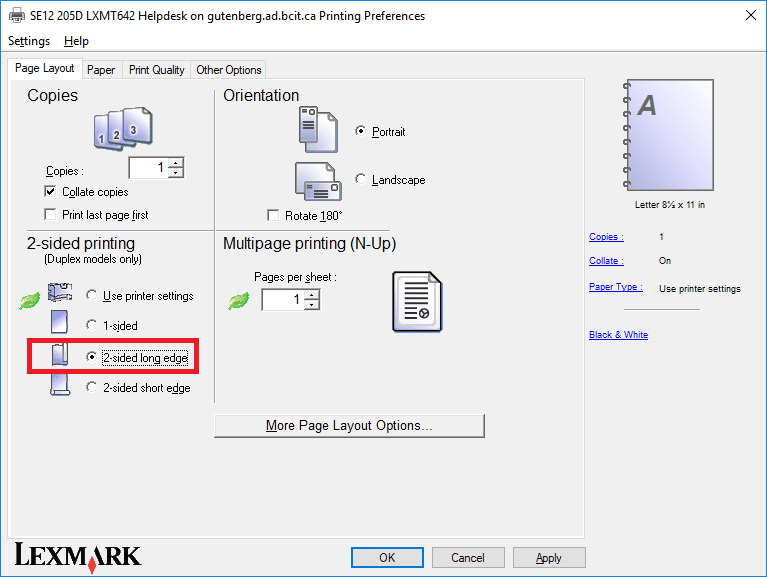
- For Lexmark printers: Select 2-sided long edge.
- For Ricoh Printers: Select Open to Left under Duplex
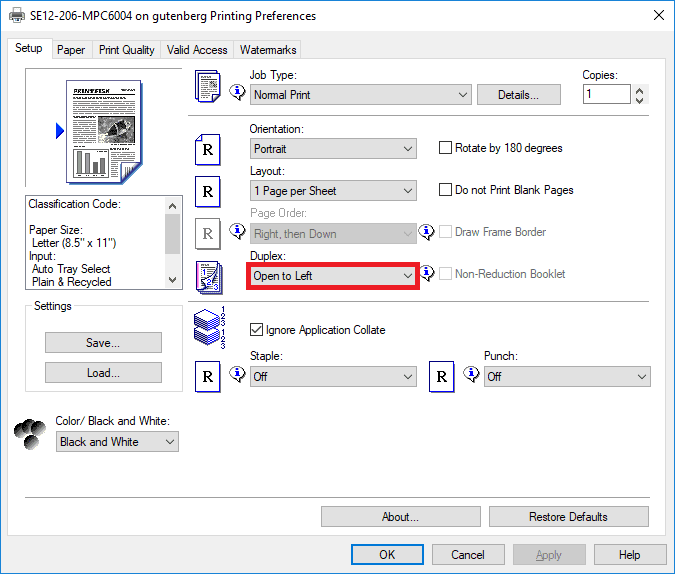
- Click OK to save the new settings.
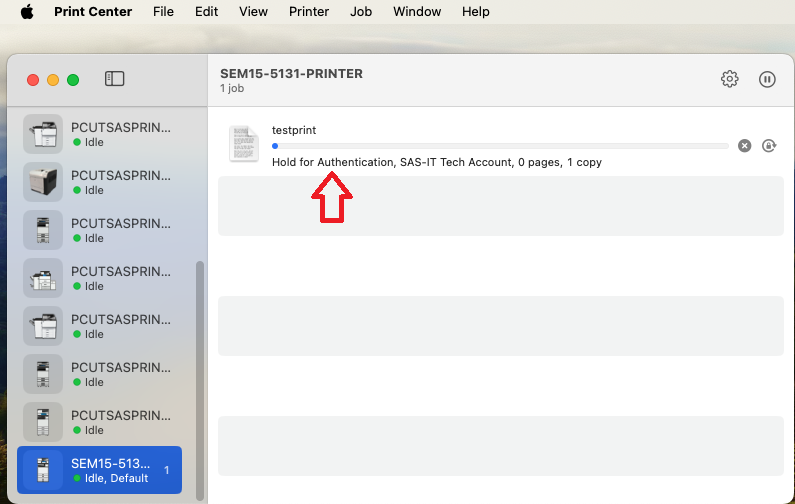
Sometimes, when printing from a Mac, the job may pause in the print queue with the message Hold for Authentication. This typically means the printer isn’t accepting the job, often due to incorrect or missing credentials. Below are common reasons this occurs and how to troubleshoot each scenario.
The first time you send a print job to the newly added printer, you will be prompted for a username and password.
Important: Enter only the prefix of your BCIT email address (the part before @my.bcit.ca or @bcit.ca), along with your usual BCIT password. For example, if your BCIT email address is asmith948@my.bcit.ca, enter asmith948 as the username.
In some instances, you will see Hold for Authentication instead of prompting you for your username and password. Please follow the steps below to resolve this:
- Press the Retry button to the right of the error.
- When it prompts you to enter a username and password, enter only the prefix of your BCIT email address (the part before @my.bcit.ca or @bcit.ca), along with your usual BCIT password.
- Optionally, you can put a check mark next to Remember this password in my keychain.
- Click OK to send your print job. If the job disappears from the print queue, it was sent successfully and you’re done!
- If you were not prompted for a username and password, you will need to clear the incorrectly stored credentials from the Keychain.
- Type in Keychain Access in the Spotlight search in the top-right of your screen, and open Keychain Access.

- In Keychain, search for ‘Prt-Pay’ (or ‘gutenberg’ for faculty and staff). This will display BCIT printers with stored credentials. Right-click on the entry and select Delete.

- Try printing again, and when it prompts you to enter a username and password, please enter only the prefix of your BCIT email address (the part before @my.bcit.ca or @bcit.ca), along with your usual BCIT password.
- Optionally, you can put a check mark next to Remember this password in my keychain.
- Click OK to send your print job. If the job disappears from the print queue, it has been sent successfully.