NetSupport School (NSS) is a software tool which allows you to manage student lab computer activities. It is installed in all General Access labs.
More info: What is netsupport school?
On your computer:
- Select the start Menu
- Select All Programs -> N -> Net Support School.
- Select Net Support School Tutor Console.
- Contact IT Services to get the password.
- Note: When the password is shared with you, do not share this password with students.
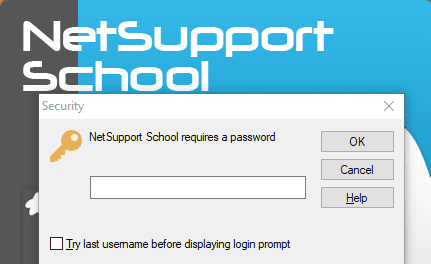
- Note: When the password is shared with you, do not share this password with students.
Sharing the instructor screen
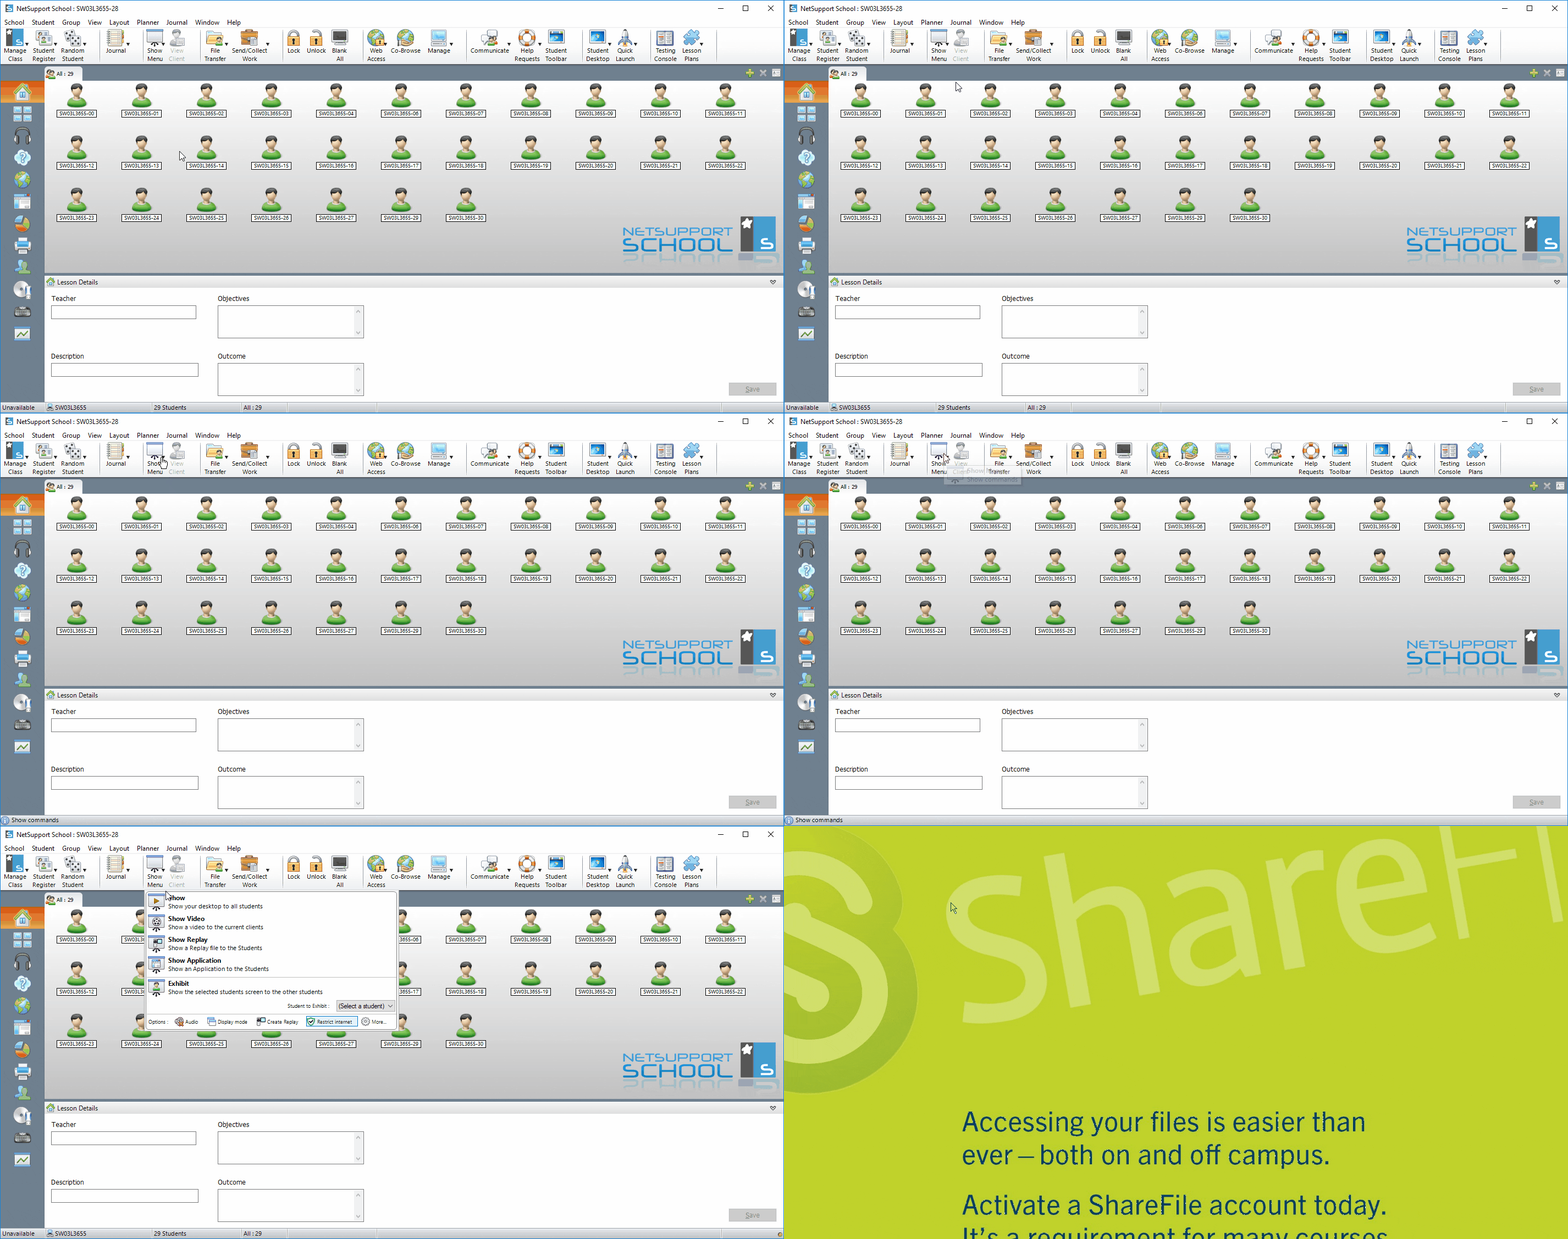
- To start a show for all students click the Show Menu icon at the top of the screen and then click on Show (Show your desktop to all students).
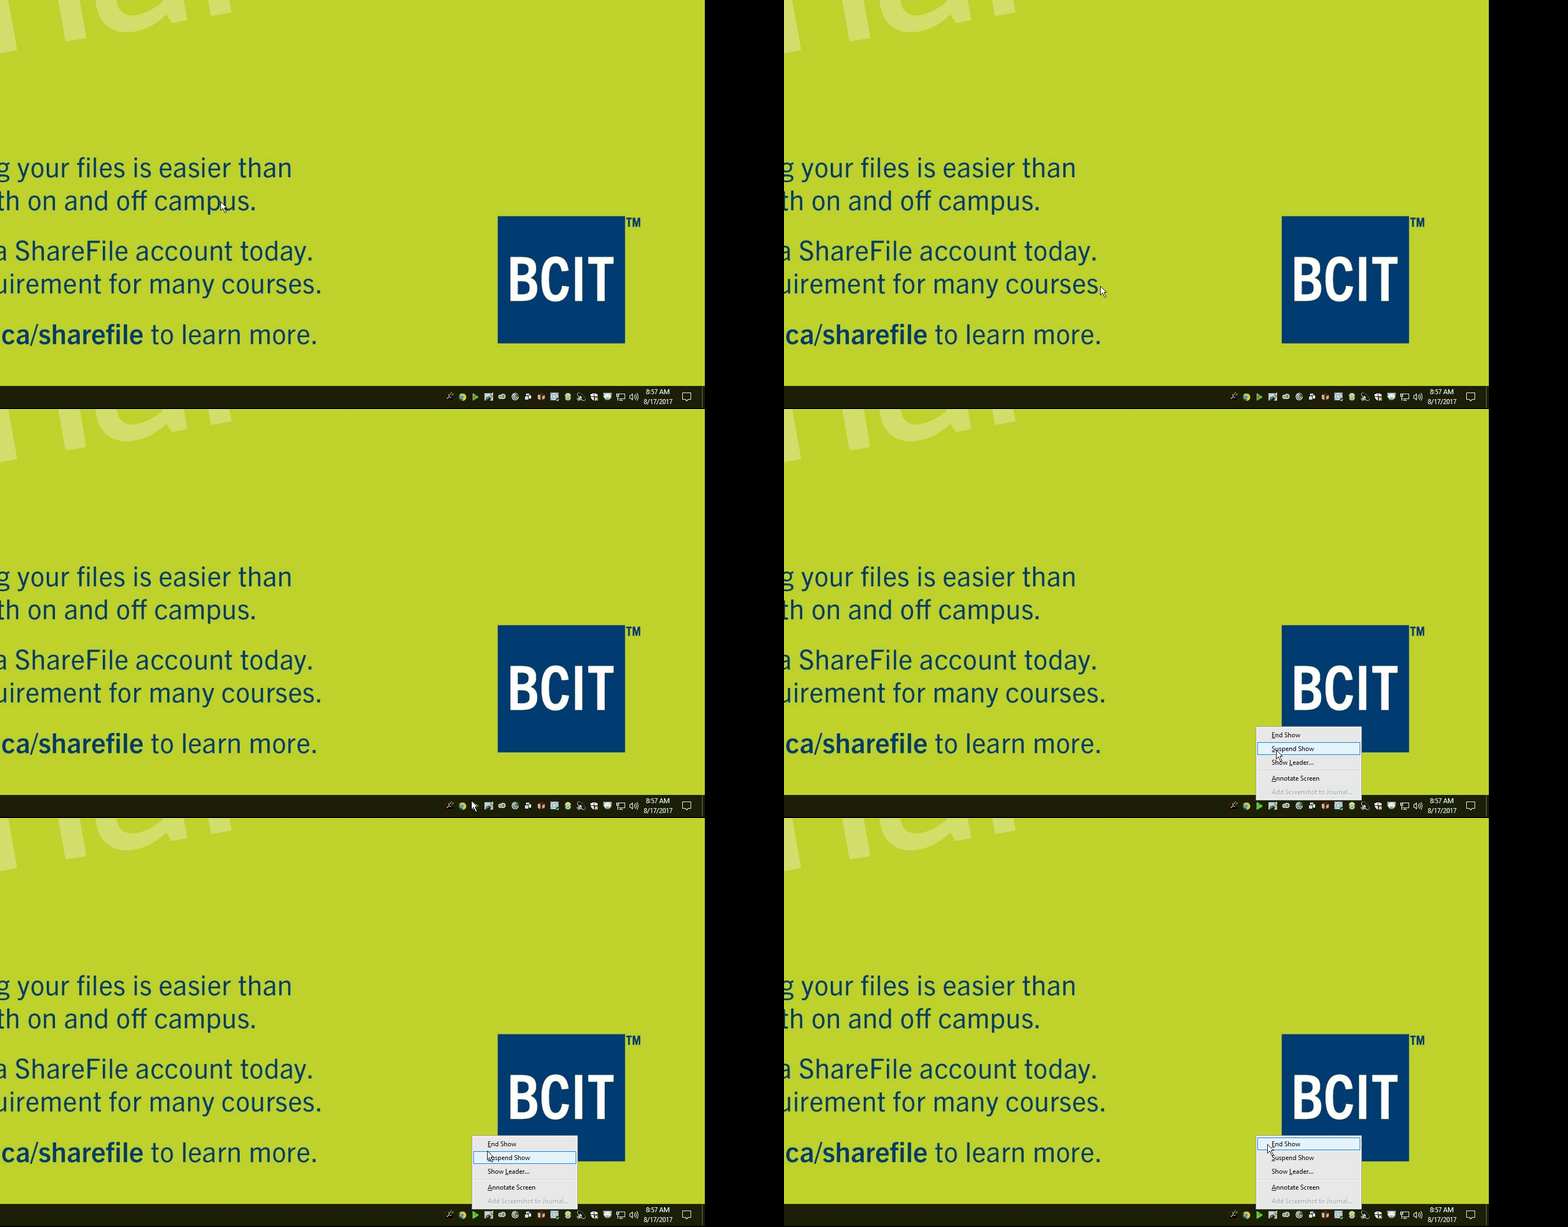
- To stop or suspend the show, right click on the green play button icon at the right side of your task bar. You can select to either end or suspend the show.
Sharing a student workstation screen
- To share a screen to all other workstations click the Show Menu icon at the top of the screen.
- Select the workstation from the Student to exhibit drop down menu.
- Click on Exhibit.
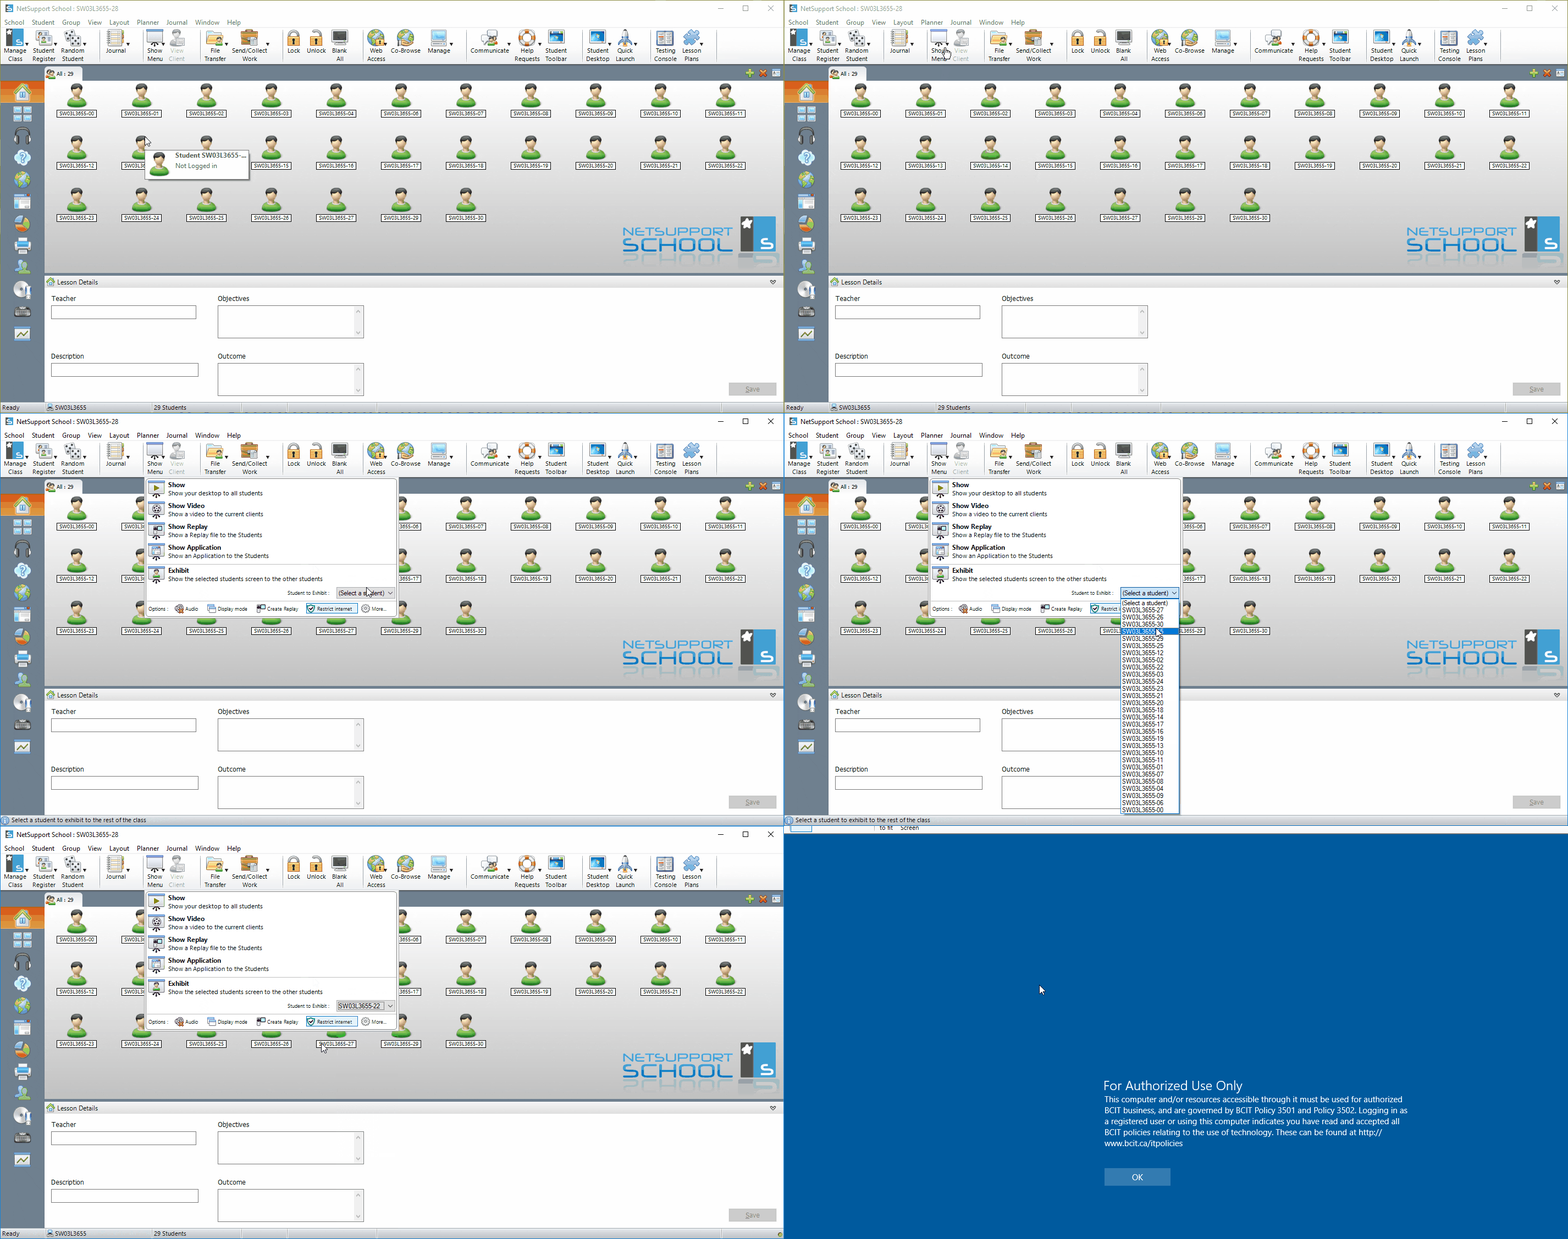
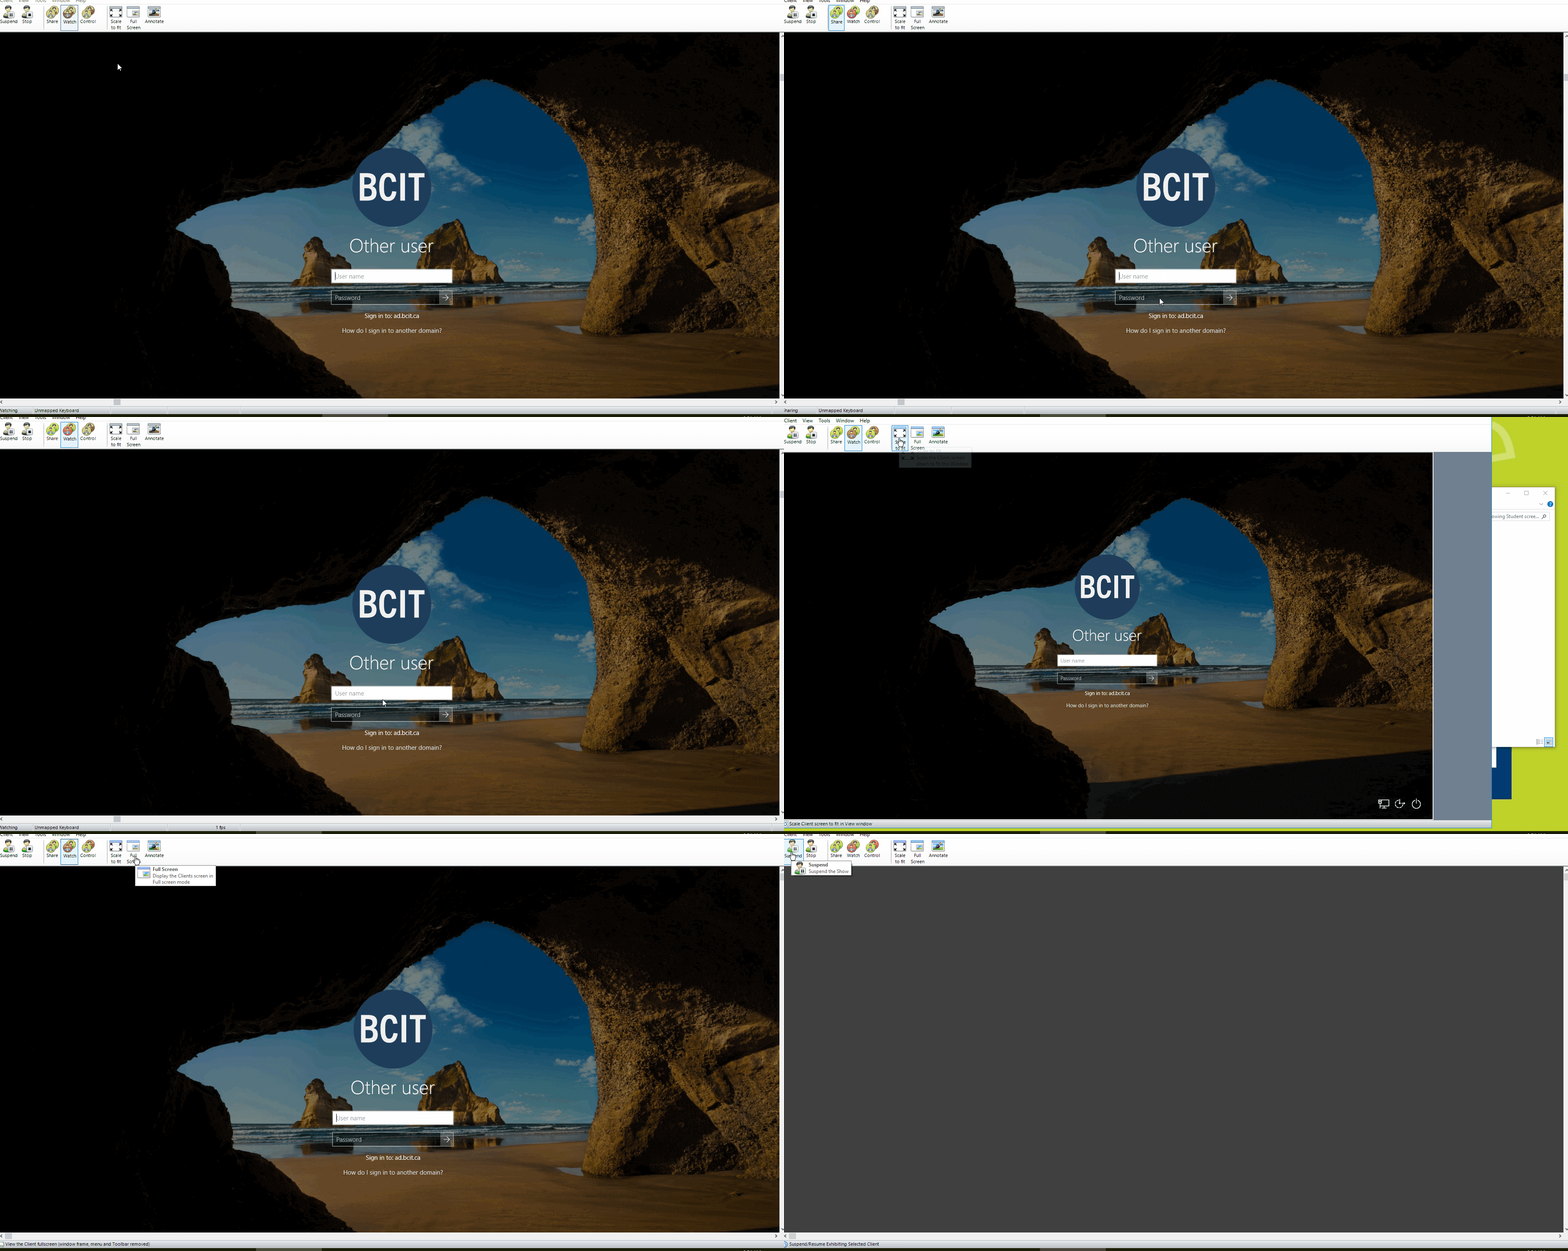
- A new window will open displaying the screen. From here you can select to control, share, or watch the screen.
- The screen is set to shared control by default.
- To change the window to full screen, change control settings, suspend, or stop a show use the respective icons located at the top left corner of the window.
Blank all workstation screens
You might want to ensure that students pay attention to you during lectures.
- To blank out all student screens during a lecture click Blank All at the top of the tutor console.
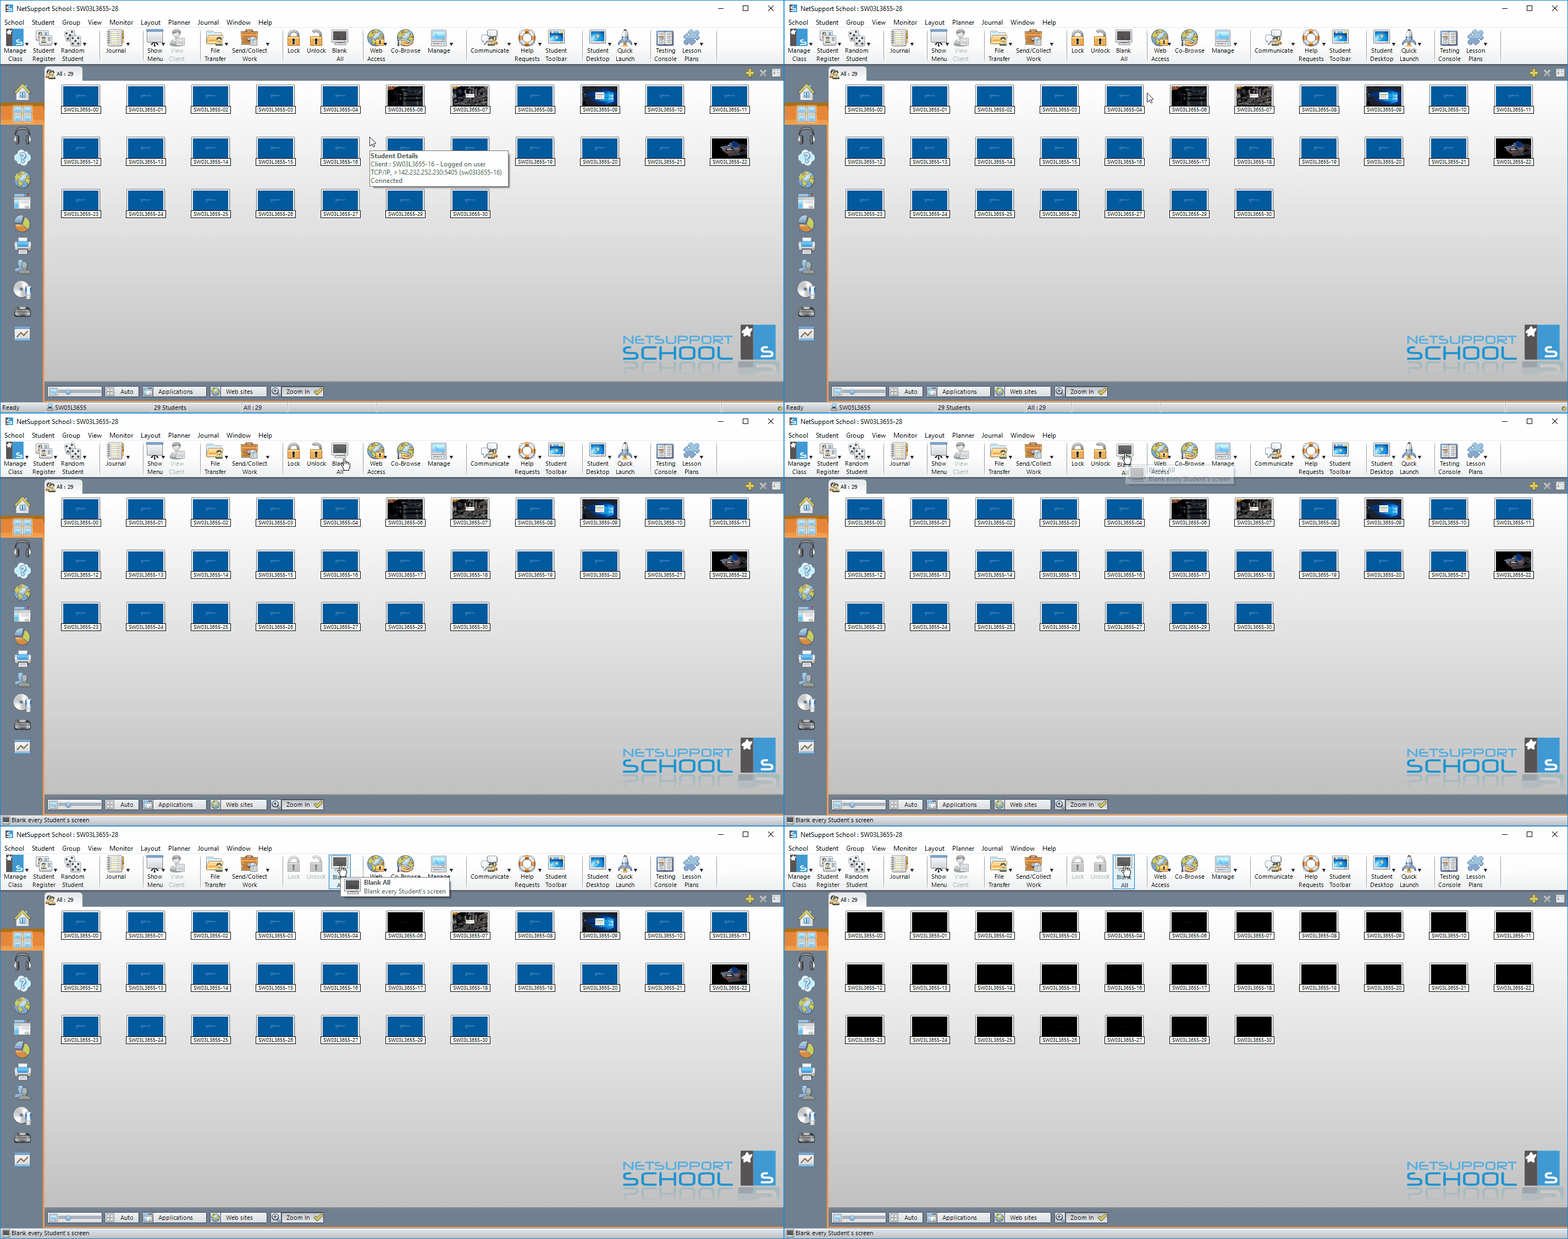
- To return the screens back to normal click on the Blank All icon again.
Lock the keyboard & mouse
- To lock a workstation screen at any time, click on the icon for the desired workstation, then click the lock icon at the top of the window.
- If a workstation is not selected then clicking the lock icon will lock all screens.
- You can also right click on a workstation and click lock in the menu bar that opens up.
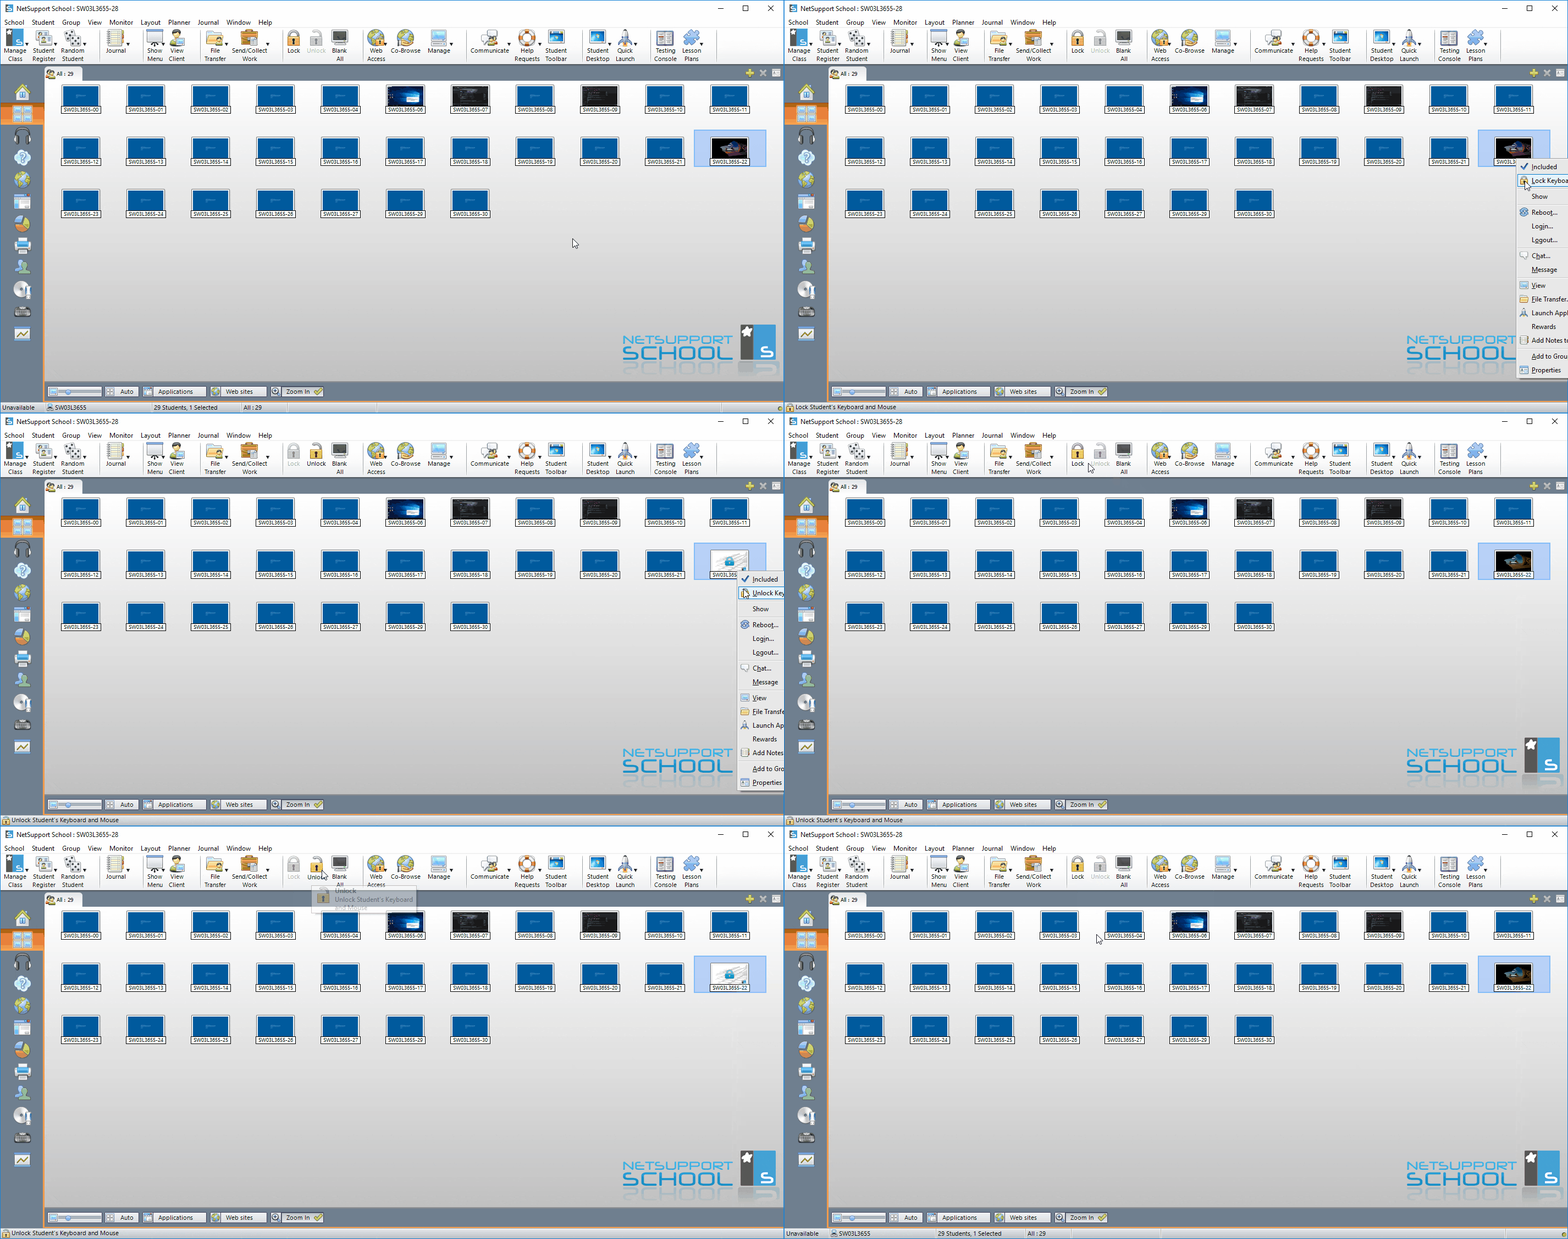
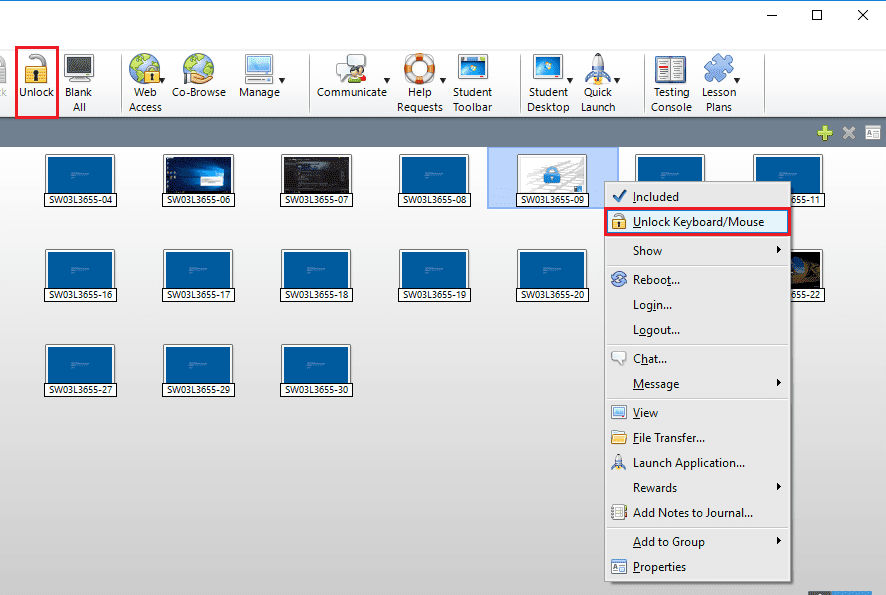
- To unlock a screen repeat the same steps but click on the unlock icon instead.
Sending files (Quick Send)
- To send out a file to all students, click on Send/Collect Work.
- From the drop down menu select Send work.
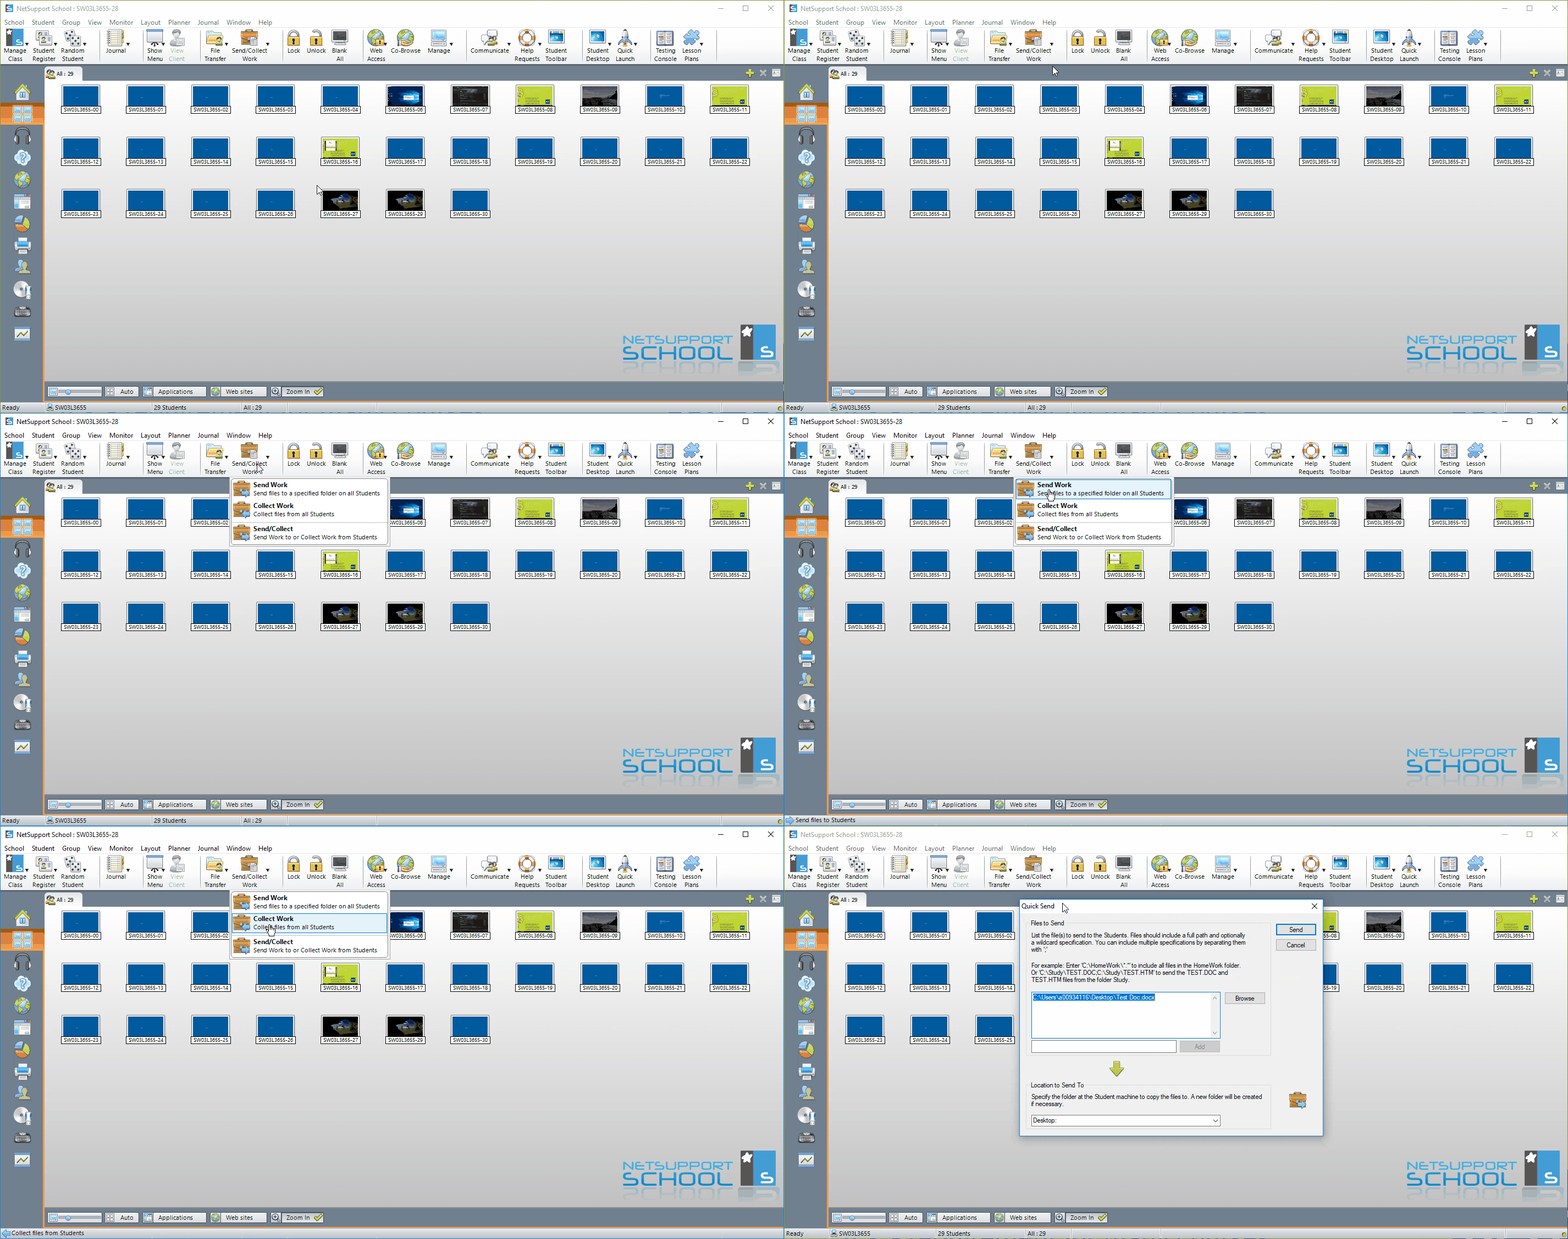
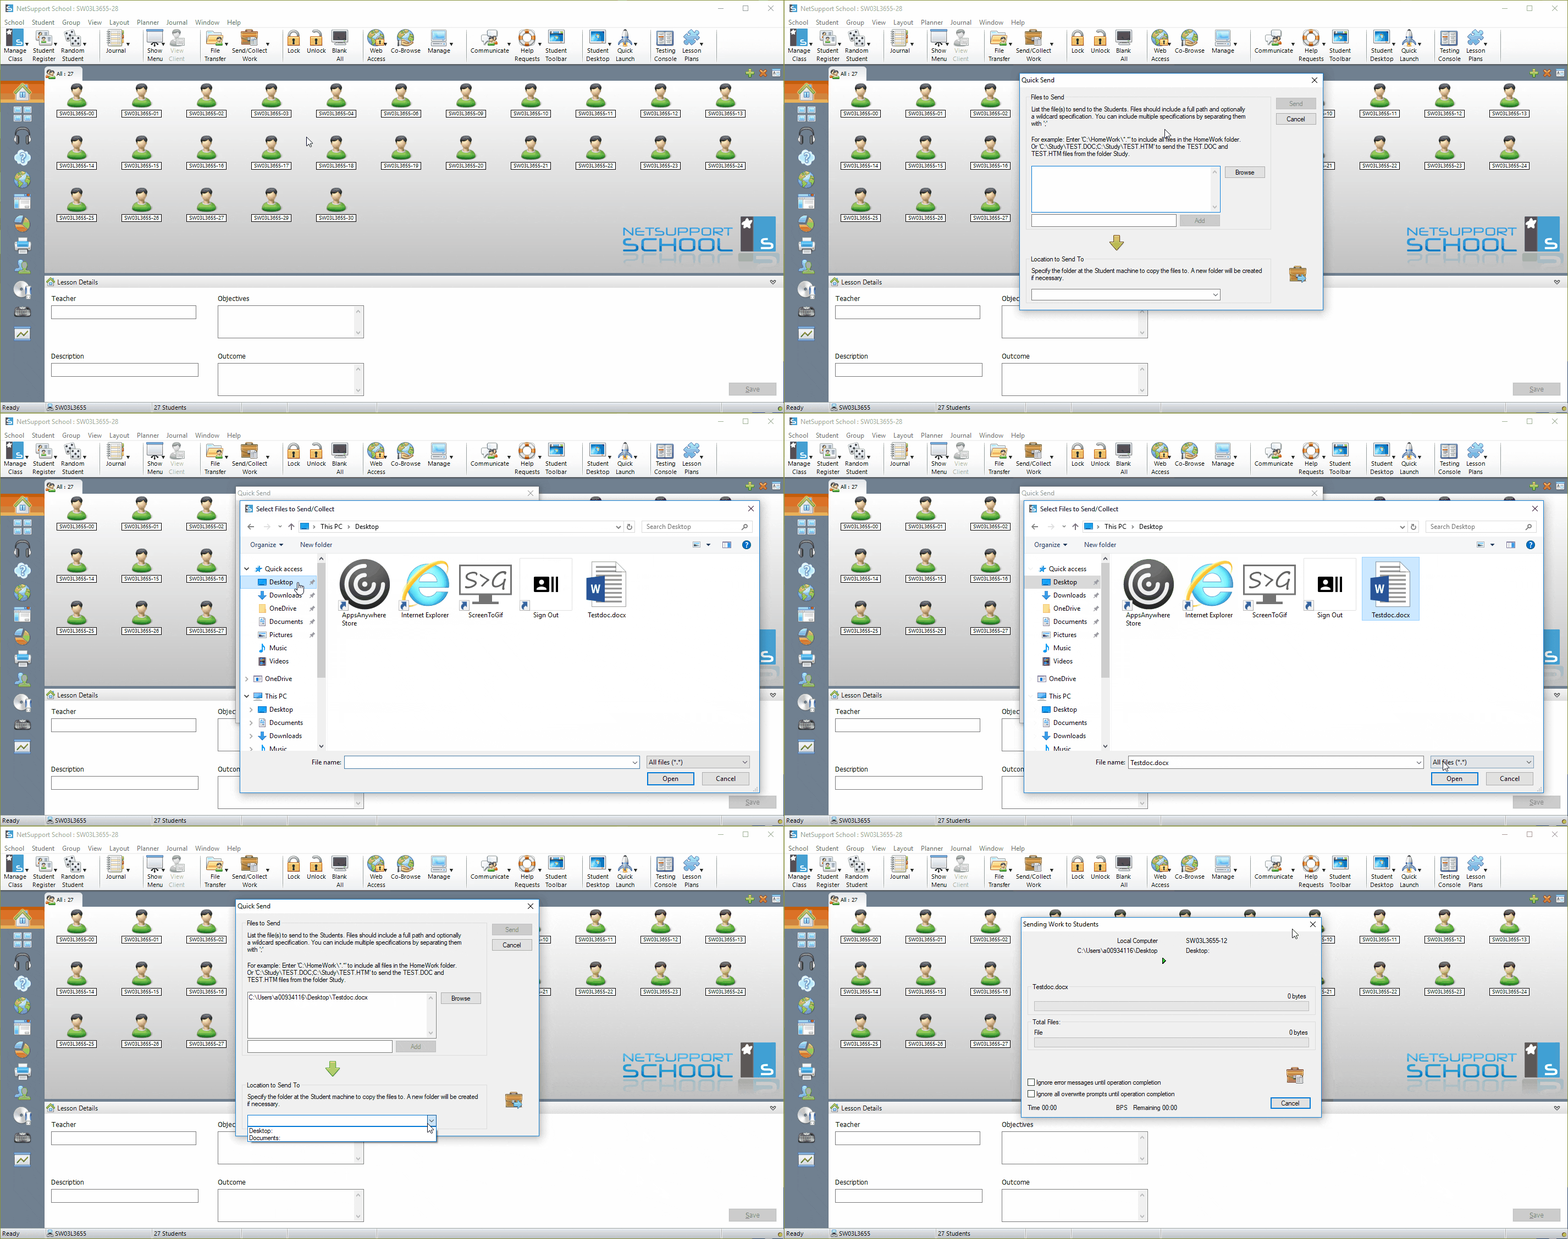
- In the quick send window, click on Browse and select the file you wish to send.
- Select the desired destination on the workstation, and then click send.
Collecting files (Quick Collect)
- If you would like to collect an assignment, select Send/Collect Work.
- From the drop down menu select Collect work.
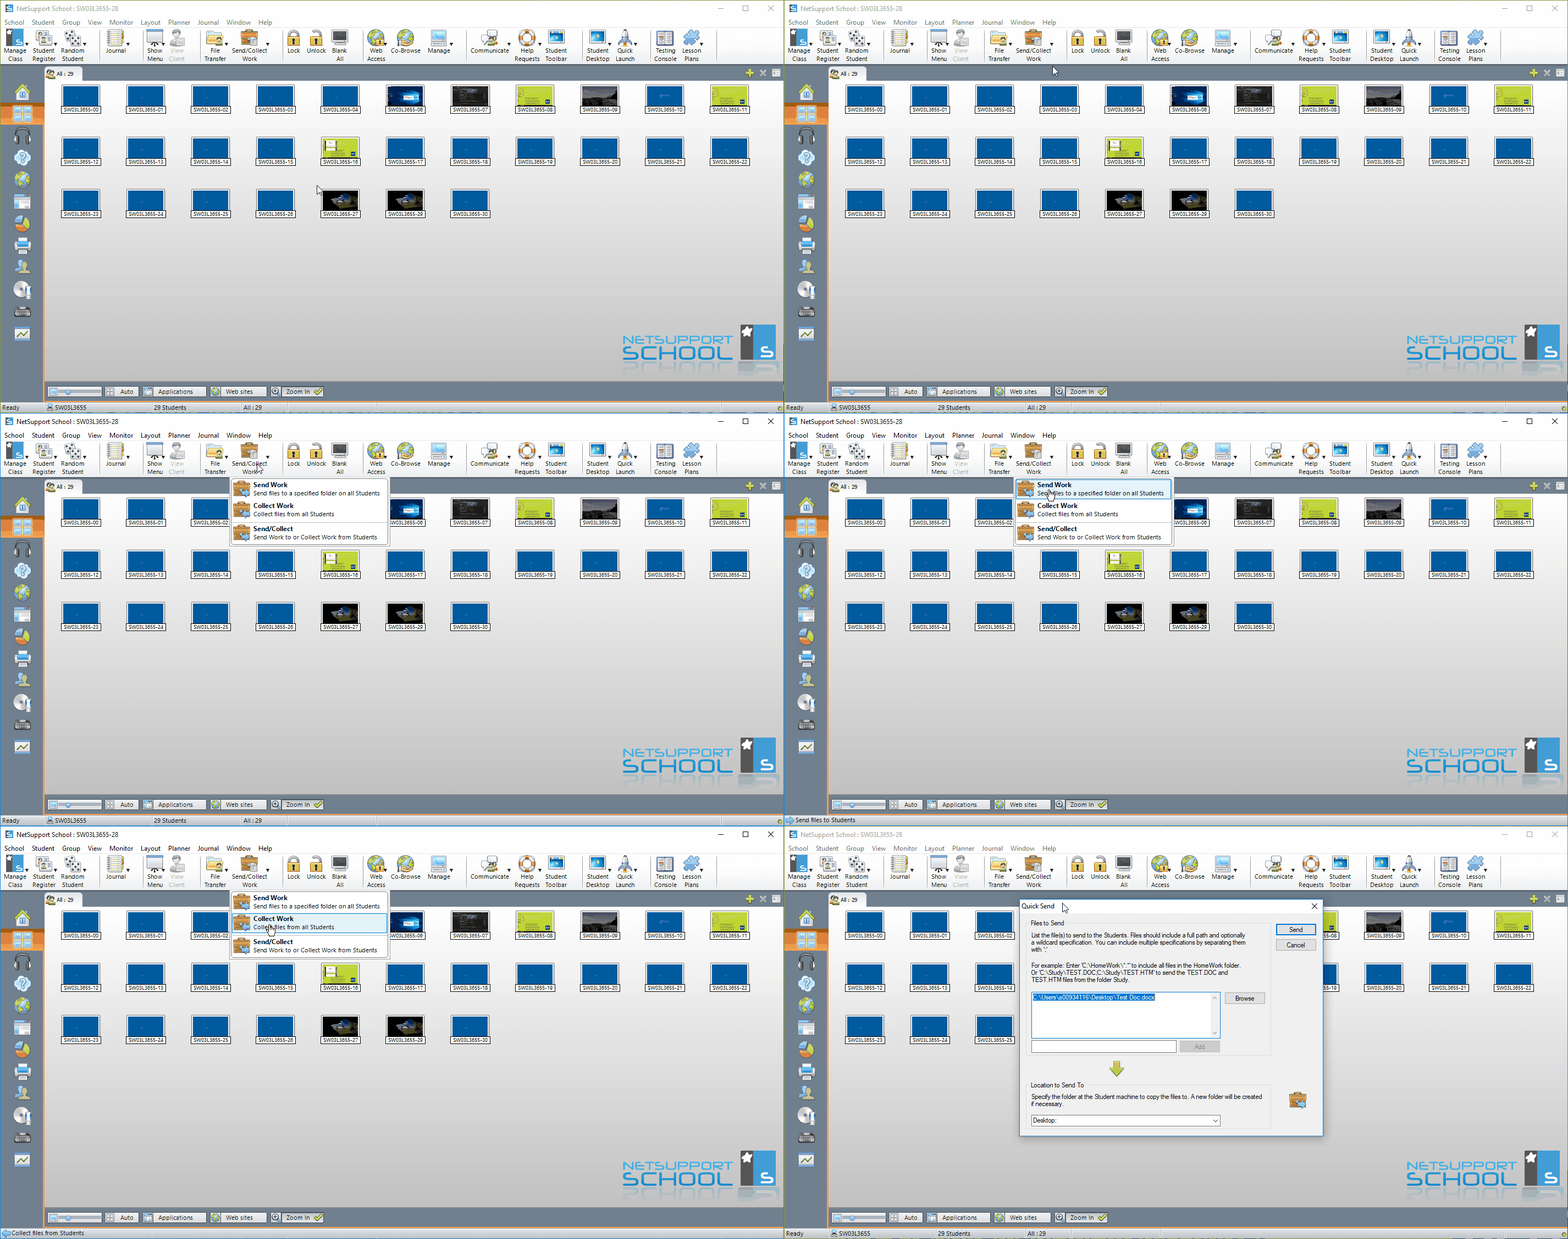
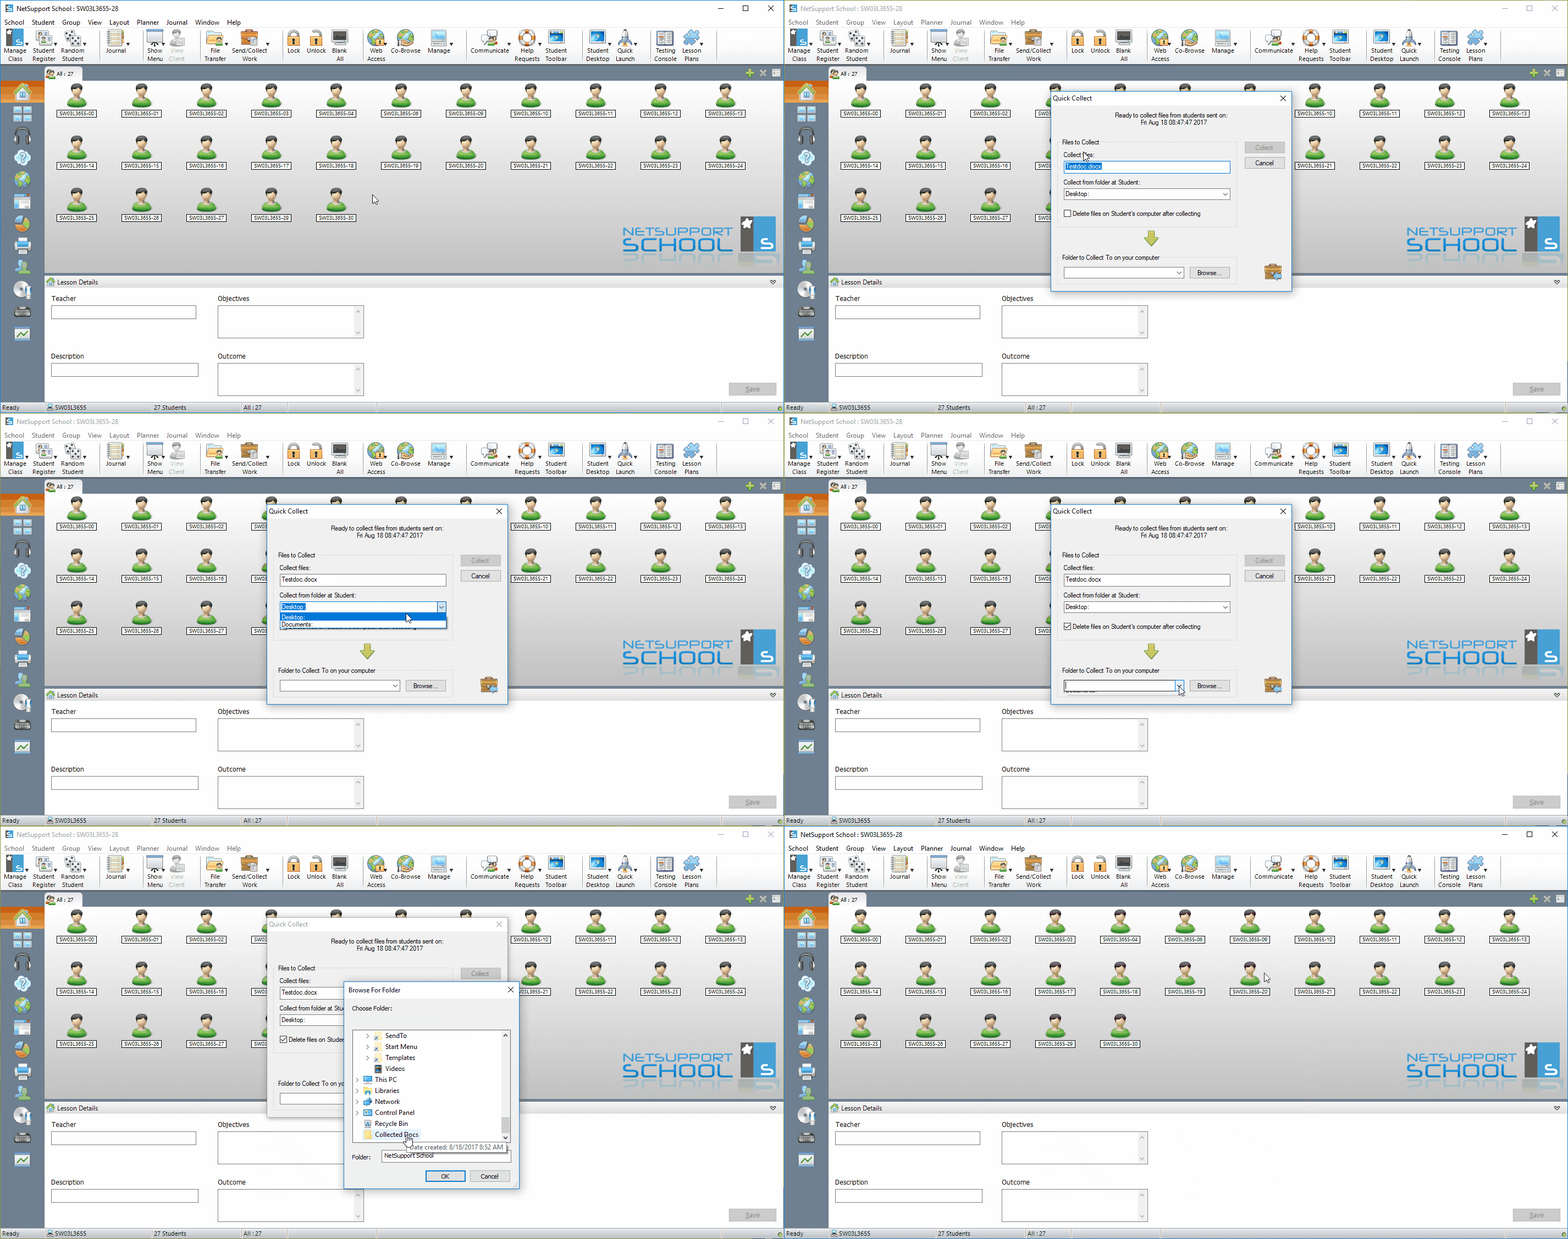
- In the quick collect window, under Collect files, type in the name of the file you wish to collect.
- Under Collect from folder at student select the location of the file on the student workstation.
- You can tick the check box in the window to delete the file from the student computers after collection.
- At the bottom of the window click on Browse and select the location you wish to store the file.
- Note: All filenames need to match the filename you entered and need to be placed in the same location.
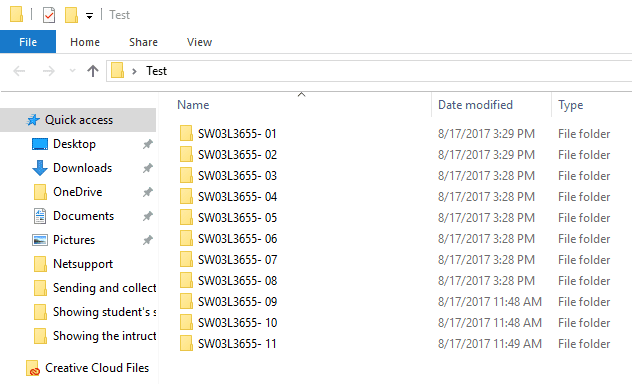
- Once the files are collected they will each be placed in a folder with the workstation number.
Restrict all internet access
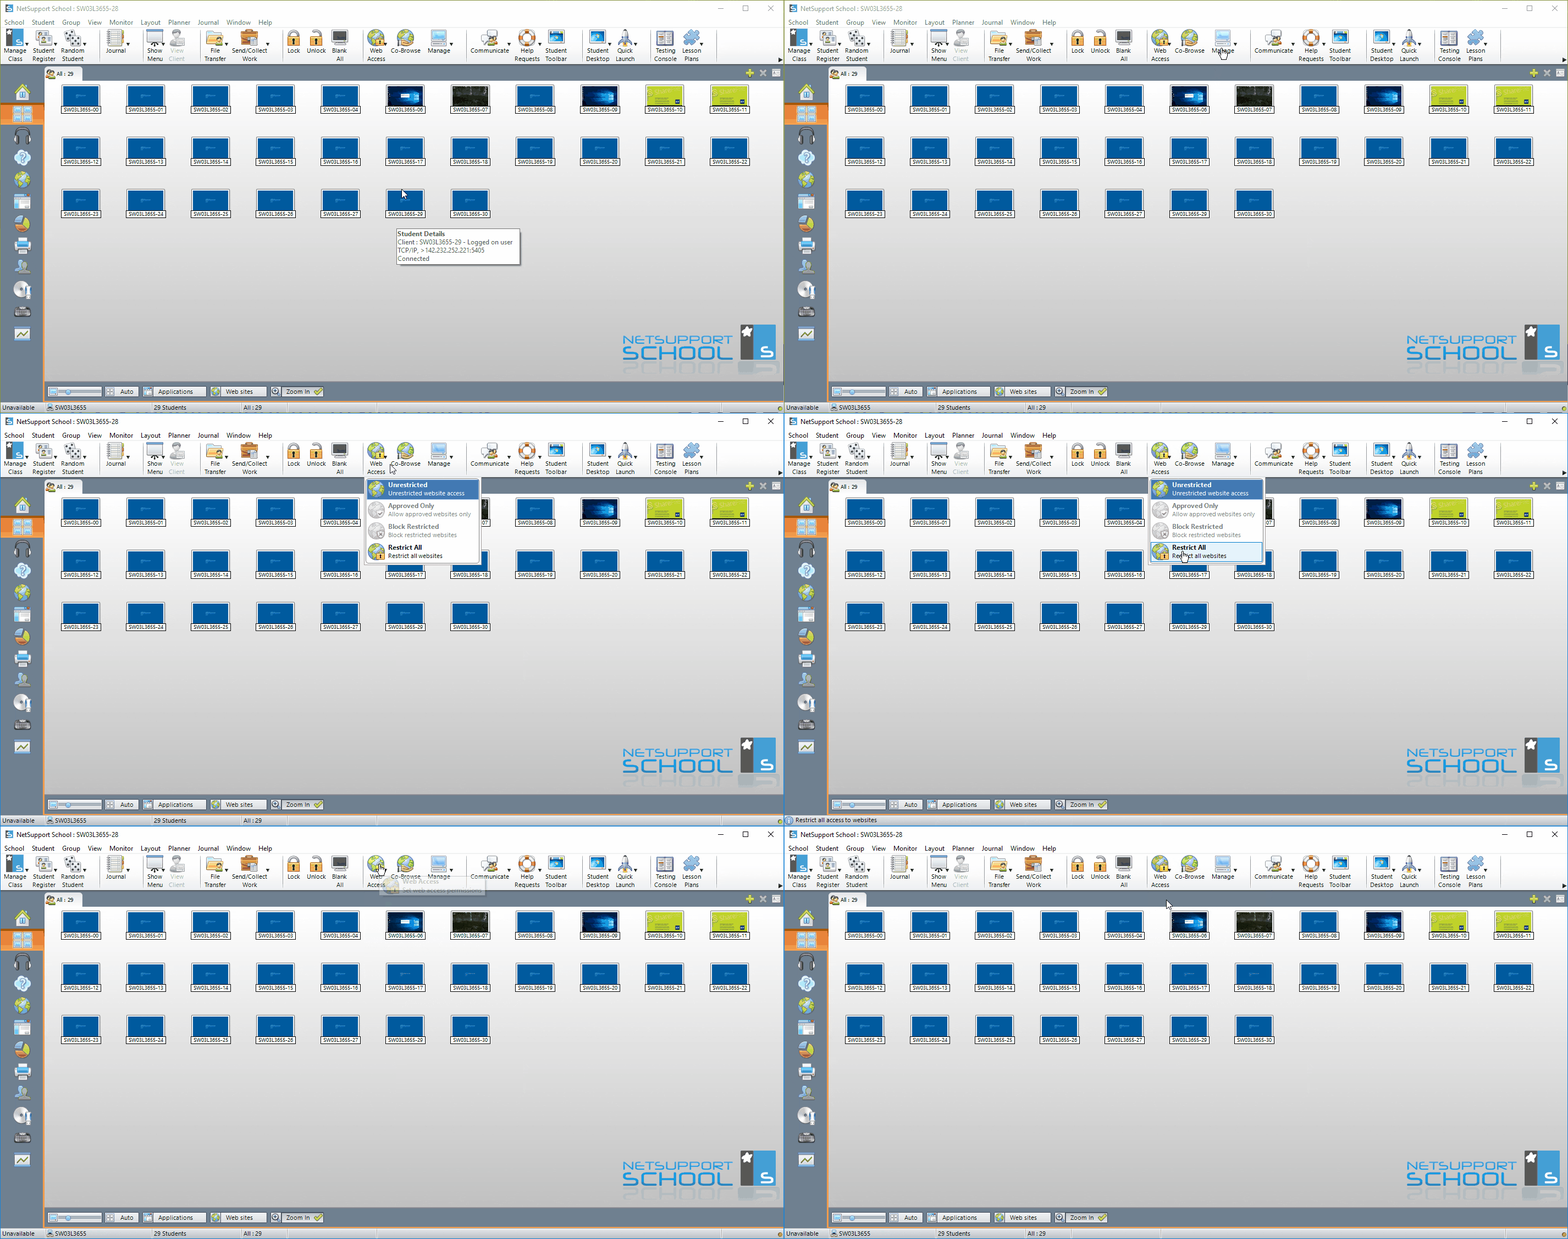
- To restrict web access during lectures, click on Web Access.
- In the drop down menu select Restrict All.
-
- Note that this will close some browsers or lock webpages that students may be working on. This could cause some students to lose unsaved work.
Restricting specific websites
- Select the Internet tab (globe icon) on the left hand side.
-
- To create a list of approved websites click on the + sign in the Approved Websites Tab.
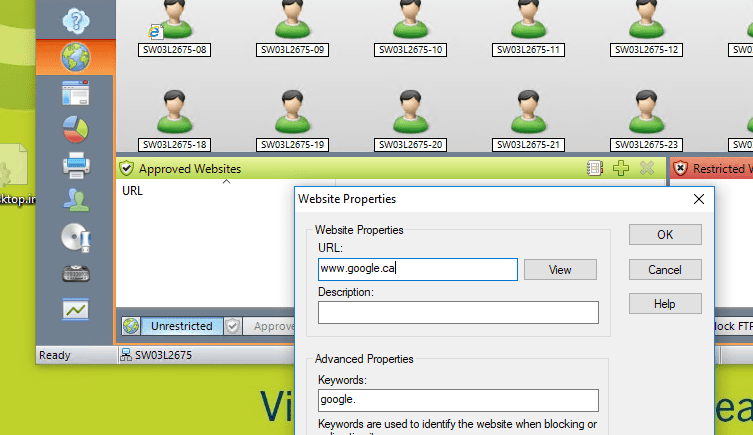
- To create a list of approved websites click on the + sign in the Approved Websites Tab.
- To create a list of Restricted websites click on the + sign in the Restricted Websites Tab.
- Use the bottom bar to alternate between Unrestriced, Approved Only, Block Restricted, or Restrict All

Restricting applications
- To access application restrictions, click on the Applications icon to the left hand side in the tutor console.
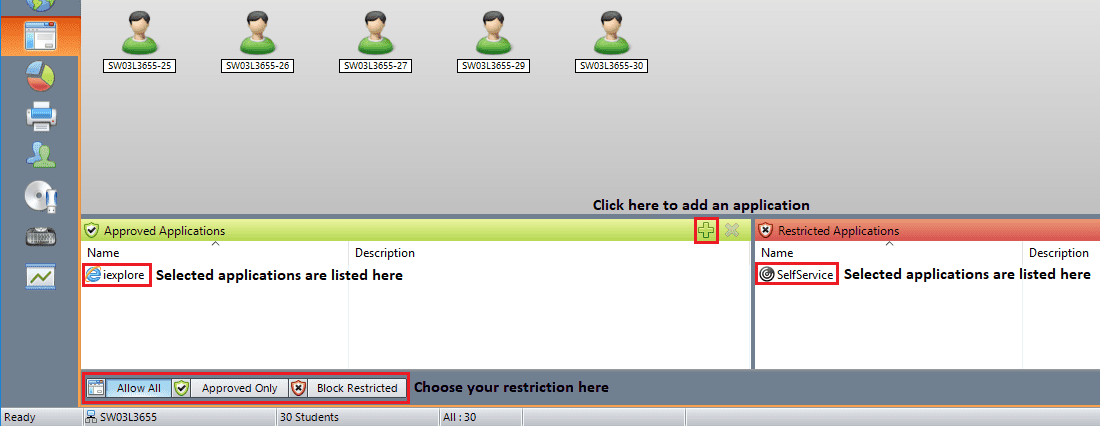
- Approve or Restrict applications by adding them to the green Approved Applications or the red Restricted Applications lists at the bottom of the console.
- To add an application to a list click on the green + at the top right hand side of either list to open up a new window.
- Browse to the location where the application is installed and add it to the list then at the bottom left hand side of the console.
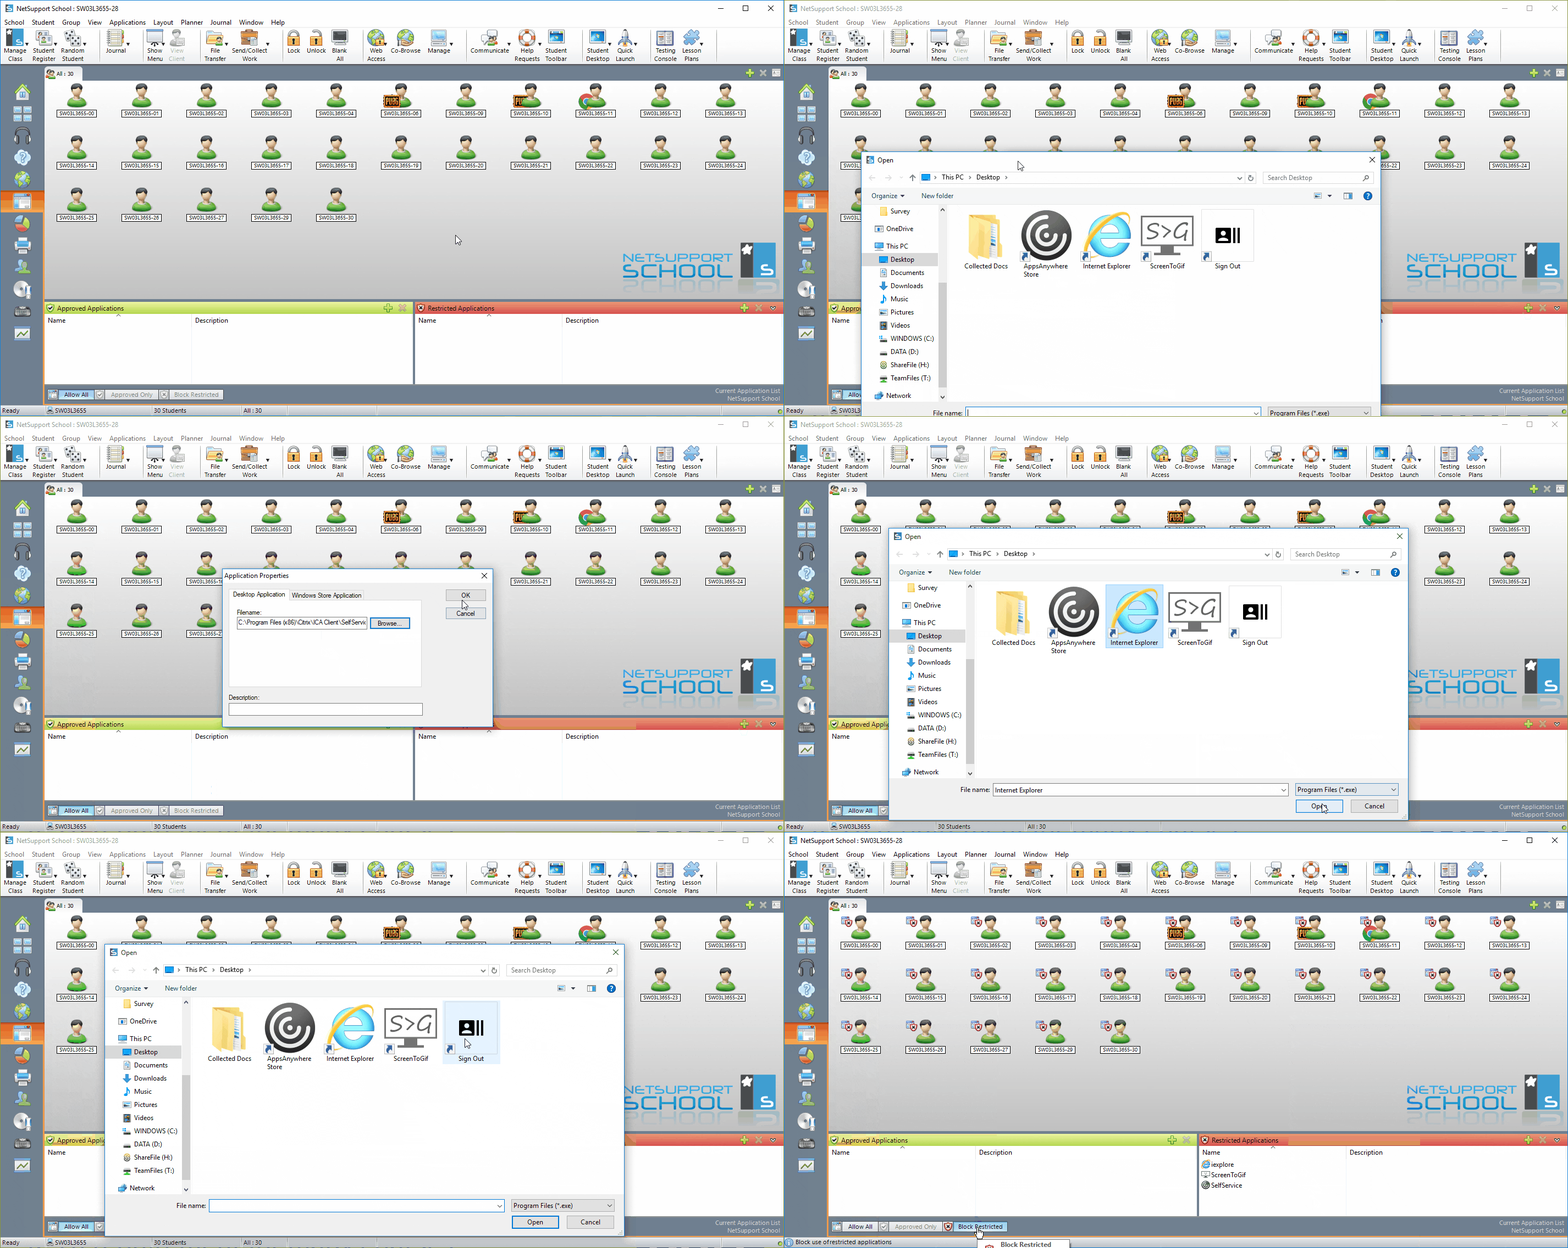
5. Select one of three restrictions:
- Allow All: This will allow all applications with no restrictions.
- Approved Only: This will only allow applications within the Approved Applications list to be run and ALL other applications will be restricted.
- Block Restricted: This will block the applications with the Restricted Applications list and ALL other applications will be allowed.
Restricting USB devices
You can restrict students from using USB storage devices
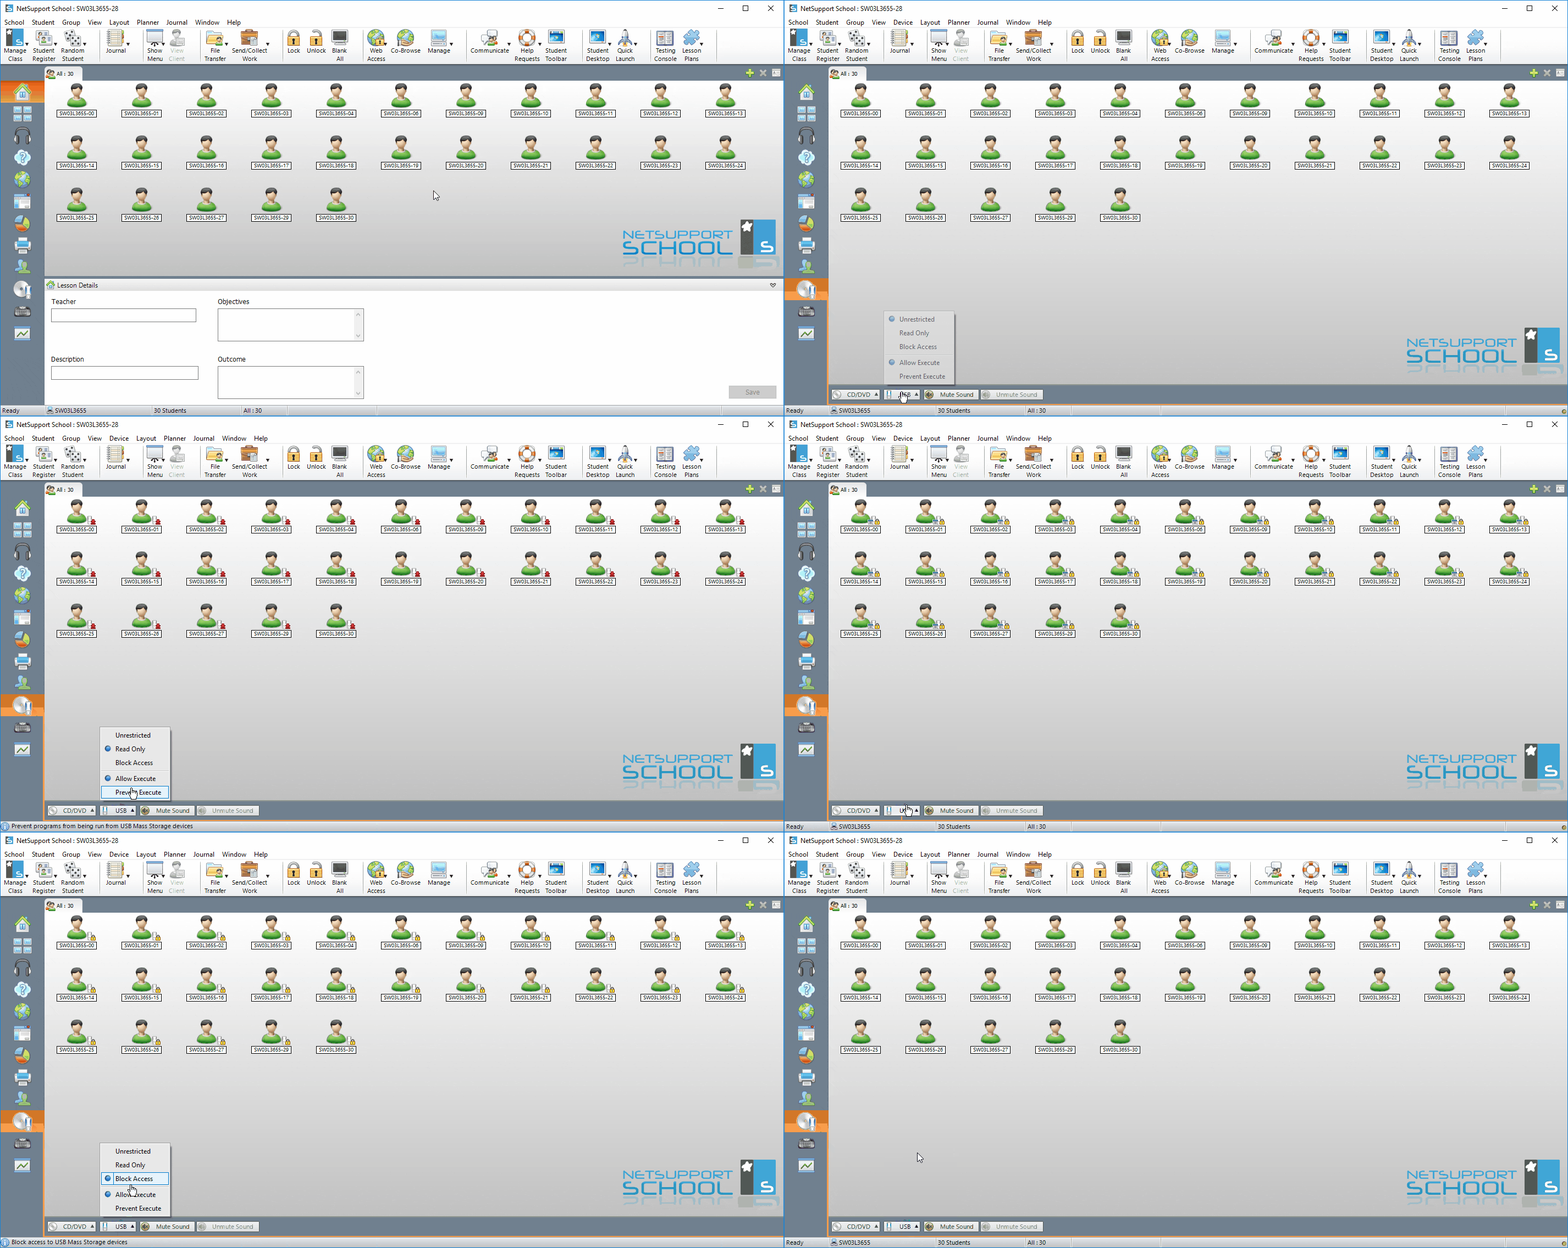
- To access the device restrictions, click on the CD/USB icon at the bottom left hand side of the console.
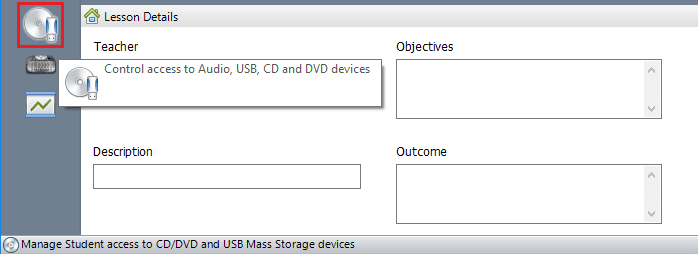
- Click on the USB icon and select one of the five restriction options.
-
- Unrestricted: This allows files to be read and written from the device.
- Read Only: This only allows files on the device to be read as files are prevented from being written to the device.
- Block Access: This blocks access to the device.
- Allow Execute: Allows programs to be run from the device.
- Prevent Execute: Prevents programs from being run from the device.

Create surveys to ask multiple choice style questions.
- Click on the Survey tab (pie chart icon) on the left hand side of the tutor console.
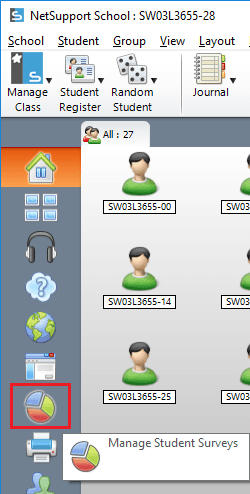
- At the bottom left hand side of the survey page enter a question in the Question text box.
- Select from a set of default responses from the Response drop down menu, or, write in custom responses separated by commas and then hit send.
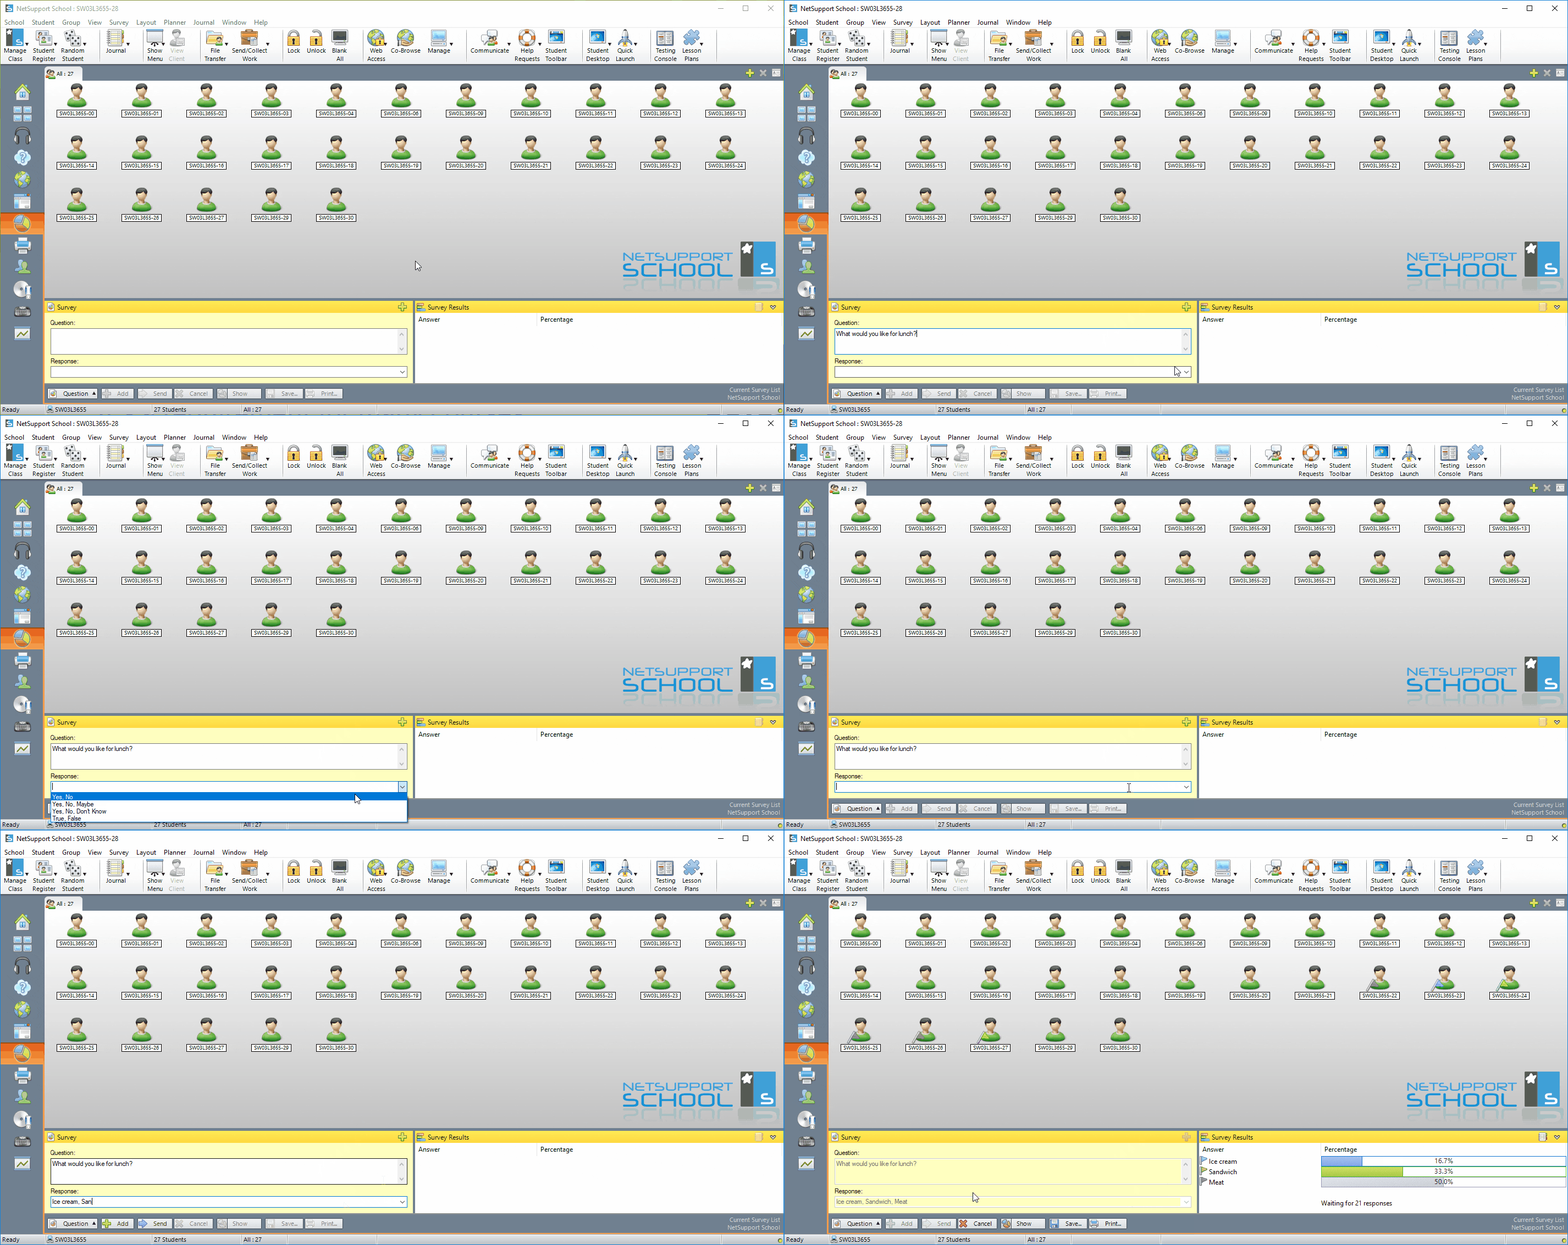
- At the bottom of the Survey tab you can choose to save, print, or display the results to the students.
- Note: By default the survey is sent to all students but you can also survey a select group of students by highlighting their stations before hitting send.
- To access the Whiteboard click on the Whiteboard icon on the bottom left hand side.
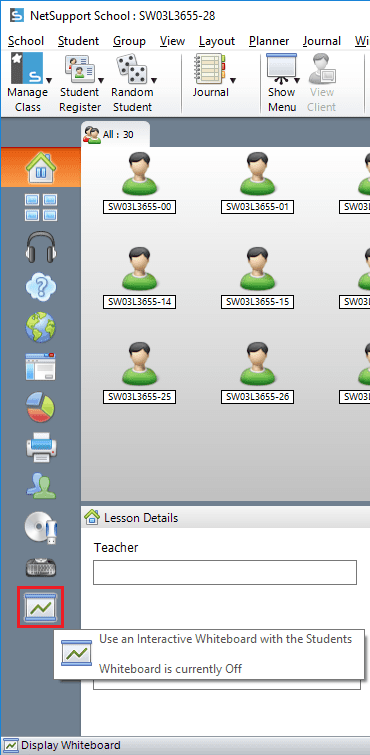
- To start a show click the button labeled Show at the bottom left hand corner of the console window
- You also click this same button to end the show.
- The show will be started on all workstations including stations that are not logged on.
- There are multiple tools located to the right of the Show button that can be used.
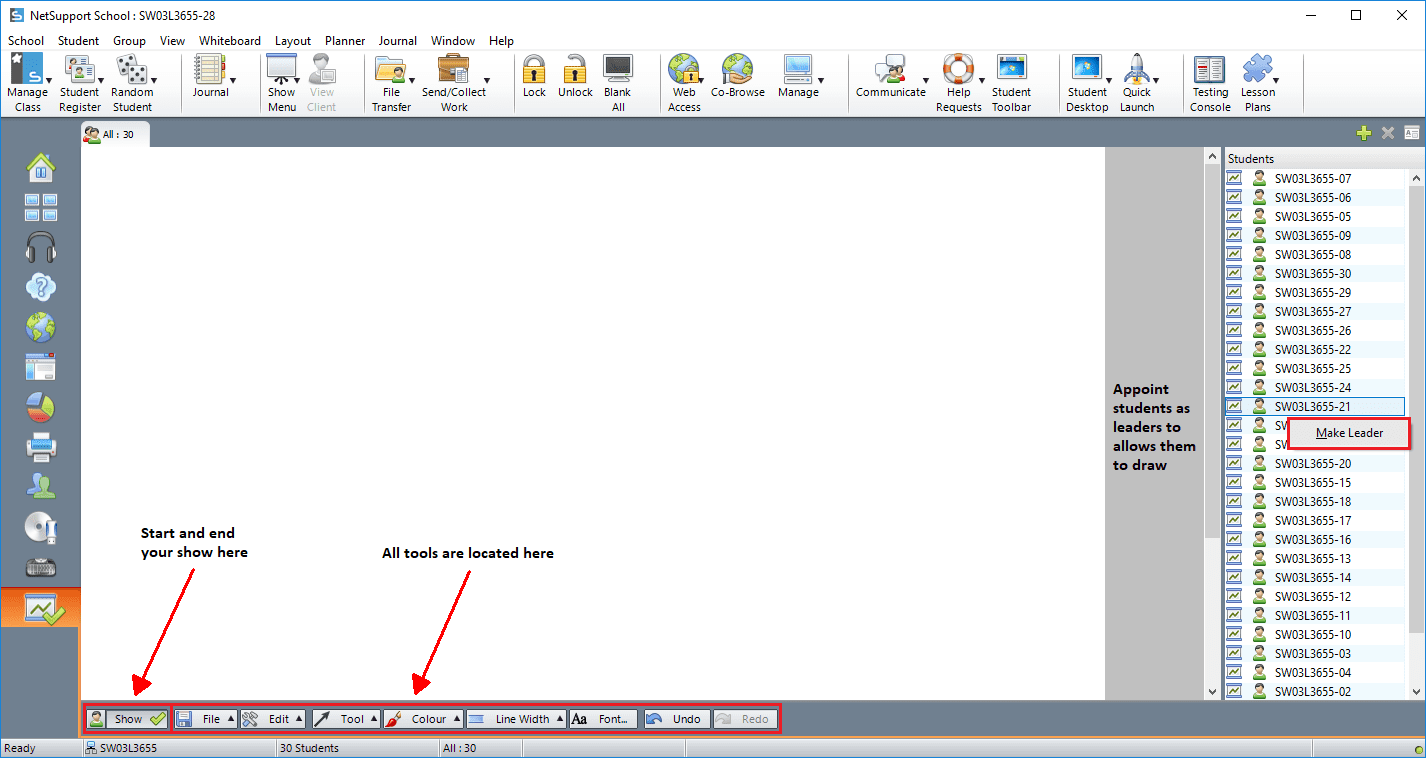
- There are multiple tools located to the right of the Show button that can be used.
- You can appoint a student as a leader by right clicking on their station and selecting Make Leader. This allows the student to draw.
- Select the Make Leader button again to revoke leadership.
Net Support School includes many in-depth features that cannot easily be covered by an introductory tutorial. The company has published their complete documentation online.